


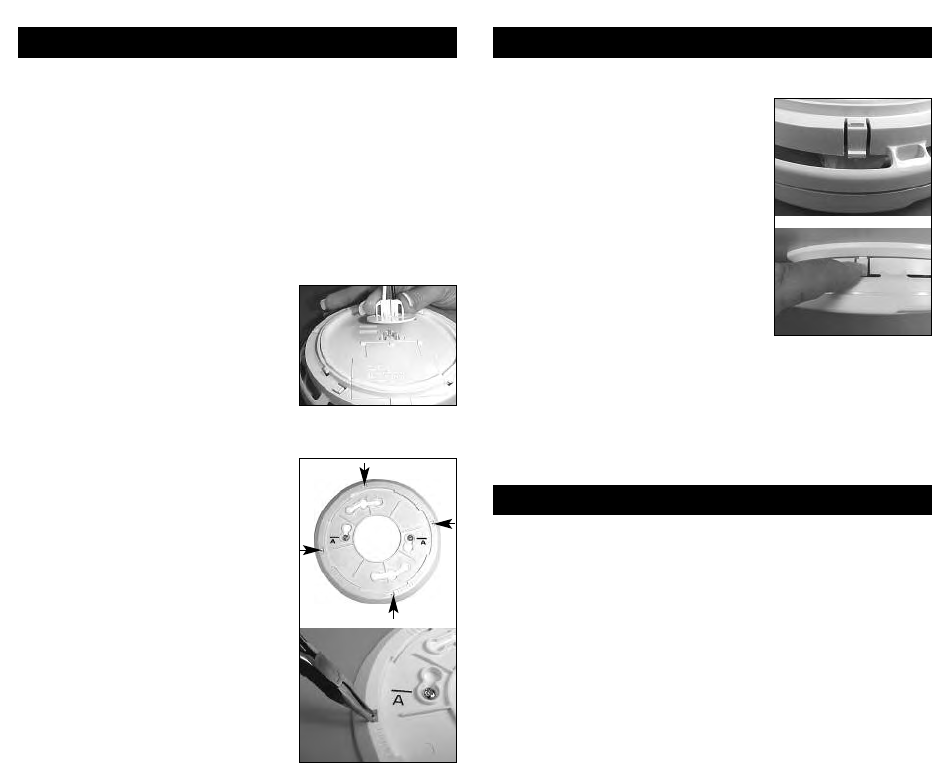
Tamper Resist Feature
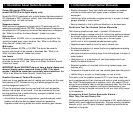
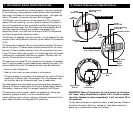
To make this CO alarm somewhat tamper
resistant, a tamper resist feature has been
provided. Activate the feature by breaking
off the four posts in the square holes in
the mounting plate. When the posts are
broken off, the tamper resist tab on the
base is allowed to engage the mounting
plate. Rotate the alarm onto the mounting
plate until you hear the tamper resist tab
snap into place, locking the alarm.
Using the tamper resist feature will deter
children and others from removing the
alarm. To remove the alarm, press on the
tamper resist tab, and rotate the alarm off
of the mounting plate.
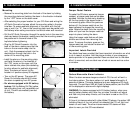
Important Labels Provided
Two labels have been provided that have important information on what
to do in case of an alarm. Add the phone number of your emergency
service provider in the space pr
ovided. Place one label next to the alarm
after it is mounted, and one label near a fresh air source such as a door
or window.
4. Installation Instructions
5. Alarm Characteristics
4. Installation Instructions
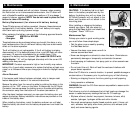
Tamper Resist Tab
Mounting
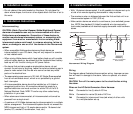
• Remove the mounting plate from the back of the alarm by holding
the mounting plate and twisting the alarm in the direction indicated
by the “OFF” arrow on the alarm cover.
• After selecting the proper location for your CO Alarm and wiring the
AC Quick-Connector harness, attach the mounting plate to the elec-
trical box. To ensure aesthetic alignment of the alarm with the hall-
way, or wall, the “A” line on the mounting plate must be parallel with
the hallway when ceiling mounted or horizontal when wall mounted.
• Pull the AC Quick-Connector through the center hole in the mounting
plate and secure the bracket, making sure that the mounting screws
are positioned in the small ends of the
keyholes before tightening.
• Plug the AC Quick-Connector into the
back of the alarm, making sure that the
locks on the connector snap into the
unit. Push the excess wire back into the
electrical box through the hole in the
center of the mounting plate.
• Install the alarm on the mounting plate
and twist the alarm in the direction of
the “ON” arrow on the cover until the
alarm ratchets into place (this ratcheting
function allows for aesthetic alignment).
Note: The alarm will mount to the
bracket in 4 positions (every 90 degrees).
• Turn on the AC power. The green AC
Power On Indicator should be lit when
the alarm is operating from AC power.
• For alarms equipped with 9V battery
backup: Pull the Battery Pull Tab (yellow
tab protruding fr
om unit) completely out
of unit. This will automatically connect
the battery.
AC Quick Connector
Post Locations
Carbon Monoxide Alarm Indicator
When the alarm senses a dangerous level of CO, the unit will emit a
loud alarm pattern. The alarm pattern is 4 quick beeps followed by 5
seconds of silence. This cycle repeats as long as a dangerous CO condi-
tions exist. The red Alarm LED will flash the same pattern (and the PPM
will be displayed on alarms with digital displays).
WARNING: For alarms equipped with 9V battery backup, when pow-
er
ed by battery backup only; after four minutes, the alarm will sound
and flash only once every minute, until the alarm is reset or the CO is
eliminated.
If this unit is interconnected with other Kidde CO alarms, the amber LED
(Initiating Alarm) of the unit which first detected the CO, will light and
remain on until reset. The other interconnected CO alarms will also
alarm to warn you that CO was detected.