8. Maintenance
alarms will not be tested and will not alarm. However, when pressing
the Test button on an interconnected smoke alarm, the CO alarm will
emit a Smoke/Fire audible and visual alarm pattern of 3 long beeps, 1
second of silence, repeated. NOTE: You do not need to press the Test
button to take a CO r
eading.
Battery Replacement (for alarms with battery backup)
These CO alarms are not battery operated. However, these alarms are
equipped with 9 volt battery backup – the 9 volt battery is to supply
short term back-up during a power outage.
When r
eplacing the battery, use one of the following approved brands:
• Duracell
MN1604 or MX1604
• Energizer 522
These batteries can be purchased wher
e you bought the alarm or at a
local hardware store. Use of a different battery may have a detrimental
effect on the alarm operation.
The 9 volt battery is not rechargeable. If the 9 volt battery is missing,
disconnected, or if the battery’s power is low, a red LED flash will occur
once every 15 seconds, accompanied by an audible beep. If this
happens, the battery must be replaced. (For model KN-COP-IC with
digital display: “Lb” will be displayed alternately with the current CO
r
eading once every second).
IMPORTANT: Constant exposures to high or low humidity may reduce
battery life. A good safety measur
e is to replace the battery at least once
a year, or at the same time as you change your clocks for daylight saving
time.
Alarm Removal
If the tamper resist feature has been activated, refer to tamper resist
featur
e description in section 4 for removal instructions.
Remove the alarm from the mounting plate by rotating the alarm in the
direction of the “OFF” arrow on the cover. To disconnect the AC Quick-
Connector harness, squeeze the locking arms on the sides while pulling
the connector away from the bottom of the alarm (see section 4).
After the alarm has been removed, you can open the battery door and
replace the battery. Battery installation instructions are provided on the
inside of the battery door.
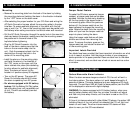
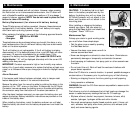
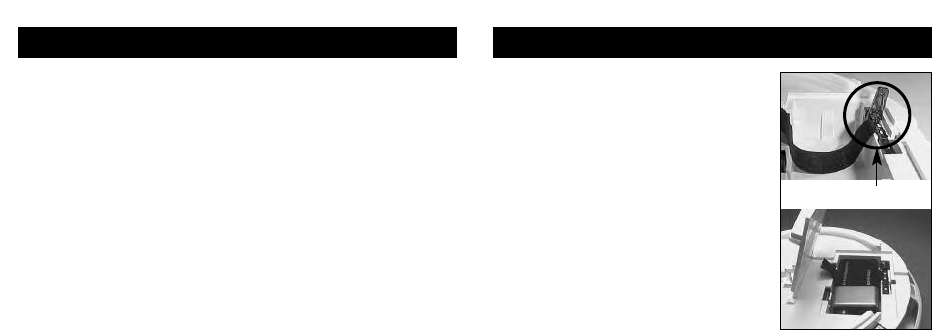
When installing the battery, orient the battery as shown on unit label.
Press the battery tab down into the battery compartment and install the
battery.
8. Maintenance
CAUTION!: If the battery tab is not held
down in the battery compartment by the
battery, the battery door will not close, the
AC Quick-Connector will not attach to the
alarm, and the alarm will not attach to the
mounting plate.
After installing or changing the battery,
reinstall your alarm. Test your alarm by
using the Test/Reset button and check that
the green “Power” LED is on.
Maintenance Tips
To keep your alarm in good working order,
you must follow these simple steps:
• T
est the alarm once a week by pressing
the Test/Reset button.
• Vacuum the alarm cover once a month to
remove accumulated dust.
• Never use detergents or solvents to clean the alarm. Chemicals can
permanently damage or temporarily contaminate the sensor.
• Avoid spraying air fresheners, hair spray, paint or other aerosols near
the alarm.
• Do not paint the unit. Paint will seal the vents and interfere with
proper sensor operation.
Move the CO Alarm to a remote location, to prevent possible damage or
contamination of the sensor, prior to performing any of the following:
• Staining or stripping floors or furniture, painting or wall-papering
• Using aerosols or adhesives
WARNING: Reinstall the CO Alarm as soon as possible to assure contin-
uous protection.
The following is a list of substances that at high levels can damage the
sensor or cause temporary r
eadings that are not CO readings:
• Ethylene, ethanol, alcohol, iso-propanol, benzene, toluene, ethyl
acetate, hydrogen, hydrogen sulfide and sulfur dioxide.
• Also most aerosol sprays, alcohol based products, paint, thinner, sol-
vent, adhesive, hair spray, after shave, perfume, auto exhaust (cold
start) and some cleaning agents.
Battery Tab
Battery Replacement


