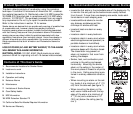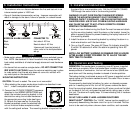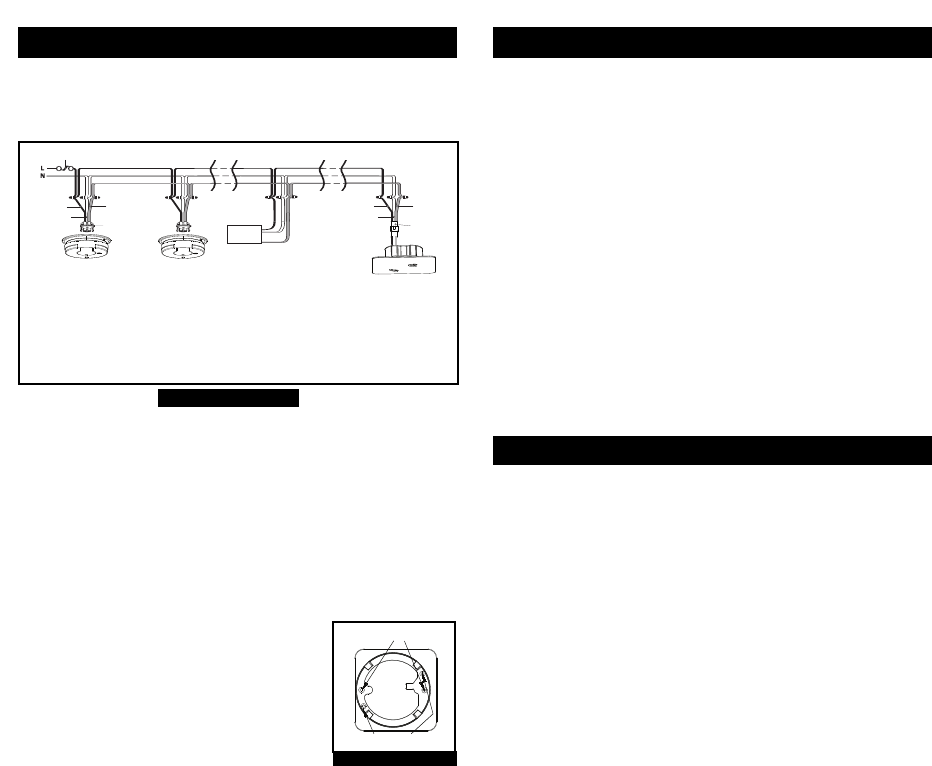
FUSE OR CIRCUIT BREAKER
REDBLACK
WHITE
BLACK
WHITE
RED
CONNECTOR
CONNECTOR
F
irst
A
larm
Additional
A
larm
Kidde
Relay Module
SM120X
Additional
A
larm
Optional Accessory
WIRES ON ALARM HARNESS CONNECTED TO
Black Hot side of AC line
White Neutral side of AC line
Red Interconnect lines (red wires) of
other units in the multiple station
set up
3. Installation Instructions
• The maximum wire run distance between the first and last unit in an
interconnected system is 1000 feet.
• Figure 4 illustrates interconnection wiring. Improper connection will
result in damage to the alarm, failure to operate, or a shock hazard.
3. Installation Instructions
• Make certain alarms are wired to a continuous (non-switched) power
line. NOTE: Use standard UL listed household wire (as required by
local codes) available at all electrical supply stores and most hardware
stores.
• For alarms that are used as a single station,
DO NOT CONNECT THE
RED WIRE TO ANYTHING.
Leave the red wire insulating cap in place
to make certain that the red wire does not come into contact with
any metal parts or the electrical box.
MOUNTING INSTRUCTIONS
CAUTION:
This unit is sealed. The cover is not removable!
1. After selecting the proper smoke alarm location as described in sec-
tion 1 , install a compatible electrical box.
2. Connect the AC QUICK CONNECT harness as
described in the WIRING INSTRUCTIONS and,
attach the included mounting bracket to the
electrical box using the included hardware in
the appropriate mounting holes (see figure
5). Be sure the foam seal on the mounting
bracket completely covers the electrical box
cut out hole and makes complete contact
with the ceiling/wall surface. The mounting bracket is keyed so that
FIGURE 4
the alarm fits in one orientation only. Pull the AC QUICK CONNEC-
TOR through the center hole in the mounting bracket.
WARNING! DO NOT OVER-TIGHTEN THE BRACKET SCREWS.
ENSURE THE MOUNTING BRACKET IS NOT DEFORMED OR
STRESSED ONCE IT IS INSTALLED. USE ONLY MOUNTING HARD-
WARE PROVIDED. USE OF ANY OTHER MOUNTING HARDWARE
MAY CAUSE THE UNIT TO NOT ATTACH CORRECTLY POSSIBLY
EFFECTING ITS PERFORMANCE.
3. After you have finished wiring the Quick Connect harness and attach-
ing the mounting bracket, install the alarm on the bracket. Insure the
alarm is properly aligned to prevent breaking the keying feature off of
the mounting bracket.
5. Install the alarm on the mounting bracket by rotating the alarm in a
clock-wise direction until the alarm stops.
6. Turn on the AC power. The green AC Power On Indicator should
be
lit within 30 seconds of when the alarm is operating from AC
power.
NOTE: LOW BATTERY WARNING IS DISABLED FOR 24 HOURS
AFTER ALARM IS FIRST POWERED ON TO ALLOW THE BAT-
TERY TIME TO CHARGE.
Mounting Holes for 3 1/2”
spacing round ceiling boxes.
Mounting Holes for
2-gang electrical boxes.
FIGURE 5
4. Operation and Testing
OPERATION: The smoke alarm is operating once AC power is applied
and testing is complete. When the smoke alarm ionization chamber
senses products of combustion, the horn will sound a loud (85dB) tem-
poral alarm until the sensing chamber is cleared of smoke particles.
The backup battery is activated as soon as AC power is supplied and will
remain active until the alarm reaches the end if its useful life or is manu-
ally deactivated.
To permanently deactivate the battery for return or disposal purposes
prior to it reaching end of life: turn off AC power, remove the alarm
from the mounting bracket, disconnect the AC wires, puncture the label
on the back of the unit, and press the small switch using a pen or other
thin tool. The alarm will rapidly beep 10 times indicating that it has been
deactivated.
DO NOT USE ALARM IF LABEL HAS BEEN PUNCTURED!
SMART HUSH
TM
CONTROL: The “HUSH” feature has the capability of
temporarily desensitizing the alarm circuit for up to 8 minutes. This fea-
ture is to be used only when a known alarm condition, such as smoke


