Darning
Stitch pattern: 23
Needle thread tension 3 to 6
Presser foot R: Automatic buttonhole foot
Pressure dial 3
S
@ ®
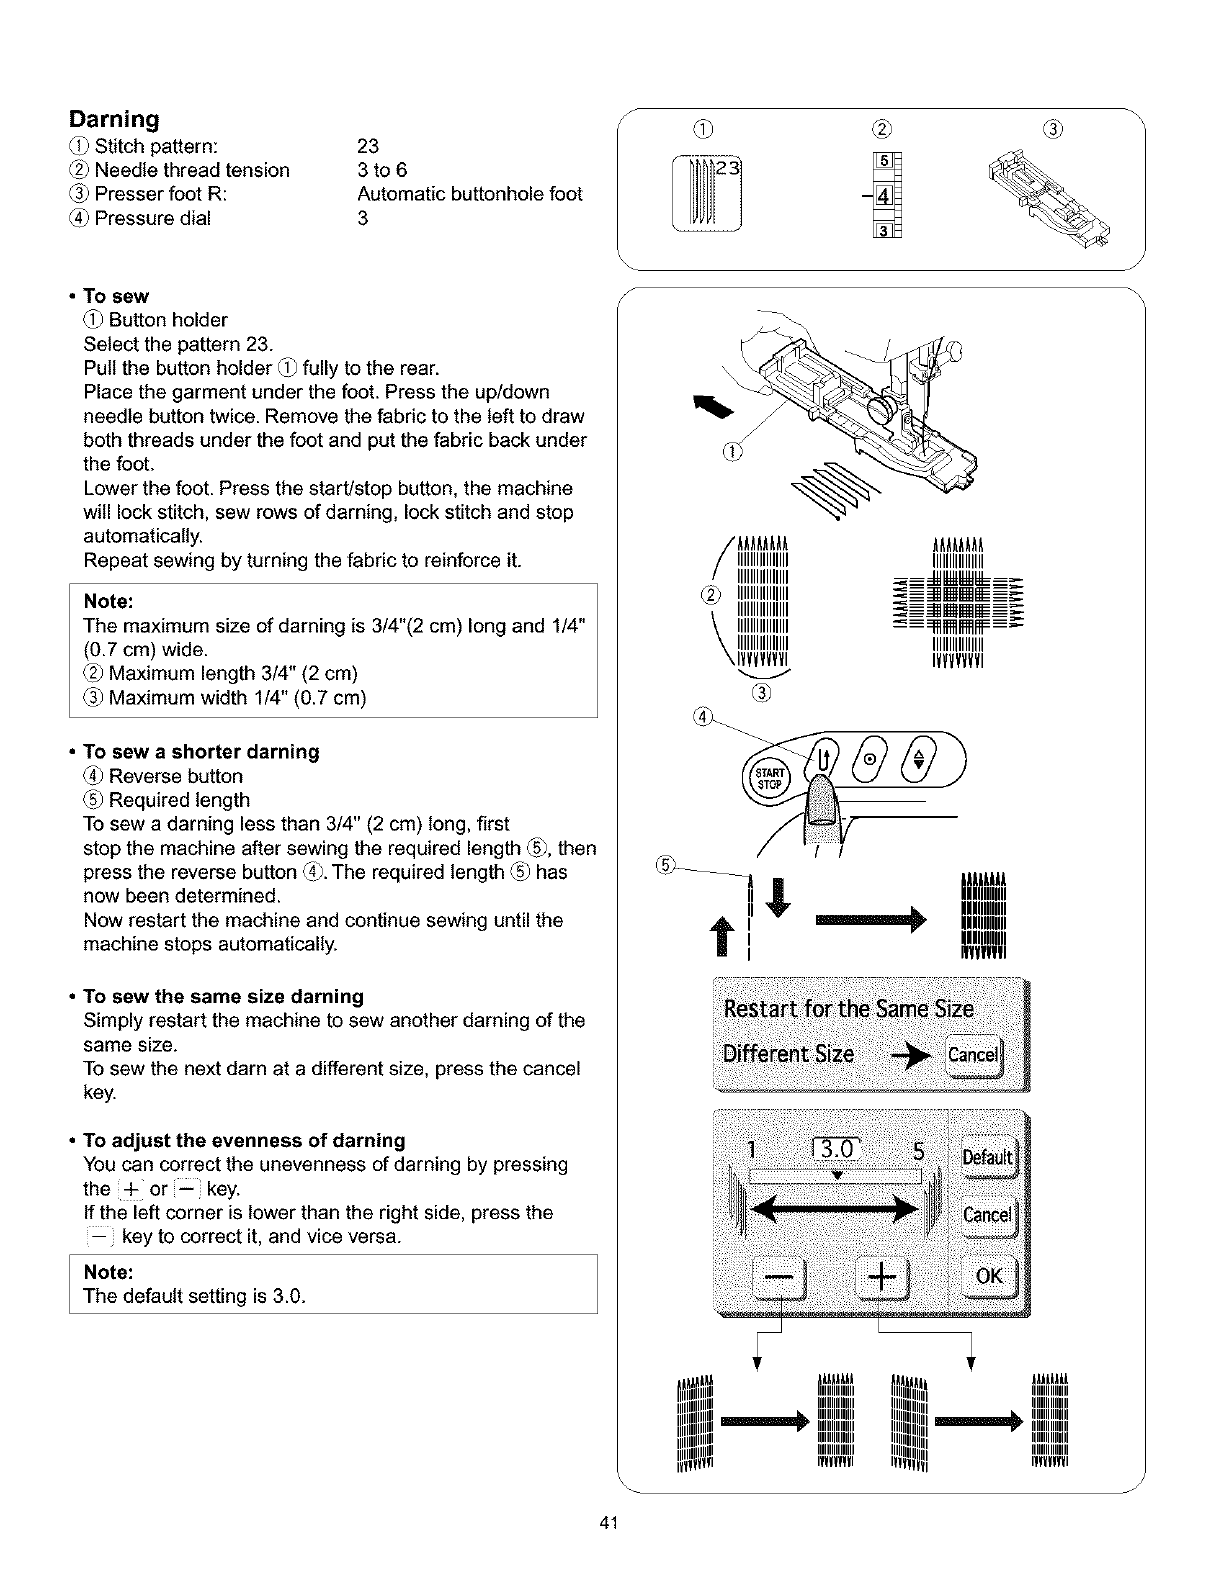
• To sew
Button holder
Select the pattern 23.
Pull the button holder _ fully to the rear.
Place the garment under the foot. Press the up/down
needle button twice. Remove the fabric to the left to draw
both threads under the foot and put the fabric back under
the foot.
Lower the foot. Press the start/stop button, the machine
will lock stitch, sew rows of darning, lock stitch and stop
automatically.
Repeat sewing by turning the fabric to reinforce it.
Note:
The maximum size of darning is 3/4"(2 cm) long and 1/4"
(0.7 cm) wide.
Maximum length 3/4" (2 cm)
Maximum width 1/4" (0.7 cm)
• To sew a shorter darning
Reverse button
Required length
To sew a darning less than 3/4" (2 cm) long, first
stop the machine after sewing the required length _, then
press the reverse button _. The required length _ has
now been determined.
Now restart the machine and continue sewing until the
machine stops automatically.
• To sew the same size darning
Simply restart the machine to sew another darning of the
same size.
To sew the next darn at a different size, press the cancel
key.
• To adjust the evenness of darning
You can correct the unevenness of darning by pressing
the + or _ key.
If the left corner is lower than the right side, press the
key to correct it, and vice versa.
Note:
The default setting is 3.0.
S
AAAAAAAA AAAAAAAA
IIIIIlllllllllll IIIIIIllllllllll
IIIIIIIIIIIIIIII
IIIIIIIIIIIIIIII _mmE_:
IIIIIIIIIIIIIIII <=;_[]I_IE=_
\ IIIIIIIIIIIIIIII --_------111HlllH111_------>
\1111111111111111 IIIIIIIIIIIIIIII
\IVVVVVVVI IVVVVVVVI
®
IAAIAAAA
!,_ illllllllllll
NNNIIIIIIIIII
t nlllmlllll
I _ IIIIIIIIIIIII
I IVVYVVIVl
L
A,,,,,,,,,,,,,,A,,,
IIIIIIIIIII I
I IIIIIHII I
IIIIIIIIIIIIIIII III
III
IIIII IIIIIIIMIIII III
IIII I
II III IIIIIIIMIIll _l
IV IVVmYVl
AAAAAAA
IIIIIIIIIIIIIII
ÁÁÁÁÁÁÁÁÁÁÁ
IIIIIIIIIII
I IIIIIIIII
IIIIIIIIIIIIIIII
IIIIIIIIMIII
IfVVVVVVI
J
41
