


A
A
B
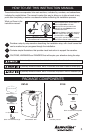
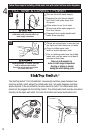
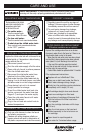
Follow these steps for installing chilled water tank with a cold only faucet.
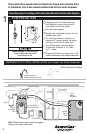
Property Damage: Join remaining tube
to cold water supply only. Water supply valves
must not prevent backward flow.
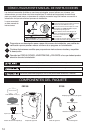
4
■■
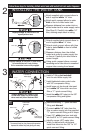
Install a T-fitting (not included)
onto the cold water supply line.
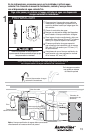
■■
Install dedicated water control valve
with 1/4" compression fitting.
■■
Attach remaining end of the supplied
white 1/4" tube into the 1/4"
compression fitting and tighten.
With no filtration system:
WATER CONNECTION
Property Damage: Join remaining tube
to cold water supply only. Water supply valves
must not prevent backwards flow.
A
Brass Nut
Ferrule
Brass Inse
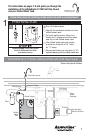
For filtration installation instructions, see
installation guide packed with the system.
Install a T-fitting (not included)
onto the cold water supply line.
Install dedicated water control valve
with 3/8" compression fitting.
Install brass nut, ferrule and tube insert at
the end of the white 3/8" tube from filter.
Insert the white 3/8" tube into the 3/8"
compression fitting and tighten.
With optional InSinkErator filtration system:
To “Inlet” on front of
chilled water tank
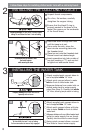
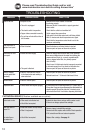
Property Damage: Before plugging in
chilled water tank, check for leaks in all
water supply connections.
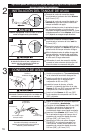
■■ Turn on the cold water supply.
■■ Depress the faucet handle and
hold it until water flows from the
spout.
■■ Allow water to run for at least 60
seconds after water begins to flow
from faucet.
5
FILL TANK & CONNECT POWER
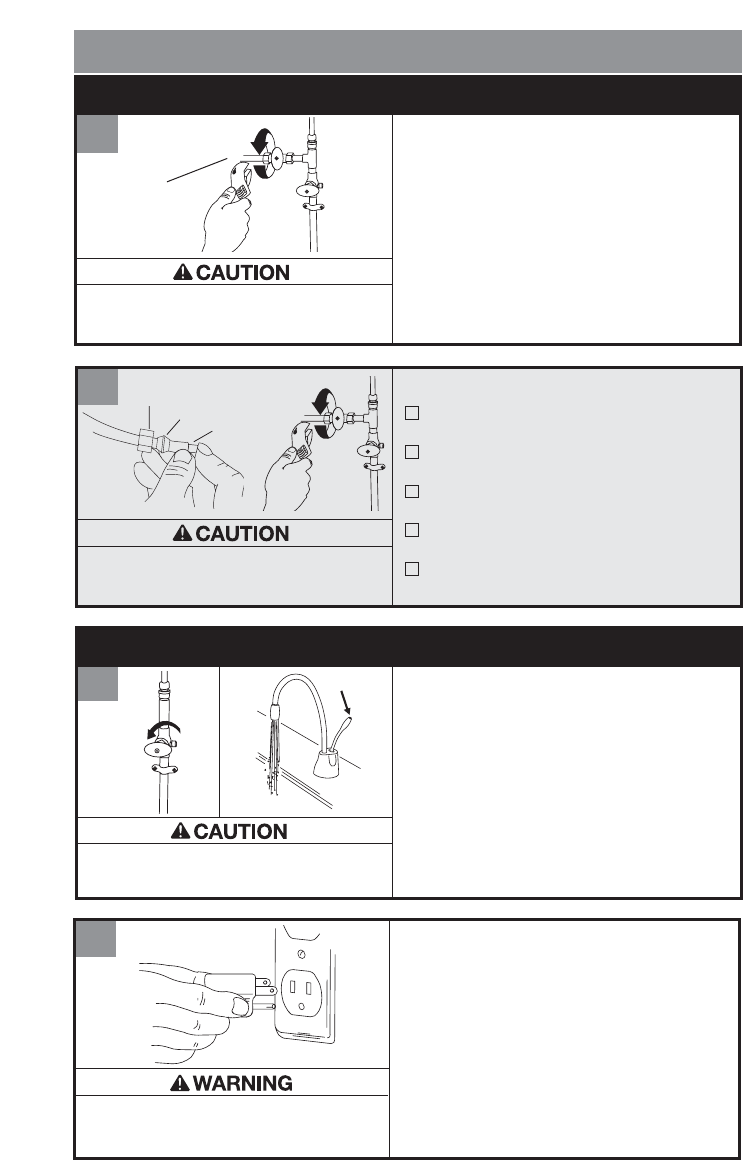
■■ Check all connections to ensure they
are tight and that there are no leaks.
■■ Plug in chilled water tank.
■■ Prior to drinking water from the
chilled water tank, run the water for
at least 5 minutes to flush lines.
Allow up to 60 minutes for
water to reach target temperature.
Property Damage: A standard grounded outlet
is required under the sink. Do not use an
extension cord set with the chilled water tank.
9