classic HE - Installation & Servicing
39
SERVICING
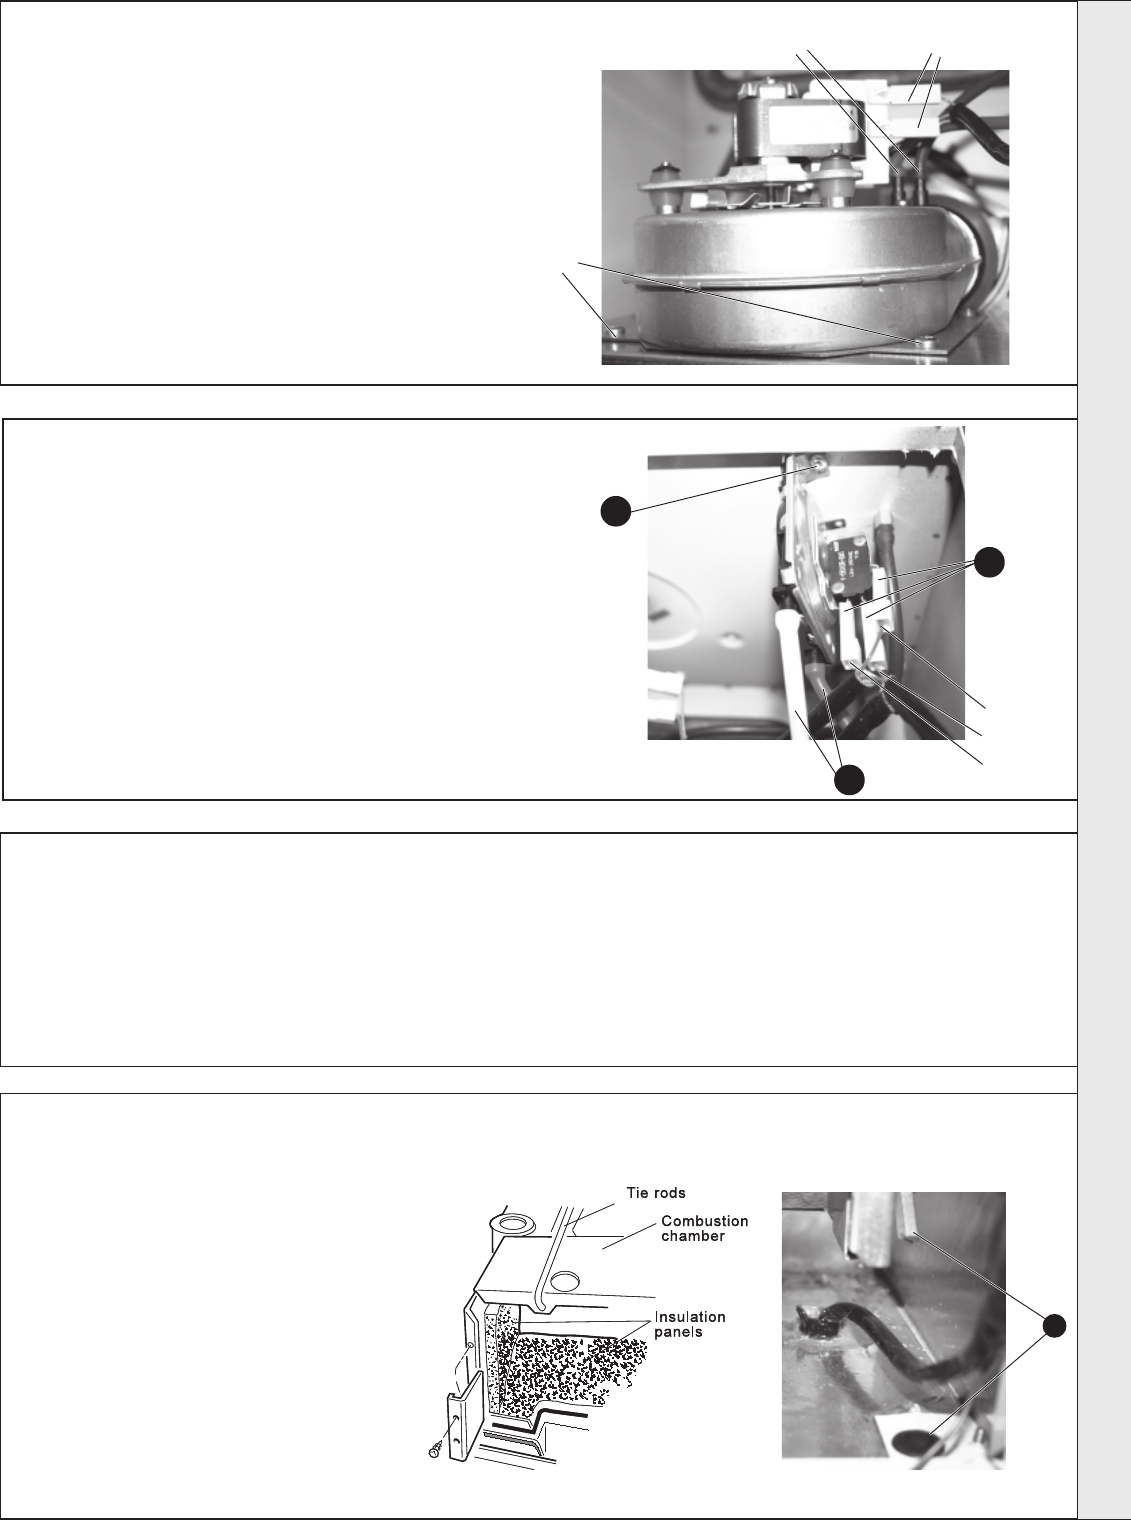
1. Refer to Frame 61.
2. Remove the two fan electrical connections, the red
pressure sensing pipe, the blue CO/CO
2 sensing
pipe and the two fan fixing screws.
3. Pull the fan forward, remove and retain.
4. Fit the new fan and reassemble in reverse order,
ensuring the fan leads, 2 sensing tubes and the two
fan fixing screws are reconnected.
5. Check the operation of the boiler.
71
FAN REPLACEMENT
5. Disengage the PCB from the mounting posts and withdraw
from the control box.
6. Fit the new PCB and reassemble in reverse order.
7. Check the operation of the boiler.
Fuse.
To change the fuse, prise it out of the holder and disengage
the fuse. Refer to Frame 78 for fuse location.
73
PRINTED CIRCUIT BOARD (PCB) REPLACEMENT
1. Refer to Frame 61.
2. Remove the control box fixing screws and swing the
control box down into the servicing position.
3. Disconnect the detection lead from the PCB.
4. Unplug all the Molex connectors from the PCB.
74
COMBUSTION CHAMBER INSULATION REPLACEMENT
1. Refer to Frame 61.
2. Remove the burner and air box assembly. Refer to
Frame 54.
3. Remove the 4 tie rods.
Note. remove rubber grommets to gain access to
side tie rod screwdriver slots.
4. Remove the combustion chamber.
5. Remove the 2 side panel retaining brackets.
6. Remove the side insulation panels.
7. Remove the front and rear insulation panels.
8. Fit the new front and rear insulation panels.
9. Fit the new side panels and retain with the
brackets and screws previously removed.
10.Reassemble in reverse order.
72
AIR PRESSURE SWITCH (APS) REPLACEMENT
1. Refer to Frame 61.
2. Remove the APS fixing screw.
3. Remove the 2 sensing tubes from the APS.
4. Remove the 3 electrical connections from the APS.
5. Fit the new APS and reassemble in reverse order.
6. Check the operation of the boiler.
red
3
2
white
red
violet
yellow
4
Fixing
screws
Air pressure switch &
CO/CO
2 sensing pipes
Electrical
connections
3
SERVICING
201850-6.pmd 21/02/2008, 12:5839


