©2012 Hunter Fan Company
5
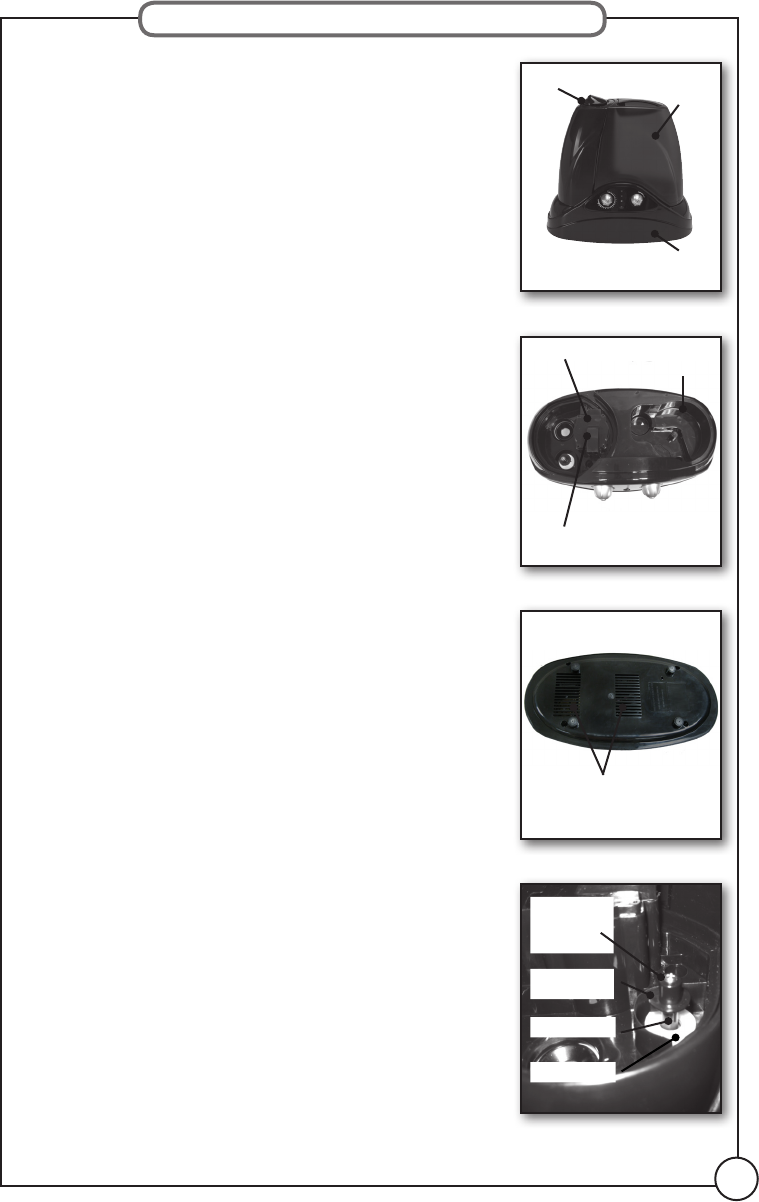
Figure 5
Figure 7
Figure 8
Figure 6
Maintenance
Cleaning:
Note: ALWAYS unplug the humidier from the electrical outlet
before cleaning. NEVER allow water to sit in the tank when not
in use.
Be careful when handling the water if warm humidication was
selected. The remaining water may be hot. Do not submerse any
part of the unit other than the Water Tank.
Cleaning the Water Tank -
Fill the Water Tank with a mixture of one (1) gallon of water and
eight (8) ounces of white vinegar. Leave the mixture in the Water
Tank for 20 minutes, giving the Water Tank a shake every few
minutes. After 20 minutes, give the Water Tank a nal shake and
discard the mixture.
Cleaning the Water Basin -
Dampen a cloth with a solution of vinegar and water. Wipe
down the Water Basin (Figure 6) with the damp cloth. Rinse
with cool water. DO NOT IMMERSE the Water Basin or hold
Nebulizer (Figure 6) directly under the water tap.
Cleaning the Base -
Wipe all exteriors surfaces of the Base (Figure 5) with a soft, dry
cloth. Do not immerse the Base in water or use water to clean
the Base. As with any electrical appliance, an electrical shock
may result or the humidier may be damaged.
Cleaning the Nebulizer -
There may be some lime deposits in the Nebulizer (Figure 6),
particularly in areas with hard water. Overcome this by cleaning
the Nebulizer with water and vinegar on a soft cloth regularly
as follows:
• Dampen a cloth with vinegar and wipe the Nebulizer gently,
until the lime deposits disappear completely.
• Gently clean with a dry cloth and remove the residue from the
humidity/vapor.
Cleaning the Fan Vent -
It’s important that the Fan Vent area (Figure 7) is kept clean
and free of obstructions. Simply wipe the Fan Vent with a clean,
dry cloth. Avoid setting the humidier on a towel or carpeted
surface as the Fan Vent may become blocked and cause the unit
to overheat.
Cleaning the Water Level Sensor -
The Water Level Sensor is made up of the Plastic Cap, the
Water Float, and the Pin. Wipe the parts with a soft damp cloth.
Reassemble by rst putting the Water Float onto the Pin and then
screwing the Plastic Cap onto the Pin. Figure 8.
Water
Basin
Nebulizer
Water Level
Sensor
Fan Vents
Plastic Cap
Phillips
Head
Screw
Water Float
Pin
Base
Spout Water
Tank


