


41695-01 5/17/2004
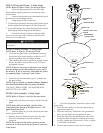
STEP 3: Mounting the Light Kit - Ceiling Fan
IMPORT ANT INST ALLA TION INFORMA TION: Before
mounting the light kit to your ceiling fan, locate and install
the lockwashers included in the light kit sack parts onto the
screws identified below in Sub-step 2.
1. Align the holes in the fan mounting plate with the mounting
holes in the switch housing.
2. Attach the light kit to the switch housing, using the screws
provided with the fan. Tighten securely.
Warning: Failure to ensure that all fasteners are
secure could result in the switch housing/light
kit assembly falling.
3. Install two 60 watt maximum type A-19 bulbs into the
lamp sockets.
NOTE: T ype A-19 bulbs are Standard Shape, Standard
Size Household Medium Base Incandescent Bulbs.
CAUTION - RISK OF FIRE, USE MAXIMUM 60 WATT
TYPE A-19 LAMPS.
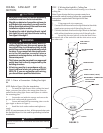
STEP 4: Light Kit Final Assembly - Ceiling Fan
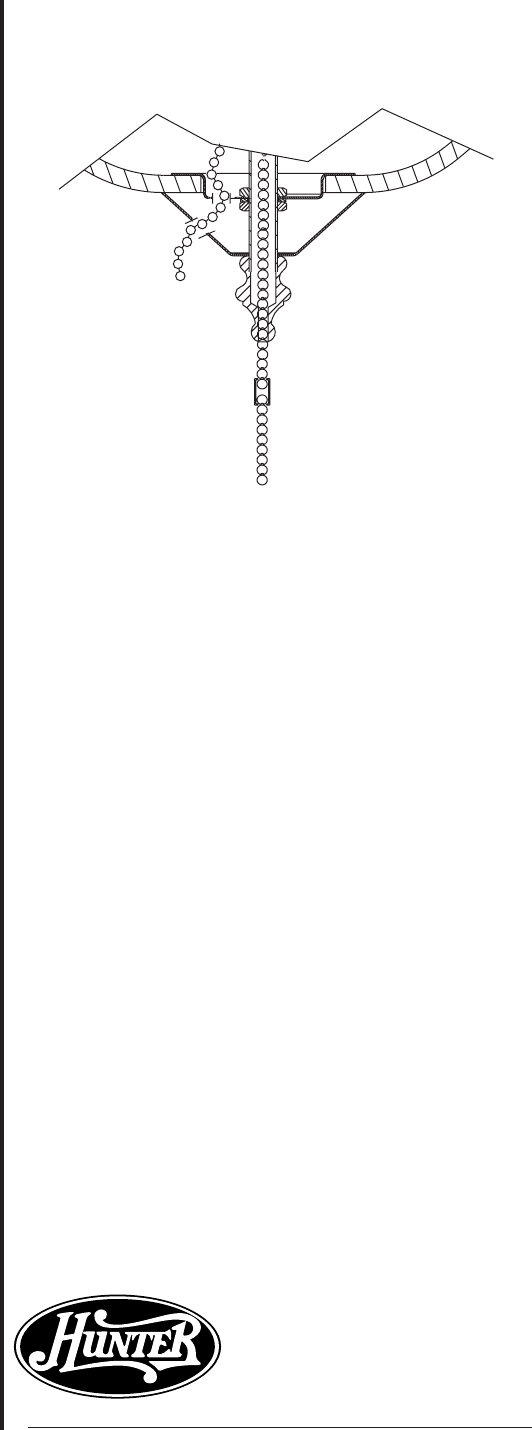
NOTE: Refer to Figures 5 and 6 for the steps below .
1. Locate the pull chain extension in the sack parts.
2. Locate the pull chain and breakaway connector for the fan
speed switch on the fan switch housing and attach the
extension from the step above.
3. Direct the fan switch pull chain through the grommetted hole
in the upper cap.
4. Remove the lower chain and breakaway connector from the
light kit by unhooking the breakaway connector and chain
from the light upper pull chain.
NOTE: Do not discard the breakaway connector or the
light chain extension as you will need them to complete
assembly.
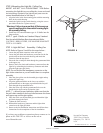
5. Place the glass globe over the threaded pipe nipple and up
against the upper cap.
6. Align the grommetted hole on the lower cap with the
grommetted hole on the upper cap and thread the fan pull
chain through the grommetted holes.
7. Place the lower cap with the grommetted hole over the
threaded pipe nipple and up against the glass.
NOTE: T o ensure proper operation, make sure that the
fan pull chain extension does not bind between the lower
and upper cap and the glass globe.
8. Place the finial over the threaded pipe and thread the light
pull chain through the finial.
9. Tighten the finial securely.
10. Reattach the breakaway connector and the light chain
extension to the light pull chain.
11. Return to the fan installation instructions and follow those
instructions for the completion of the fan installation.
Hunter Fan Company
2500 Frisco Avenue
Memphis, TN 38114
USA
© 2004 Hunter Fan Co. 5/17/2004
If you have any problems or questions please contact us via
phone at 901-248-2222 or visit us on the web at
www.Hunterfan.com
FIGURE 6