


Possible Cause
Possible Solution
• Incorrect carpet height setting
• Move carpet height control to a higher
setting
Problem: Cleaner won’t run
P ro bl e m : Cleaner / tools won’t pick up
Possible Cause
Possible Solution
• Broken or worn belt(s)
• Replace belt(s)
• Brush roll worn
• Replace brush roll
• Filter bag full
• Change filter bag
• Incorrect carpet height setting
• Move carpet height control to lower
s e t t i n g
• Blockage in air flow passage
• Clear blockage (see “Clearing block-
ages section)
Problem: Cleaner hard to push
Possible Cause
Possible Solution
• Flat belt broken or worn
• Replace belt
• Self-propel button in OFF position
• Slide button to ON
Possible Cause
Possible Solution
• Brush roll in OFF position
• Move brush roll control to ON position
(carpet)
• Flat belt broken or worn
• Replace belt
12
4 - 1
4 - 2
C
B
A
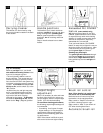
4. Trouble shooting
Possible Cause
Possible Solution
• Not firmly plugged in
• Plug unit in firmly
• No voltage in wall plug
• Check fuse or breaker
• Blown fuse or tripped breaker
• Replace fuse or reset breaker
•Thermal protector activated
• Allow cleaner to cool for 30 minutes
(this will reset the thermal protector)
Problem: Cleaner won’t self-propel
Problem: Brush roll not turning
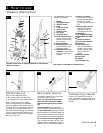
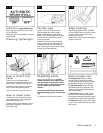
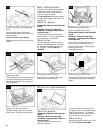
Clearing blockages
Disconnect cleaner from electri-
cal outlet.
Warning - Brush roll can start
suddenly. Unplug cleaner when it
is turned over.
Low suction or pick up may be due to a
blockage in the system. Refer to the
following steps to check for blockages
continuing with each step until the
blockage is found:
1. Check fullness of filter bag; change if
needed.
If a minor problem occurs, it usually can
be solved quite easily when the cause
is found by using the checklist below.
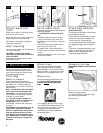
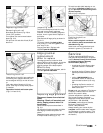
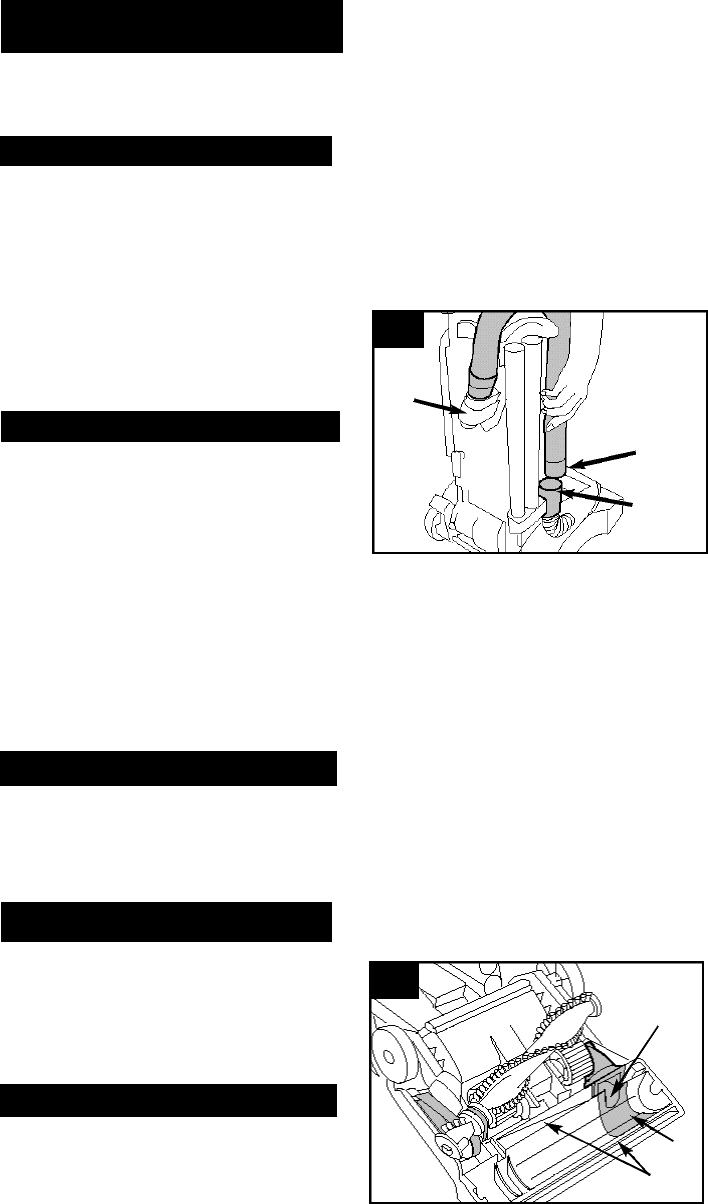
Checking airflow path
2. Plug cleaner in and turn ON. Check for
suction at end of hose (A).
a. If there is suction, continue with
step 3.
b. If there is no suction, check for
blockage in hose and dirt tube as
follows:
1) Disconnect hose from dirt duct (C)
by reversing procedure for “Attach
hose” on p. 4, Figs. 1-5 and 1-6.
2) Clear out hose.
3) Look into (C) and remove blockage.
3. Check connection at hose tube (B);
remove any blockage.
4. Turn cleaner OFF and unplug.
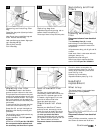
Checking under bottom plate
5. Remove bottom plate ( Fig. 3-9) and
brush roll (Fig. 3-15).
Look into opening (F), in channnels (G)
and around liner (H), and remove any
accumulated debris.
F
G
H
Thermal protector
An internal thermal protector has been
designed into your cleaner to protect it
from overheating.
When the thermal protector activates,
the cleaner will stop running. If this
happens, proceed as follows:
1. Turn the cleaner OFF and discon-
nect it from the electrical outlet.
2. Check secondary and final filters
for dirt accumulation.
3. Refer to “Clearing blockages” sec-
tion.
4. When cleaner is unplugged and
the motor cools for 30 minutes, the
thermal protector automatically resets
and cleaning may continue.
If the thermal protector continues to
activate after following the above steps,
your cleaner may need servicing (see
“Service” section).
Lubrication
The motor is equipped with bearings
that contain sufficient lubrication for the
life of the motor. The addition of lubri-
cant could cause damage. Therefore,
do not add lubricant to motor bear-
ings.
The agitator is equipped with two ball
bearings that should be lubricated peri-
odically by a Hoover Factory Service
Center or an Authorized Hoover
Warranty Service Dealer (Depot).
Hoover Cleaning
Performance
This Hoover Cleaning Performance
System is for comparing the relative pro-
gressive performance of Hoover
uprights only and not for comparison
with any other brands. The majority of
this rating is based upon the American
Society for Testing and Materials (ASTM)
Carpet Cleaning Effectiveness Testing
(ASTM Test F608). Other performance
factors include Hose Power (ASTM Test
F558), Surface Litter Cleaning, Hard
Floor Cleaning, Edge Cleaning, Air
Filtration and Cleaning Width.