


4
2
3
5
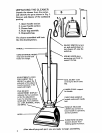
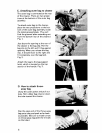
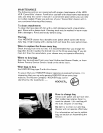
HOW TO ASSEMBLE
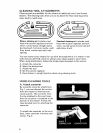
A. Put handle together
Be sure you have removed cardboard
from the end of handle pieces. Slide
the two handle pieces together. Check
to see that cord storage hooks are on
the same side of handle. Insert bolt
through small holes and secure with
nut. Tighten nut with screwdriver.
Fig. 1.
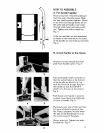
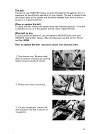
If the nut and bolt are not assembled
as shown in the illustration, the holes
in the handle are not lined up correctly.
Fig. 2.
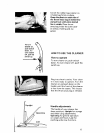
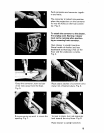
B. Attach handle to the cleaner
Unscrew nut and remove bolt and
plate from handle socket. Fig. 3.
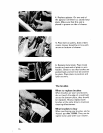
Take assembled handle and place so
that the socket holes in the bottom
of the handle are directly in line
with the electrical prongs. Position
the handle so that the ON-OFF
switch is to the rear of the cleaner.
Fig. 4.
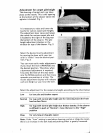
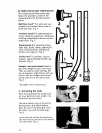
Push down until handle is securely
in place. Insert bolt into small hole
in front of handle. Fig. 5.
Place plate over end of bolt and hole.
Fit curve of plate to curve of han-
dle. Plate is properly in place when
the tabs of the handle bail fit into
the cutout areas of the plate.
Secure with nut. Tighten nut with
screwdriver. Fig. 6.
6 4