


4
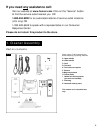
Assemble handle
1-2 1-3
1-5
1-4
1-6
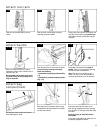
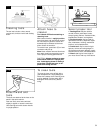
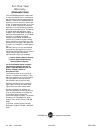
Place upper (B) and lower (C) handle sections on a flat surface
with cord hooks (A) on top. With hands on sides of handle sec-
tions, push sections together firmly until they “click” into place.
*Do not press against the rod (D) extending from the lower han-
dle. If the rod breaks or bends, the cleaner will not work prop-
erly. Do not push handle together with your hands on the ends
of the sections.
N o t e : The small red tab (E) above the ON/OFF switch (F) is for
shipping purposes only and may fall off during assembly. If it
does not fall off, the tab will be removed during the final steps of
a s s e m b l y.
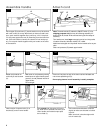
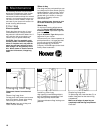
Tu r n handle over. Insert l a r g e rectangular end of cord into pocket
in bottom of handle, with side marked “UP” visible.
Make sure rectangular end is pushed into the handle as far as pos-
s i b l e .
Slide cord protector (G) toward upper handle.
B
E
I
H
J
J
L
M
K
K
“UP”
G
C
A
D
D
F
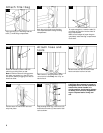
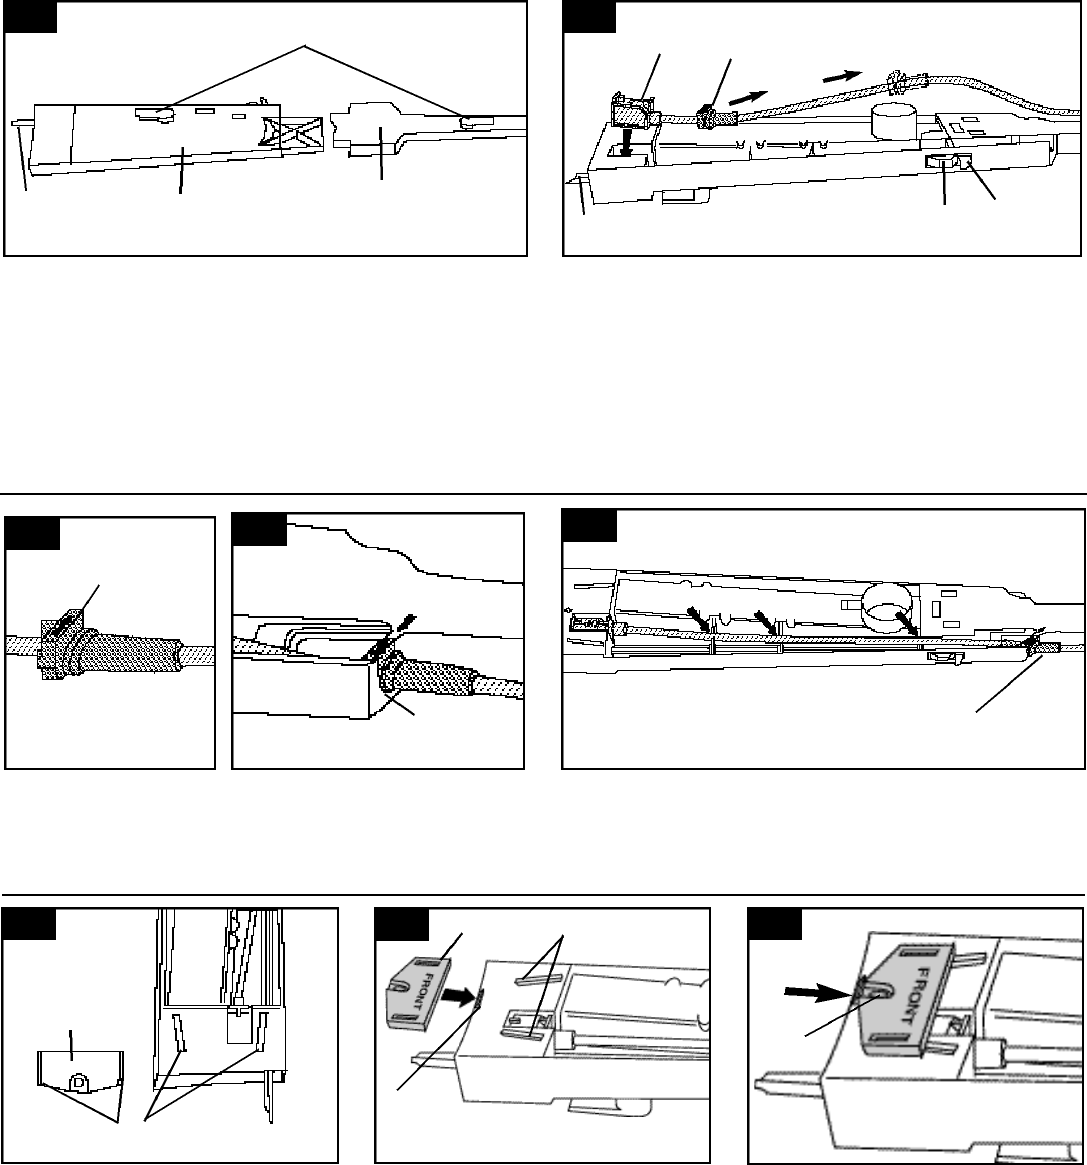
With arrow on cord protector pointing
t o w a r d arrow on upper handle, pre s s
g r oove (I) in cord protector into slot in
upper handle.
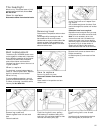
Pull cord tight.
P ress cord into place at each of the three notches indicated and
note correct positioning of (G).
Do not plug cleaner in until assembly is totally complete.
1-7
1-8
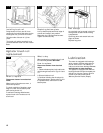
Note location of tapered rails (J) on
bracket (K) and on lower handle.
1-9
Pull bracket toward bottom of handle
slightly to make sure bracket is locked
in place.
Make sure hole in bracket aligns with
hole in handle (M).
G
Rotate cord protector on
c o rd until you see its arro w
(H).
With printed side of bracket (K) facing
up, slide rails on bracket onto rails (J) on
lower handle until bracket snaps past
the lock tab (L).
Attach cord