


7 69-0638—1
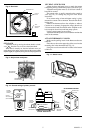
Calibration
NOTE: Select models can be calibrated.
THERMOMETER
The thermometer in your thermostat was accurately cali-
brated at the factory. The thermometer should need adjust-
ment only if it has been dropped or shifted due to mishandling.
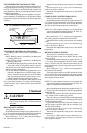
If the setpoint lever and the thermometer reading do not
agree:
1. Remove the thermostat cover by pulling up from the
bottom of cover until it clears the mounting slots.
2. Set the thermostat cover on a table near an accurate
thermometer.
3. Allow five minutes for cover thermometer to sense
area temperature; compare the readings. Be careful not to
touch thermometer or breathe on it.
4. If the readings are the same, replace cover and put the
system into operation.
5. If the readings are different, insert a small screwdriver
in the thermometer and turn it until the thermometers have
the same reading (Fig. 13).
6. Replace thermostat cover and put the system into
operation.
NOTE: Radiant heat from your hands will offset the ther-
mometer reading. After making each adjustment, wait 5
or 10 minutes for the thermometer to stabilize before
comparing.
Fig. 13—Thermometer calibration.
M5128
INCREASE
THERMOSTAT
This thermostat was calibrated at the factory and should
not need recalibration in the field. If recalibration seems
necessary, first be sure wallplate or subbase is accurately
leveled. Then check thermometer calibration.
To check thermostat calibration, allow several hours of
operation after installation. Then read thermometer and re-
move cover. Push temperature levers together to a setting
below room temperature. Slowly move them up the scale
together until the mercury slides across the tube. If the
thermometer reading and the high temperature lever posi-
tion are approximately the same at the instant the mercury
moves to the other end, no recalibration is needed.
If calibration is necessary, proceed as follows:
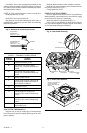
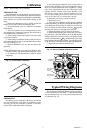
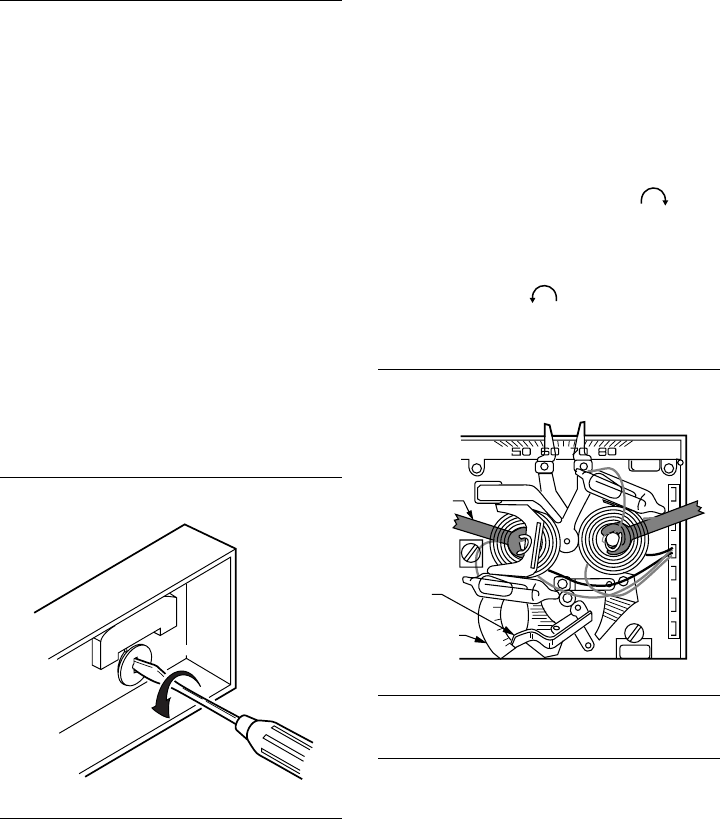
1. Remove the cover.
2. Place open-end calibration wrench, part no. 104994A
(ordered separately), on the hex nut under the bimetallic coil
controlled by the red lever (Fig. 14). Hold lever so it does not
move, and gently turn the wrench clockwise until the
mercury rests securely in the right end of the tube.
3. Put the thermostat cover on and wait 10 minutes.
4. Read the thermometer. Then remove the cover. Mov-
ing both levers, place the HIGH lever at the thermometer
reading. Hold lever so it does not move, and gently turn the
wrench counterclockwise until the mercury just slides
to the left end of the tube but no farther. Try to do this quickly
so the heat from your hands does not affect the thermostat.
5. Repeat this procedure for the blue lever.
Fig. 14—Use of 104994A calibration wrench.
.35
.30
.25
.20
.10
M8583
ANTICIPATOR
SETTING
LEVER
ANTICIPATOR
SCALEPLATE
CALIBRATION
WRENCH
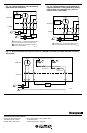
Typical Wiring Diagrams
The clock for the T8095 and TS8095 must be powered by
a 24V transformer for the T8095. A separate transformer
may be connected (Fig. 15), or the system transformer may
be connected (Fig. 16).