


T8665A CHRONOTHERM® IV DELUXE PROGRAMMABLE WIRELESS THERMOSTAT
5 69-1535-3
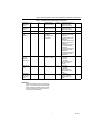
INSTALLER SETUP
NOTE: For most applications, the thermostat factory-
settings do not need to be changed. Review the
factory default settings in Table 3 and, if no
changes are necessary, go to the Installer Self-
Test section.
The Installer Setup is used to customize the thermostat
to specific systems. Some of the options include
temperature display and system changeover. Installer
Setup numbers are listed in Table 3. The table includes
all the configuration options and the factory-settings for
the T8665.
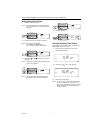
A combination of key presses are required to use the
Installer Setup feature:
— To enter the Installer Setup, press and hold the
Information i key with the increase V and decrease W
keys until the first number is displayed. All display
segments appear for approximately three seconds
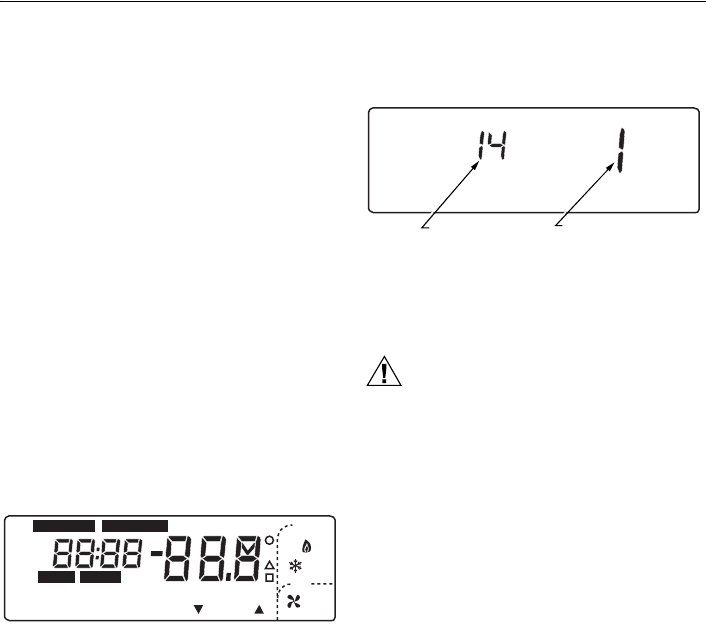
before the number is displayed. See Fig. 7 and 8.
— To advance to the next Installer Setup, press the Time
V key.
— To change a setting, use the increase V or decrease
W key.
— To scroll the Installer Setup numbers backward, press
the Time W key.
— To exit the Installer Setup, press Run Program.
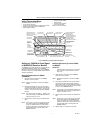
Fig. 7. DIsplay of all LCD segments.
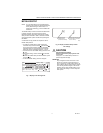
Fig. 8. Display of Installer Setup number
and settings.
CAUTION
Equipment Damage Hazard.
Electric heat and heat pump systems must
run with fan.
Configure to 1 in Installer Setup number 2 to
prevent equipment damage.
IMPORTANT
Only configured numbers are shown on the
device.For example: If thermostat does not
have a system key, Installer Setup Number 12
will not display. Review Table 3 factory settings
and mark any desired changes in the Actual
Settings column. When Installer Setup is com-
plete, review the settings to confirm they Mat-
thew system.
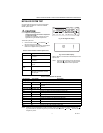
M1455
9
Aux Ht
Set Day/TimeSet Program
Mon
Wake Leave Return Sleep
OutdoorRoom
Filter
Wait
System
Fan
Em Hea
t
On
Auto
Of
f
Coo
l
Auto
AM
PM
Hold for
Heat
Cool
Repl Batt
Recovery
DST
TueWedThu Fri Sat Sun
Days
Temporary Setting
Em Ht
M14618
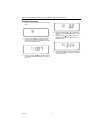
INSTALLER SETUP
NUMBER DISPLAY
(COLUMN 2 OF TABLE 3)
FACTORY SETTING OR OTHER
CHOICE DISPLAY (COLUMN 3
OR 5 OF TABLE 3)