


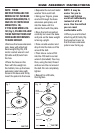
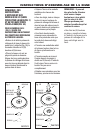
• Place the metal stand
fan pole into the base
extension, lining up the
groove of the pole to the
hole in the base
extension.
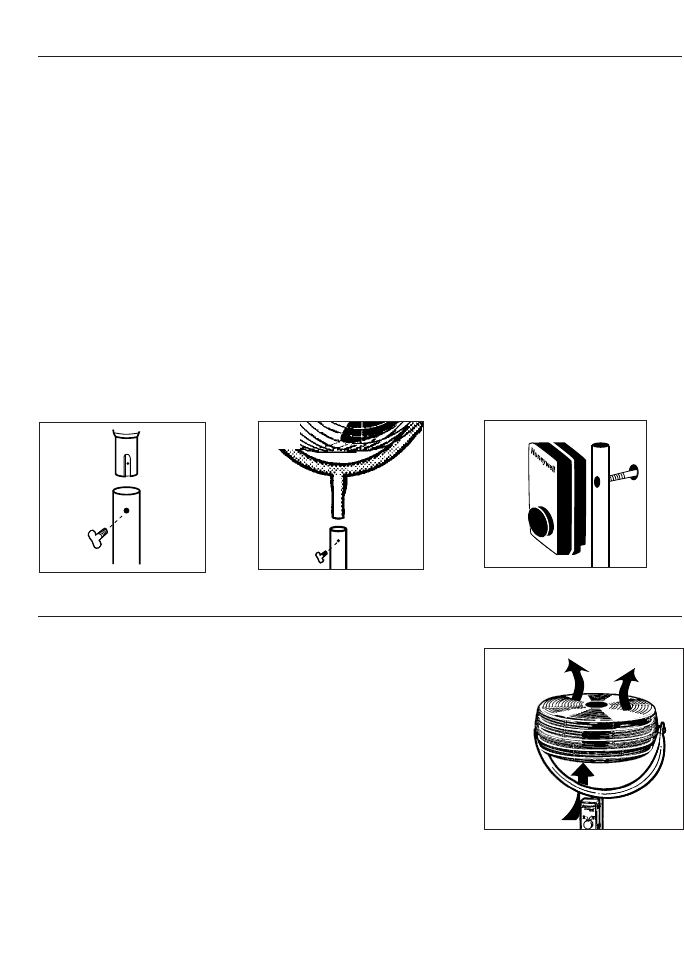
• Push together until the
holes (in the groove) line
up (Fig. 2).
•
Insert and hand tighten
the locking thumb screw.
➡
➡
Fig. 2
➡
➡
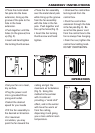
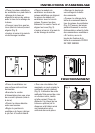
Fig. 3
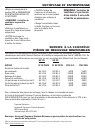
• Unscrew the control box
locking knob from the
control box.
• Push the control box
extension through the hole
in the fan pole (Fig. 4). Be
sure that the power cord
from the control box to the
fan is always free hanging.
• From the rear, tighten the
control box holding knob.
DO NOT OVERTIGHTEN.
ASSEMBLY INSTRUCTIONS
• Place the fan assembly
over the metal stand pole
while lining up the groove
from the fan assembly
with the hole in the fan
pole. Push together and
line up the holes (Fig. 3).
• Insert the fan locking
thumb screw and hand
tighten.
➡
Commercial
Grade
Fig. 4
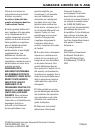
OPERATION
• Set your fan on a level,
dry surface.
• Plug the power cord
into a grounded three
prong wall outlet.
• Select the desired
speed for your needs
• Tilt the fan assembly to
the desired air direction.
• For maximum
circulation, you may
point the fan toward the
ceiling and get the
maximum air turbulence
(Fig. 5). Using this
method in the summer
will circulate air
providing a “wind chill”
effect, and in the winter
will move the warm air
from the ceiling,
dispersing it and giving
you a more uniform room
temperature.
Fig. 5