


Automation and Control Solutions
Honeywell International Inc. Honeywell Limited-Honeywell Limitée
1985 Douglas Drive North 35 Dynamic Drive
Golden Valley, MN 55422 Scarborough, Ontario M1V 4Z9
customer.honeywell.com
® U.S. Registered Trademark
© 2006 Honeywell International Inc.
69-1104—3 C.H. Rev. 04-06
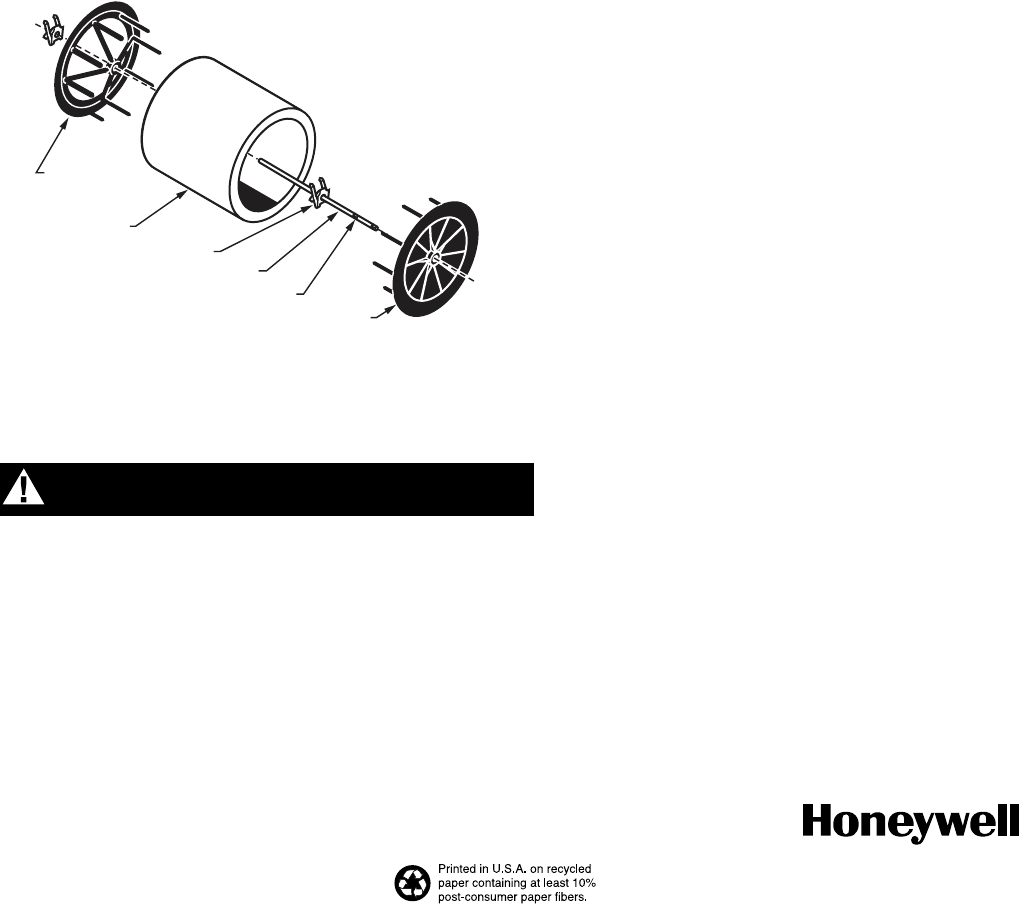
Fig. 3. Drum and humidifier pad assembly.
WIRING
CAUTION
Electrical Shock Hazard.
Can shock or burn out equipment.
• Disconnect power supply before installing or servicing.
• To prevent premature transformer burnout on multispeed
blower applications, do not wire the high voltage side of
the transformer to the same power source that services
the furnace blower.
All wiring must comply with applicable local codes, ordinances and
regulations.
1. Mount the transformer in a convenient location.
2. Connect the wires to the 120V side of the transformer.
3. Wire the drum motor, transformer, and humidity Control.
Refer to the humidity Control installation instructions for
mounting and wiring information.
CHECKOUT PROCEDURE
After winter startup or maintenance, use the following procedure to
check the humidifier operation:
1. Turn on the humidifier power and water supply.
2. Check the water level in the humidifier water pan water level
setting should be 1-3/8 in. (35 mm). Turn the valve adjust-
ment screw (located on the water valve inside the humidifier)
clockwise to lower the water level, and counterclockwise to
raise it.
3. Turn the Convertible Humidity Control to the highest setting,
or the H1008 Automatic Humidity Control to the Test position,
and set the thermostat to 10°F (6°C) above the room temper-
ature.
4. Check that the humidifier pad is rotating.
5. Reset the thermostat and the Convertible Humidity Control to
a comfortable setting, or the Automatic Humidity Control to
the desired frost factor setting, for automatic operation.
OPEN
DRUM END
CLOSED DRUM END
METAL TABS
TINNERMAN
DRUM SHAFT
PAD
SQUEEZE
SLIGHTLY
TO INSTALL
M12243