


F300E ELECTRONIC AIR CLEANER
68-0240-1
11
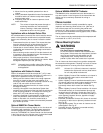
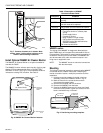
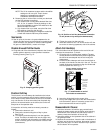
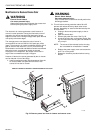
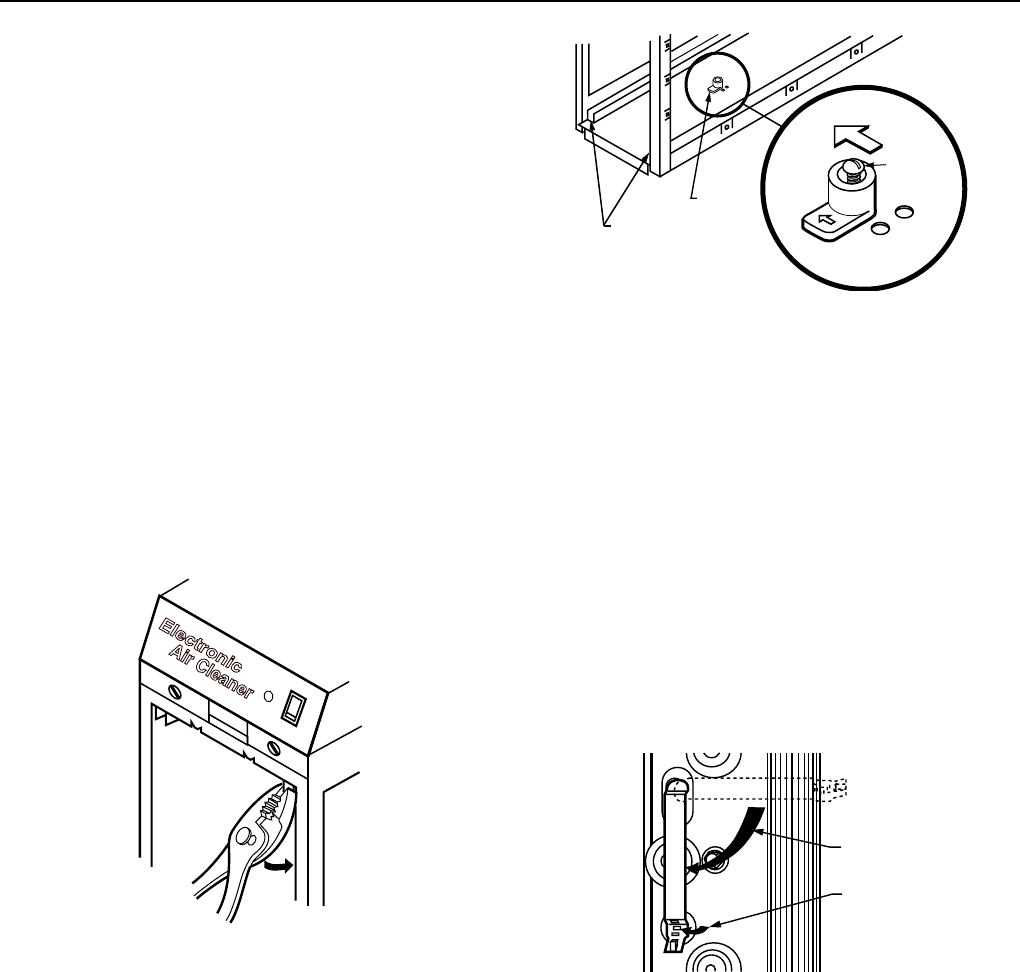
Fig. 16. Position of cell key determines orientation
of cell (arrow on key must point downstream).
4. Tighten the screw into the new hole.
5. Insert the electronic cell. The ionizer section will now
be on the air-entering (upstream) side of the cabinet.
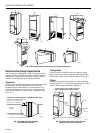
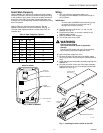
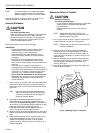
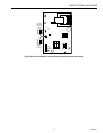
Attach Cell Handle(s)
The cell handles must be installed on the end of the cell
closest to the access door. To install:
1. Orient the cell as it will be when installed. The gray
contact board must be toward the power supply and
the airflow arrow stamped into the cell must point
downstream.
2. Hold the handle sideways and insert the solid tab on
the back of the handle into the slot in the cell. Turn the
handle 90 degrees clockwise to align the divided tab
with the square hole. See Fig. 17.
PREFILTER GUIDES
CELL KEY
M5639
CELL
KEY
ALTERNATE
HOLES FOR
KEY
CELL KEY
SCREW
DOWNSTREAM
AIRFLOW
M6047A
ROTATE 90
DEGREES
FOLD TAB
TO LOCK
HANDLE
IN PLACE
INSTALL HANDLE ON END OF CELL
CLOSEST TO ACCESS DOOR.
M14737
S
Y
S
T
E
M
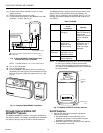
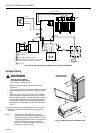
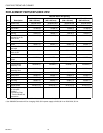
NOTE: The UV air treatment system and the humidifier
settings are for one year. Theair cleaner
settings are selectable according to
homeowner activities and needs.
2. Determine the air cleaner filter run time you desireand
set the DIP switches accordingly:
a If air cleaner filter is used, select desired filter time
of 3, 6, 9 or 12 months. Follow the settings on the
back of the W8600A to set the DIP switches for the
desired number of months.
b. If air cleaner filter is not used, move the filter time
DIP switches 4 and 5 to the left (off).
c. Use factory default settings to change the media filter
or wash the electronic filter every three months.
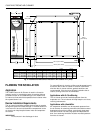
Seal Joints
❑ Seal all joints in the return air system between the air
cleaner and the furnace to prevent dust from entering the
clean airstream. Use optional air cleaner cabinet gasket
kit (part no. 32002109-001), mastic or foil tape.
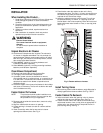
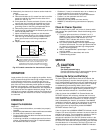
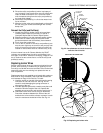
Disable Unused Prefilter Guide
❑ Crimp the end of the downstream (closest to the furnace)
prefilter guide to prevent incorrect prefilter installation
following cleaning. See Fig. 15.
Fig. 15. Crimping prefilter guide.
Position Cell Key
The electronic cell must always be installed so the ionizer
section is on the upstream side. A factory-installed cell key
on the bottom of the cabinet allows the cell to be inserted in
only one direction. If the arrow molded into the plastic key
points in the same direction as the airflow, the ionizer will
always be on the upstream side.
If the position of the key must be reversed, proceed as
follows:
1. Remove the electronic cell.
2. Remove the screw holding the cell key in place.
See Fig. 16.
3. Turn the key around and place it over the opposite
holes. The tab on the bottom fits into the larger hole,
and the screw fits into the smaller hole. Make sure the
arrow on the key points in the direction of the air flow
(downstream).
Fig. 17. Install handle on end of
cell closest to access door.
3. Insert the divided tab into the square hole.
4. Fold up the wedge and insert it into the divided tab to
lock the handle in place. If necessary, press with a
blunt instrument like the end of a pliers.
Reassemble Air Cleaner
❑ Insert the electronic cell with the gray contact board
toward the power supply and the airflow arrow pointing
downstream. If the cell does not slide easily into the
cabinet, check the orientation of the cell key.
❑ Insert the prefilter on the upstream side of the cabinet in
the guide provided.
❑ Replace the access door. Insert the tab on the bottom of
the door into the slot in the cabinet, then swing it closed
and press into place. The door must be firmly in place or
the air cleaner will not operate.