


17 69-0733—3
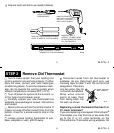
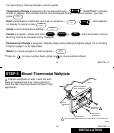
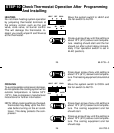
■■ Remove wallplate from wall, and drill
3/16 inch holes in wall (if drywall) as marked.
For firmer material such as plaster or wood,
drill 7/32 inch holes. Gently tap anchors
(provided) into drilled holes until flush with
the wall.
■■ Reposition wallplate over holes, pulling
wires through wiring opening. Loosely insert
two mounting screws into holes.
■■ Level for appearance only; thermostat
functions properly even when not level.
Tighten mounting screws.
INSTALLATION
18 69-0733—3
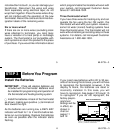
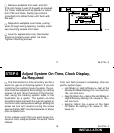
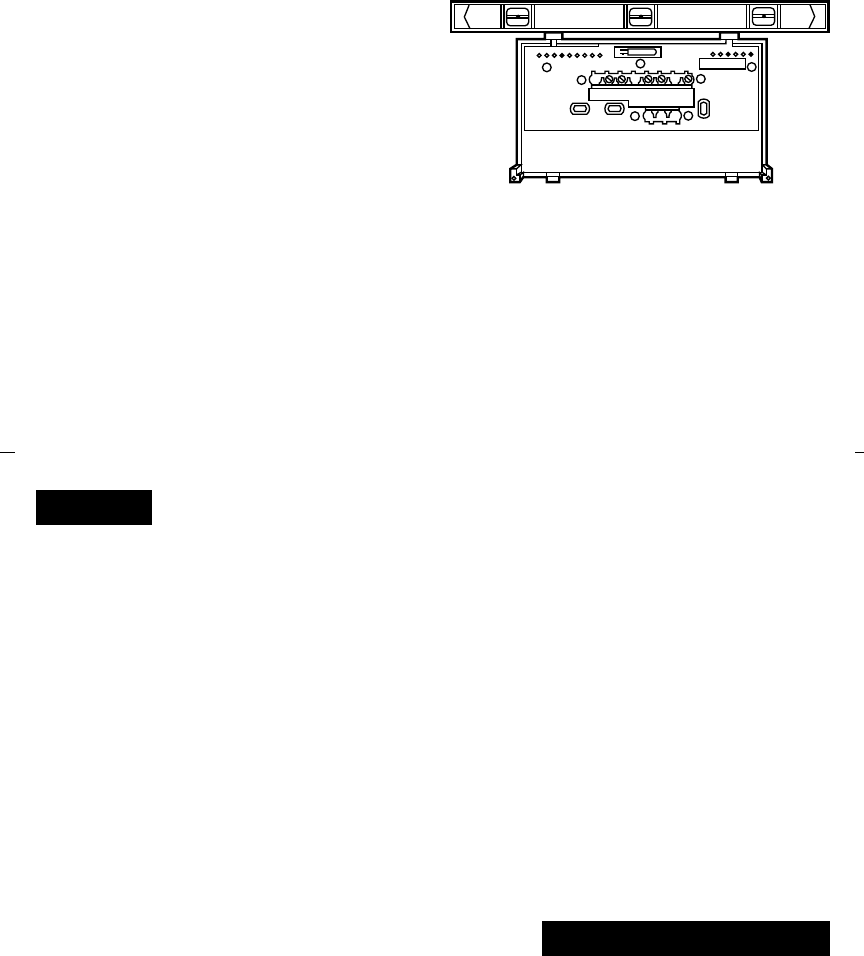
STEP 6 Adjust System On-Time, Clock Display,
As Required
■■ The thermostat on-time is factory-set for a
warm air, gas or oil heating system. If you are
installing it on another type of system, the on-
time must be adjusted accordingly by setting
screws 1A and 1B on the back of the thermo-
stat, using the heating system table in the
illustration as a guide. The system on-time
should be optimized with the type of system to
minimize room temperature swings. Setting the
screw out one turn means turning the screw
approximately 360° counterclockwise, or about
one complete turn.
In the unlikely event that you want longer fur-
nace on-time, readjust screws 1A and/or 1B as
follows:
First, turn both screws in completely, then ad-
just for system type:
• Hot Water or High Efficiency—Set at the
Gravity Air/Water setting (1A—out one turn,
1B—out one turn).
• Gas/Oil Warm Air—Set at the Hot Water or
High Efficiency setting (1A—leave in, 1B—
out one turn).
• Electric Warm Air—Leave at the Gas/
Oil Warm Air setting (1A—leave in, 1B—
leave in).
M611B
LEVEL