


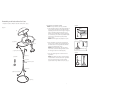

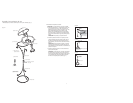
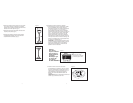
d.Align the holes of the
Upper Ring
with the holes on
the
Upper Legs
and adjust so they sit evenly. Now,
completely tighten the three screws located on the
Upper Ring
. (Fig 5)
e. Tighten the remaining three screws located on the
Leg Holder
. (Fig 5)
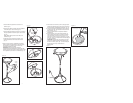
f. Check to be sure ALL screws are tightened
completely. Now the stand is fully assembled.
(Fig 6)
3.
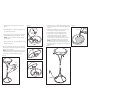
Assemble the fountain top:
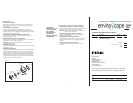
a.Familiarize yourself with the pump. The switch
located at the front of the pump controls the pump
speed. The speed is indicated by a plus (+) and
minus (-) sign. To increase the speed, move the
switch slowly downward in the direction of the plus
sign. You will hear a click as the switch moves to
each speed level. At its highest speed level, the
switch will cease to move any further. To decrease
the pump speed, move the switch upward toward
the minus sign. Similarly, at its lowest speed, the
switch will cease to move any further (Fig 7).
NOTE: It is recommended the pump be set at its
highest speed during assembly and later adjusted
to a lower setting if desired. Be sure to unplug the
pump before adjusting the speed setting.
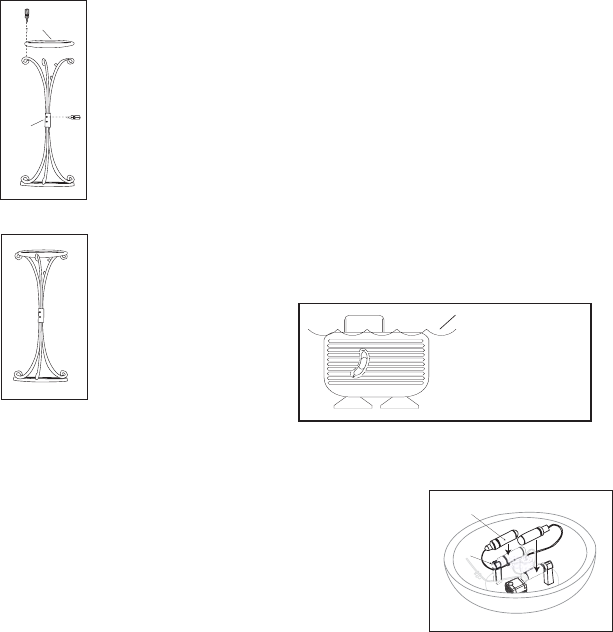
b.Insert the rubber end of the waterproof lights into
the light clips located inside the base while keeping
the light cords in the position shown in Figure 8.
(Fig 8) Slight twisting may help to push the rubber
end through the clip more easily.
NOTE: Be gentle with the bulb cover since it is
made of glass.
Minimum Water Level
Flow Control Valve
(+) faster water output
(-) slower water output
Attention:
In order to get
best results,
please operate
pump completely
submerged.
Keep the water
level above the
minimum water
level ALL THE
TIME.
Figure 7
Figure 5
Figure 6
Figure 8
Light
Light Clip
7
6
Upper Ring
Leg Holder
Upper Ring
Bottom Ring