


10
Heatilator • HEIR36, HEIR42, HEIR50 • 2285-900 Rev. D • 8/12
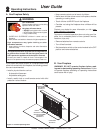
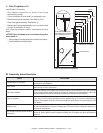
C. Clear Space
WARNING! DO NOT place combustible objects in front
of the fi replace or block louvers. High temperatures may
start a fi re. See Figure 2.2.
Avoid placing candles and other heat-sensitive objects on
mantel or hearth. Heat may damage these objects.
Figure 2.2 Clear Space
E. Fixed Glass Assembly
See Section 14.H.
D. Decorative Doors and Fronts
WARNING! Risk of Fire! Install ONLY doors or fronts
approved by Hearth & Home Technologies. Unapproved
doors or fronts may cause fi replace to overheat.
This fireplace has been supplied with an integral
barrier to prevent direct contact with the fi xed glass
panel. DO NOT operate the fi replace with the barrier
removed.
Contact your dealer or Hearth & Home Technologies if
the barrier is not present or help is needed to properly
install one.
For more information refer to the instructions supplied with
your decorative door or front.
CLEAR SPACE
3 FT. IN FRONT OF FIREPLACE
G. IPI Battery Tray/Battery Installation
The IntelliFire Plus
TM
system has a battery backup option.
Battery longevity and performance will be affected by the
service temperatures of this appliance.
NOTICE: Batteries should only be used as a power
source in the event of an emergency such as an outage.
F. Remote Controls, Wall Controls and Wall
Switches
Follow the instructions supplied with the control installed
to operate your fi replace:
For safety:
• Install a switch lock or a wall/remote control with child
protection lockout feature.
• Keep remote controls out of reach of children.
See your dealer if you have questions.
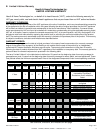
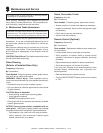
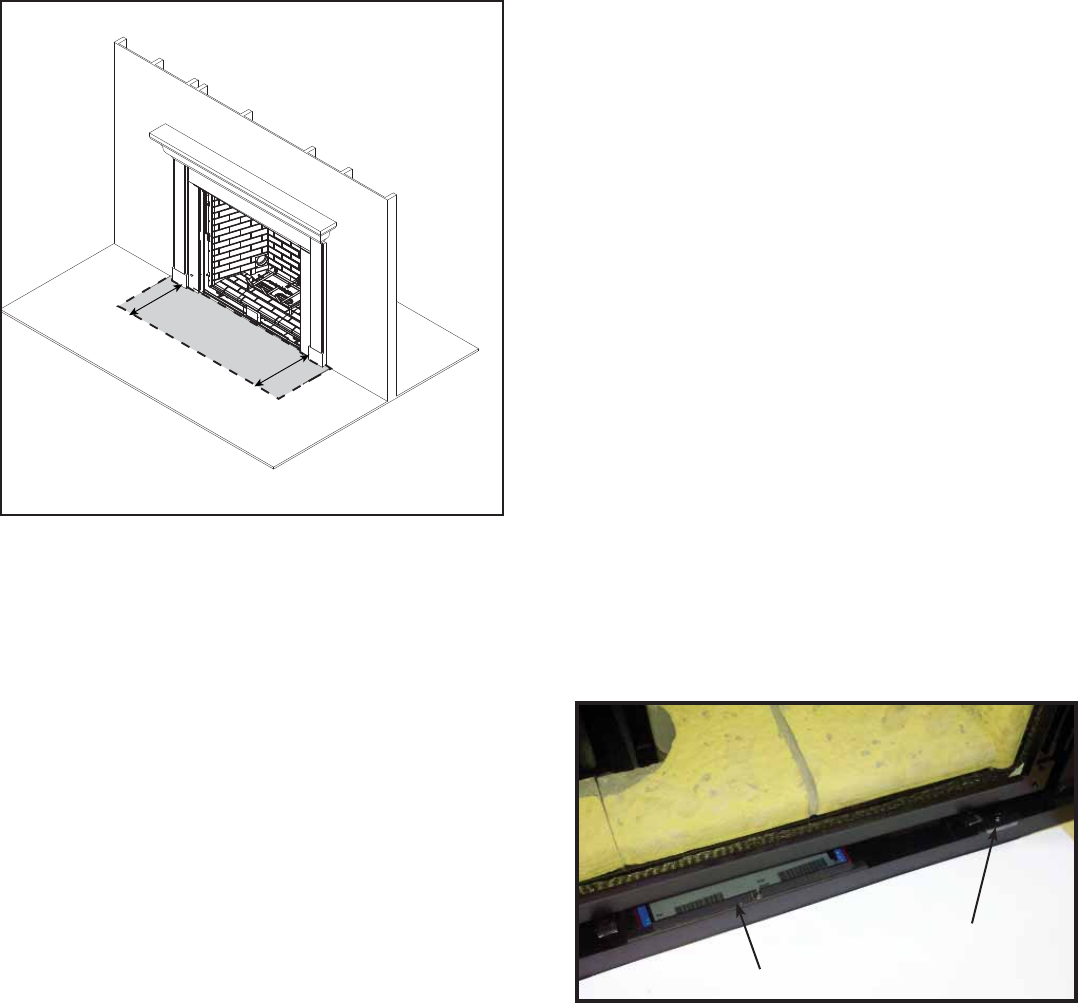
H. Rating Plate/Glass Clip Tool Location
The rating plate for this model is located underneath the
fi rebox affi xed to a tray that must be accessed using a
1/4 inch nut driver. See Figure 2.3. To access the rating
plate, remove the screw that secures the tray to the appli-
ance bottom and pull the tray out.
The glass clip removal/installation tool is also located in
this area. To access the glass clip tool, remove the screw
that secures it to the appliance bottom.
Figure 2.3 Rating Plate/Glass Clip Tool Location
RATING PLATE
RATING PLATE
GLASS CLIP TOOL
GLASS CLIP TOOL