


5598-1326-01
ENGLISH
RECEIVER INFORMATION
All receivers have the following features and ratings:
• Rated for 120VAC/60Hz supply voltage.
• Uses existing wiring.
• Fits standard single gang junction box (wall switch only).
• Not for use with Compact Fluorescent bulbs.
• When rst turned on wait 15 seconds.
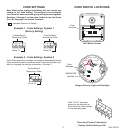
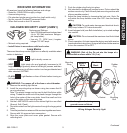
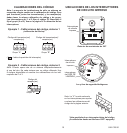
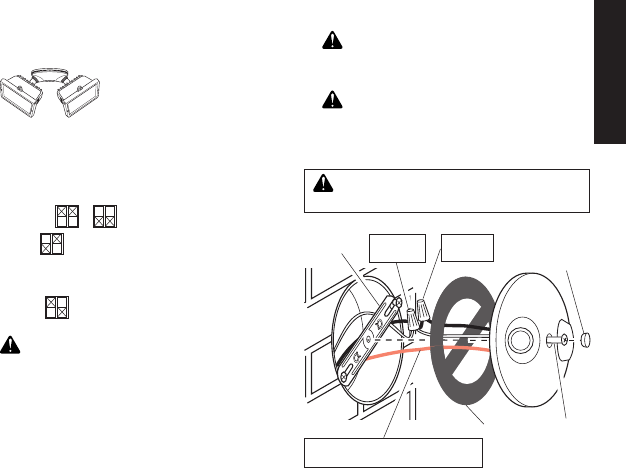
Junction box ground wire to green
ground screw on xture.
Wiring Halogen Security Light
WARNING: Risk of re. Do not aim the lamps at a
combustible surface within 3 ft. (1 m).
White to
White
Black to
Black
Gasket
Mounting
Strap
Mounting
Bolt
Rubber
Plug
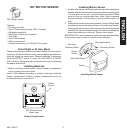
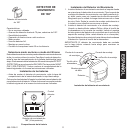
HALOGEN SECURITY LIGHT (2LBN1)
Features and Ratings:
• Up to 200 Watt maximum halogen load
(up to 100 Watt maximum halogen,
per lampholder).
•
Use only T3, 100W (max.) tungsten
halogen 120 VAC lamps.
• Minimal wiring required.
• Install xture in accordance with local codes.
Lamp Modes
There are three lamp modes (light turn-on effects) available when
motion is detected:
• NORMAL
or - Light instantly comes on.
• SOFT
- Light starts dim and gradually increases to full
brightness. Light gradually dims to half-bright, pauses, and then
continues dimming to off when motion is no longer detected and
after selected ON-TIME.
• FLASH
- Light ashes on then off twice before turning on
full brightness.
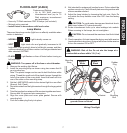
WARNING: Turn power off at the fuse or circuit breaker.
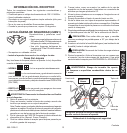
1. Remove the existing light xture.
2. Install the mounting strap as shown using two screws that t
your junction box.
Note: The plastic hanger can be used to hold the xture while
wiring. Thread the small end of the plastic hanger through the
hole in the center of the cover plate. Insert the small end into
one of the slots on the mounting strap.
3. Set the LAMP MODE switch to the desired light turn-on effect
(Normal, Soft, Flash).
4. Route the wires from the light receiver through the large gasket
holes.
5. Twist the junction box wires and xture wires together as shown.
Secure with UL approved wire connectors.
6. Align the cover plate and cover plate gasket. Secure with
mounting bolt.
7. Push the rubber plug rmly into place.
8. Not intended for waterproof junction boxes. Fixture should be
surface mount only. Caulk the wall plate mounting surface with
silicone weather sealant.
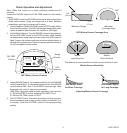
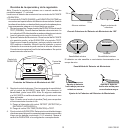
9. Adjust the lamp holders by loosening the lock nuts. Note: Do
not rotate the lamp holders more than 180° from the factory
setting.
CAUTION: To avoid water damage and electrical shock,
keep lamp holders 30° below horizontal.
10. Insert halogen bulb (see Bulb Installation) up to rated wattage
into module.
CAUTION: Do not exceed the maximum load limits listed
above.
11. Check operation. Activate transmitter being used with receiver
(see transmitter instructions). A signal will be sent to the receiver
to turn the receiver ON or OFF.
Continued