


4 598-1326-01
Check Operation and Adjustment
Note: When rst turned on or when switching modes wait 30
seconds.
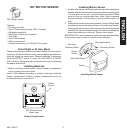
Locate the RANGE control and ON-TIME control on the motion
sensor:
• The RANGE control and ON-TIME control are located on the bottom
of the motion sensor. Using your ngernails or a small, at-head
screwdriver, gently pry the cover until it opens.
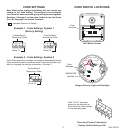
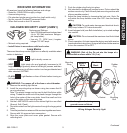
1. Check Operation. Set the ON-TIME control to TEST mode. Walk in
front of motion sensor. The LED indicator light should ash when
motion is detected (see illustration for location of LED light).
2. Adjust Motion Sensor. Turn the RANGE control to the mid posi-
tion and ON-TIME control to the TEST position. Walk through
coverage area noting where you are when the LED begins to
ash. Loosen the clamp screw and move the motion sensor to
change the coverage area. Tighten clamp screw when nished.
Do not overtighten clamp screw.
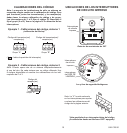
5 1 TEST
ON-TIME
(MINUTES)
RANGE
MAX
MIN
180° Motion Sensor Controls
3. Adjust RANGE Control. To increase sensitivity, turn the RANGE
control toward MAX. To decrease sensitivity, turn the RANGE
control toward MIN. Note: If the RANGE is set too high, false
triggering may result in some environments.
Note: When using test mode to check operation in the day time:
A. Set the DETECT control switch to DAY/NIGHT and
B. Set the ON-TIME control to TEST.
4. Set ON-TIME Control. Determine the amount of time you want
the connected device to stay on after motion is detected (1 or
5 minutes). Slide the ON-TIME control to the corresponding
setting.
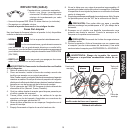
LED
Indicator
Range
Control
ON-TIME
Control
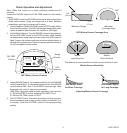
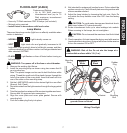
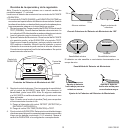
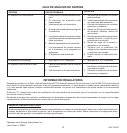
Motion Sensor Sensitivity
The detector is most sensitive to motion across its eld of view.
Motion
Most SensitiveLeast Sensitive
Sensor Sensor
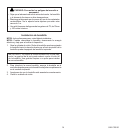
Maximum
Coverage Angle
Maximum Range
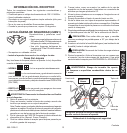
180° Motion Sensor Coverage Area
70 ft.
(21 m)
8 ft.
(2.4 m)
180°
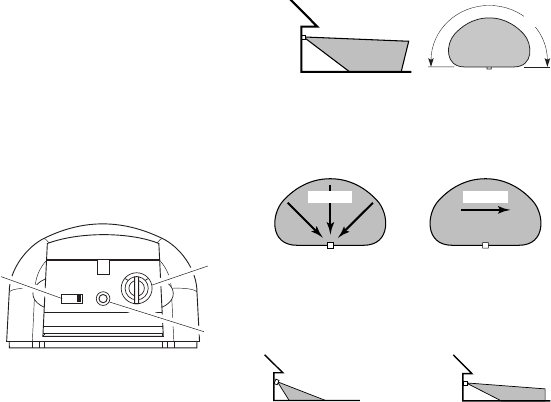
Aim Sensor Down
for Short Coverage
Aim Sensor Higher
for Long Coverage
Adjusting Motion Sensor Coverage
Motion