


Page 32
August 1, 2008
Heat & Glo · Tiara Petite B · 7026-101K
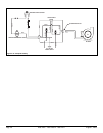
The intake damper can be used with or without the fl ue
restrictor to adjust the air fl ow. Opening the damper makes
the fl ames shorter and more active. Closing the damper
makes the fl ames taller and less active.
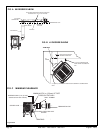
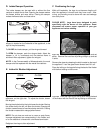
D. Intake Damper Operation
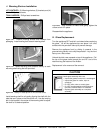
Figure 8.6 Loosen the wingnut that secures the damper. The
wingnut is located on the underside of the appliance, to the
right of the pilot assembly.
To CLOSE the intake damper, pull the wingnut forward.
To OPEN the damper, push the wingnut back. Adust the
damper in 1/4 in. increments until the desired flame is
achieved. After adjustment, tighten the wingnut.
NOTE: In the Commonwealth of Massachusetts, the word
damper shall be replaced with the words fl ue restrictor.
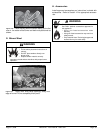
E. Intake Air Shutter Adjustment
Figure 8.7 The shutter is located on the underside of the
appliance, on the right side. To adjust the shutter, loosen
the wingnut.
Moving the shutter bolt to the right closes the shutter. Moving
the shutter bolt to the left, will open the shutter. Opening the
shutter causes flames to become shorter and blue. Closing
the shutter creates taller orange/yellow flames.
NOTE: Do not close so much as to cause a sooty flame.
Improper adjustment can cause sooting in the firebox and/
or on the outside of a house with a horizontal termination.
Retighten the wingnut after adjustment.
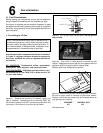
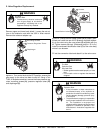
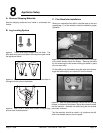
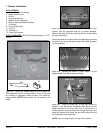
F. Positioning the Logs
While still breakable, the logs do not become fragile until
after the appliance is burned and they have cured. After
curing, any handling must be done with care as breakage
can easily occur.
PLEASE NOTE: Logs have been designed to work
specifically with the burner of this appliance. Exact
placement will ensure proper operation of your gas
appliance and reduce sooting.
Figure 8.8 Gently remove the top of the appliance and set
aside. Remove the cast face by sliding straight up and set
it aside.
Remove the glass by releasing the latch located on the top of
the appliance. Lean the glass frame forward and lift it out.
Place the left log on the log shelf along the back of the fi rebox
with thefront resting on the burner.
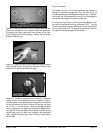
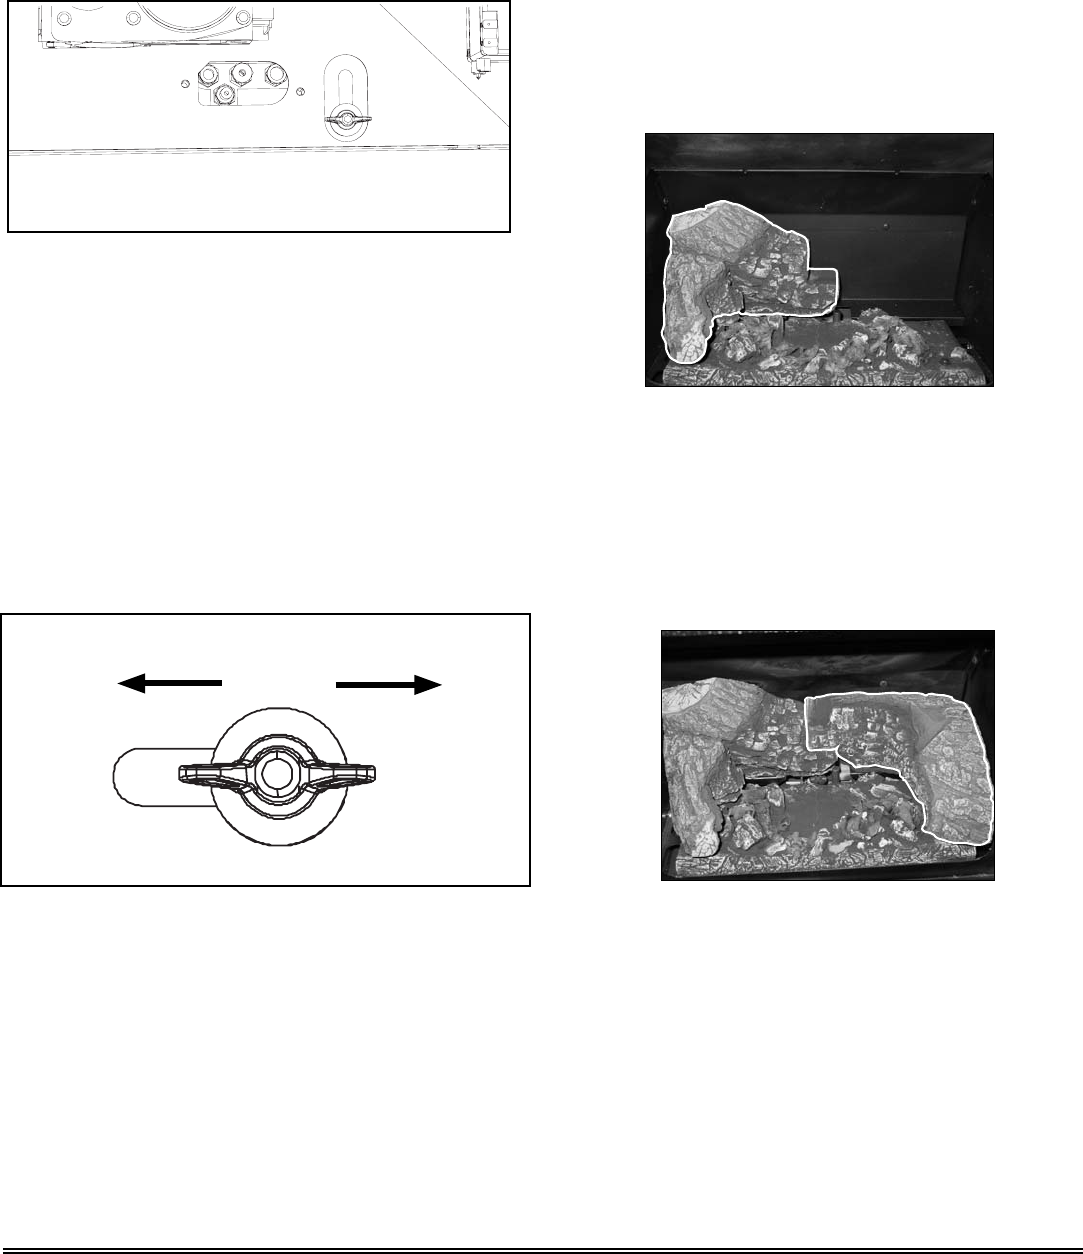
Figure 8.9 Place the right log on the log shelf along the back
of the fi rebox with the front of the log resting on the burner.
OPEN
CLOSE