


Heat & Glo • CF230E-B & CF260E-B • 4038-894 Rev C • 11/05
17
9
Maintenance and Service
Shock Risk
Burn Risk
Cleaning, performing maintenance or moving
this electric heater without disconnecting
power and allowing the heater to cool could
create a shock or burn hazard.
• Turn controls to “OFF”.
• Remove plug from outlet or turn off the
circuit breaker to the heater.
WARNING
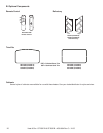
A. Access the Firebox
• Turn the heater off and turn off the circuit breaker.
• Allow the heater to cool before cleaning.
• Remove the front face to access the log area.
- Remove the screws from the switch bracket.
- Remove by pulling out the bottom of the front and then
lifting up
• Replace all parts after cleaning or bulb replacement has
been completed.
• Reset the circuit breaker.
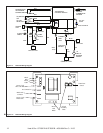
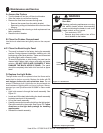
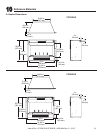
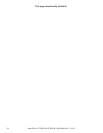
Bulbs
Hearth
Assembly
Figure 9.1 - Bulb Access
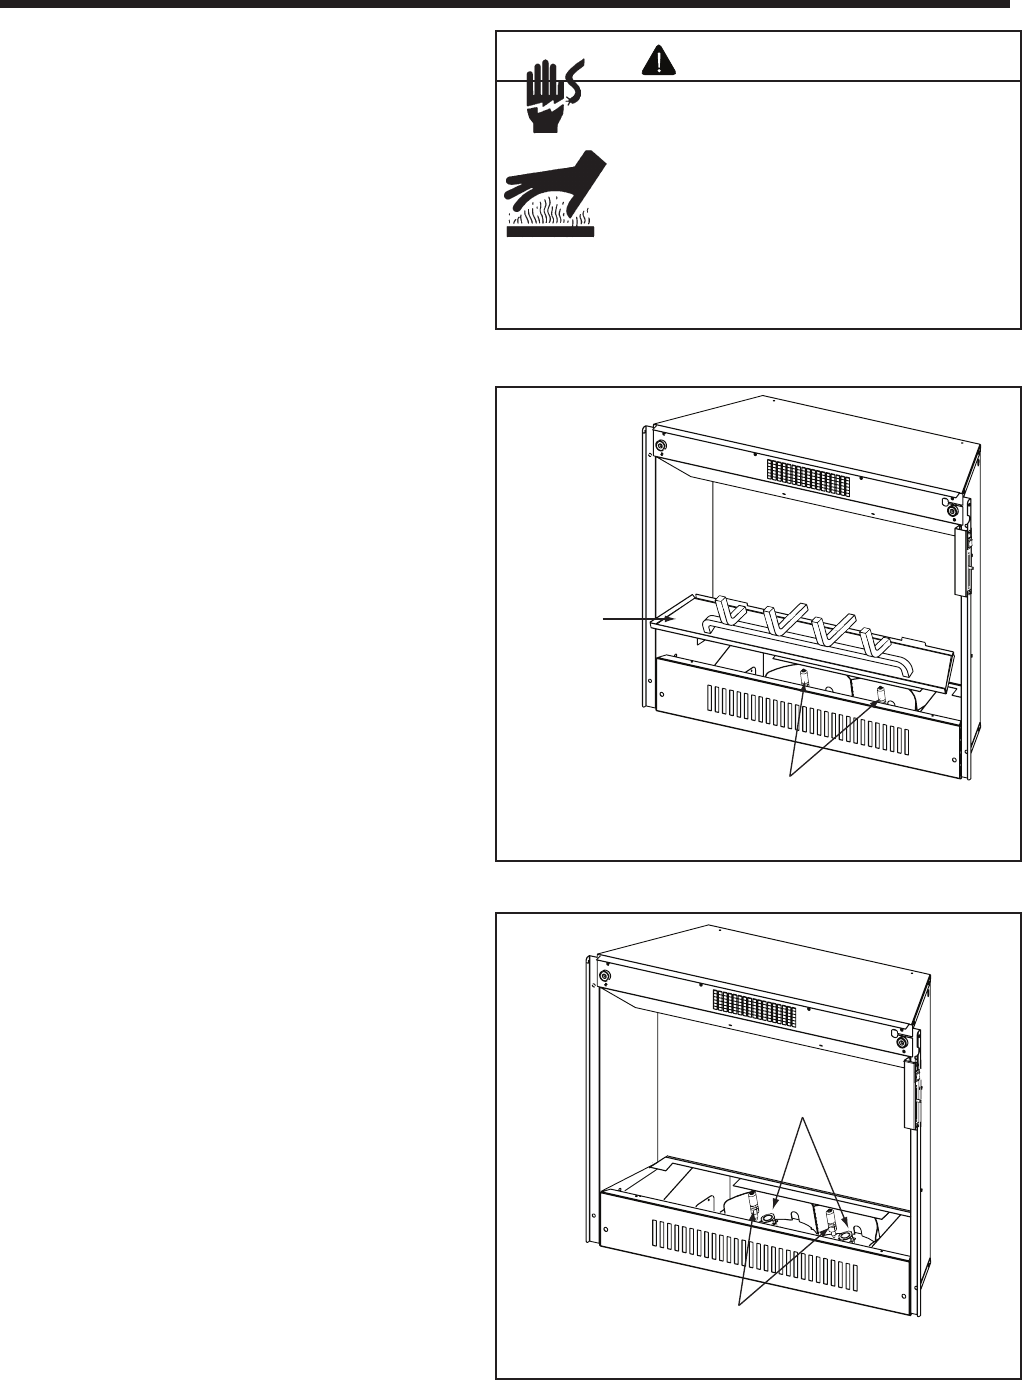
Bulbs
Sockets
Figure 9.2 - Replacing the Bulbs
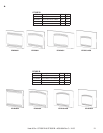
B. Clean the Firebox Compartment
Use the brush attachment and gently vacuum the compart-
ment.
C. Clean the Back Acrylic Panel
• The panel is cleaned in the factory during the assembly
process. During shipment, installation, handling, etc., the
surface may collect dust particles. These can be removed
by buffi ng lightly with a clean dry cloth.
• To remove fi ngerprints or other marks, the panel can be
cleaned with a damp cloth using a mild soap and water
solution. DO NOT USE GLASS CLEANER! IT WILL
DAMAGE THE BACK ACRYLIC PANEL. The panel
should be completely dried with a lint free cloth or paper
towel.
D. Replace the Light Bulbs
The light bulbs need to be replaced when the fl ame and/or
ember bed is dark on one side. Replace the bulbs with 75
watt halogen bulbs with mini-candelabra base. Do not
exceed 75 watts per bulb. Light bulbs can be purchased at a
local hardware or lighting store, on-line or by phone. We rec-
ommend you use Sylvania model SL58884 or Satco model
S3157.
• Light bulb access is through the hearth assembly. See
Figure 9.1.
• Locate and lift the bent tabs holding the hearth assembly
located at each end of the assembly.
• Lift out the hearth assembly.
• Carefully remove the burned out bulb from the light socket.
Place the new bulb in the socket. See Figure 9.2. Follow
directions on the light bulb package for handling
requirements.
• Reinstall the hearth assembly.