


Heat & Glo • 6000GL-IPI-R, 6000GL-IPI-S • 2102-900 Rev. R • 6/09 55
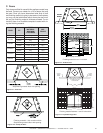
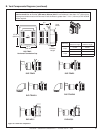
Figure 14.11 Top View
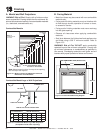
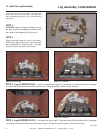
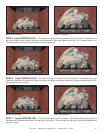
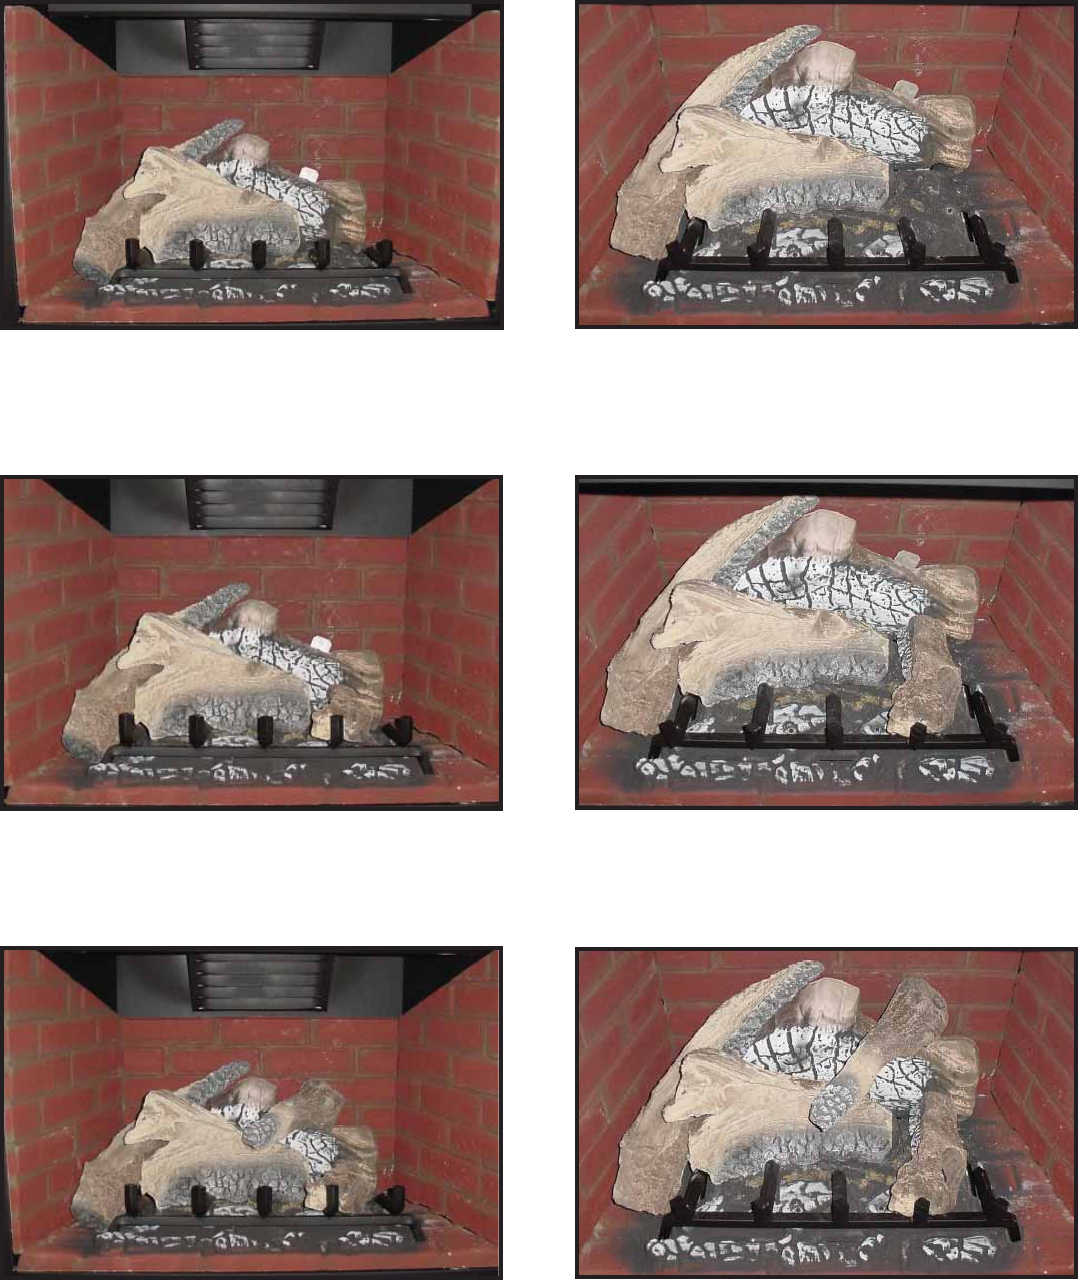
STEP 5. Log #3 (SRV2102-105): Place log #3 on top of the burner surface in front of the hump. The bottom of the
log is contoured to match some of the burner surface features. Slide it back against the hump. The “V” shaped notch in the
front bottom of the log rests into the second from the left grate tine.
STEP 6. Log #4 (SRV2102-104): Place log #4 on top of the burner. There is a groove in the bottom of this log.
Place this groove over the second tine from the right on the grate and slide the log forward. A group of ports should be vis-
ible through the hole in the log.
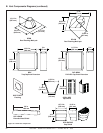
STEP 7. Log #5 (SRV2102-103): Place log #5 on top of log #1 and log #3. The bottom of this log has a slot in it
that goes over the metal tab molded in the top right side of log #1. The thin end of the log rests in the fl at spot molded into
the top of log #3.
Figure 14.13 Top View
Figure 14.15 Top View
Figure 14.12 Front View
Figure 14.10 Front View
Figure 14.14 Front View
3
3
3
3
4
4
4
4
5
5
5
5