


August 1, 2008
Page 33
Heat & Glo · Tiara I B & Tiara II B · 7010-149M
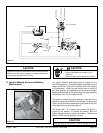
H. Positioning the Logs - Tiara I-B
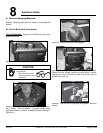
TABS
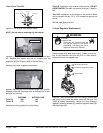
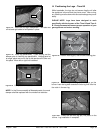
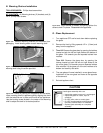
COMPLETED BRICK INSTALLATION
Figure 8.19 Complete brick installation.
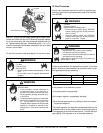
While breakable, the logs do not become fragile until after
the appliance is burned and they have cured. After curing,
any handling must be done with care as breakage may occur
easily.
PLEASE NOTE: Logs have been designed to work
specifically with the burners of the Tiara I-B and Tiara II-
B. Exact placement will ensure proper operation of your
gas appliance and reduce sooting.
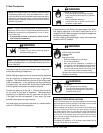
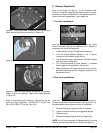
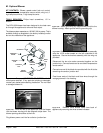
#1
NOTCH
LOCATING PINS
Figure 8.20 Position rear log (#1) over the two locating pins.
#2
Figure 8.21 Put the right front log (#2) into place on the
burner. Lean the log back towards the rear log until it fi ts into
the notch in the rear log.
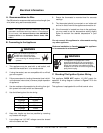
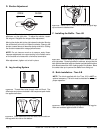
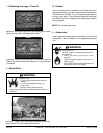
TABS
Figure 8.17 Install left and right side panels. Fold tabs over
on left and right sides to hold panels in place.
TOP PANEL/BAFFLE
Figure 8.18 Install top panel/baffl e. If rear venting, set the
damper prior to installing top panel/baffl e. Holding panel at
an angle, place one end on top of side panel and lift other end
into place.
Move left or right until centered.
NOTE: In the Commonwealth of Massachusetts, the word
damper shall be replaced with the words flue restrictor.
#1
#2
#3
Figure 8.22 Place the left front log (#3) into place on the
burner. Log installation in complete.