


16 34962 Rev G 08/04
BC36C/BC36R INSTALLATION INSTRUCTIONS
Figure 11
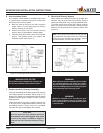
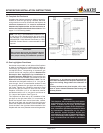
Installing the Firestop Spacer
CAUTION:
Firestop spacers must be used whenever the
chimney penetrates a ceiling/floor area.
Figure 10
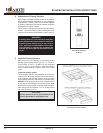
Assembling Chimney
Sections
WARNING!
Carefully follow the instructions for assembly
of the pipe and other parts needed to install this
fireplace system. Failure to do so may result in
a fire, especially if combustibles are too close
to the fireplace or chimney and air spaces are
blocked, preventing the free movement of cool-
ing air.
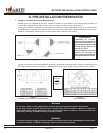
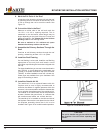
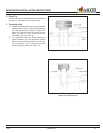
4. Assemble the Chimney Sections
Attach either a straight chimney section or an offset to
the top of the fireplace (depending on your installation
requirement). Chimney sections are locked together
by pushing downward until the top section meets the
stop bead on the lower section.
The inner flue is placed to the inside of the flue section
below it. The outer casing is placed outside the outer
casing of the chimney section below it. See Figure 10.
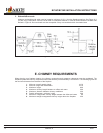
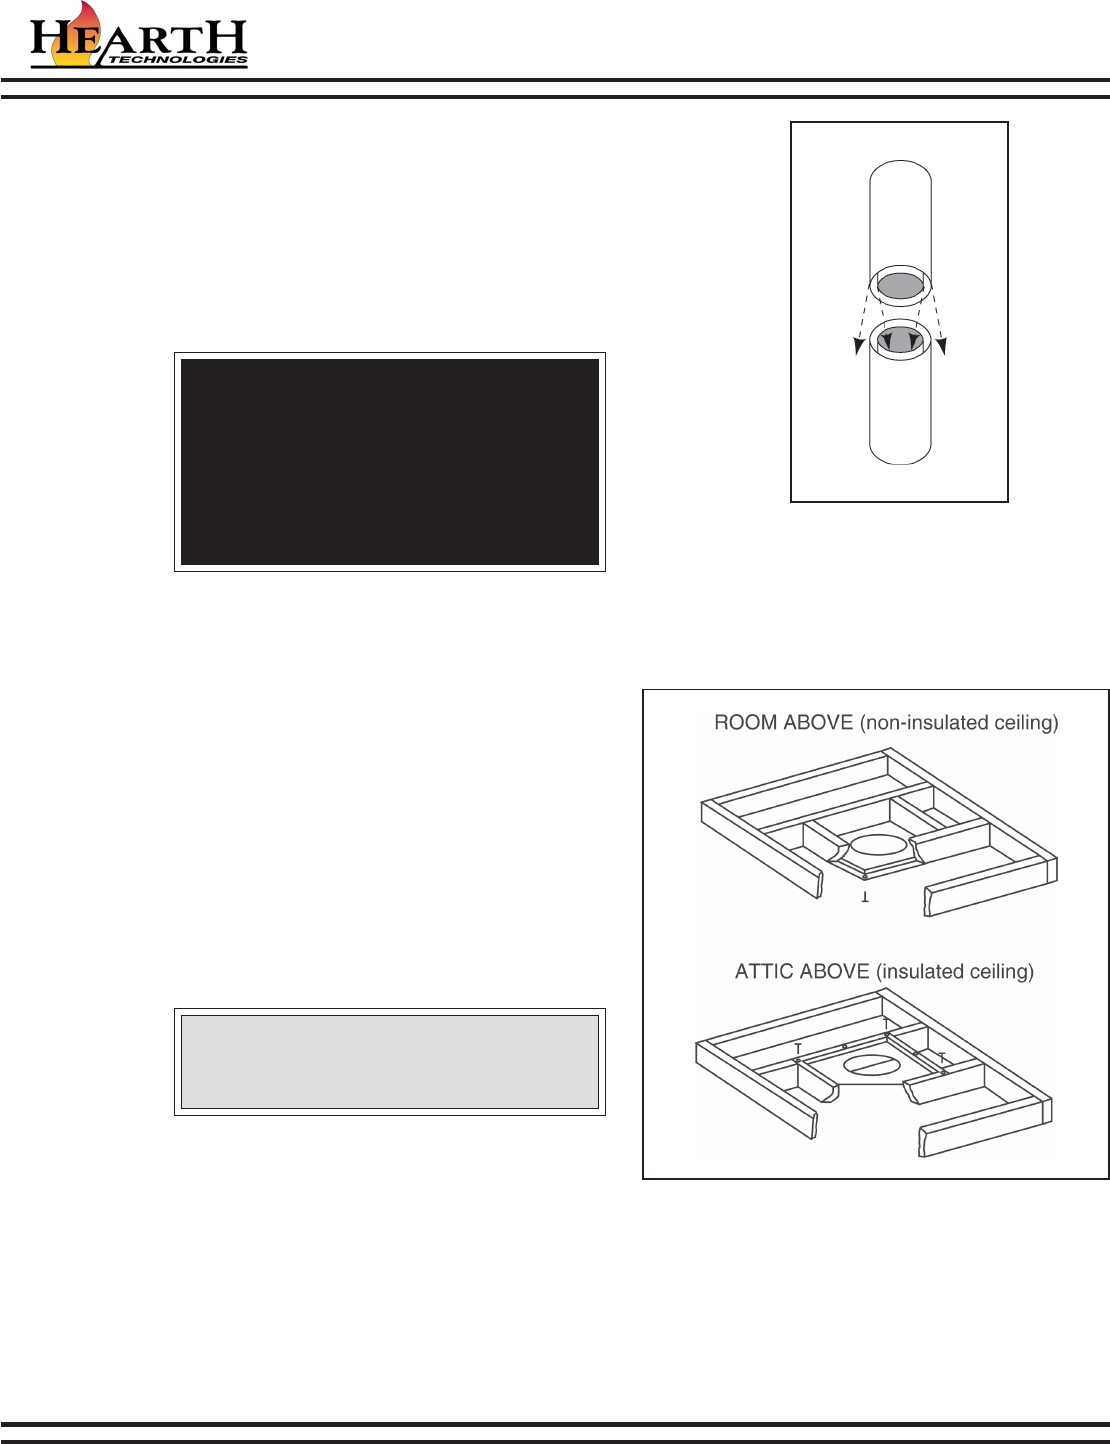
5. Install the Firestop Spacers
Mark and cut out an opening in the ceiling for the
firestop spacer being utilized (14-1/2 in. x 14-1/2 in.
for an FS338, 14-1/2 in. x 18-3/8 in. for an FS339 and
14-1/2 in. x 23 in. for an FS340). Frame the opening
with the same dimension lumber used in the ceiling
joists.
Install the firestop spacer.
These firestop spacers are designed to provide the
minimum 2 in. air space required around the chimney.
In all situations, the firestop spacers are to be nailed
to the ceiling joists from the bottom or fireplace side,
EXCEPT when the space above is an insulated ceiling
or attic space. In this situation, the firestop spacer must
be nailed from the top side to prevent loose insulation
from falling into the required 2 in. air space around
the chimney. See Figure 11.