


3
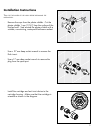
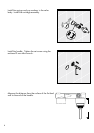
Installation Instructions
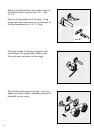
Turn off The waTer aT The supply before beginning The
insTallaTion.
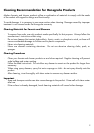
· Remove the caps from the plaster shields. Cut the
plaster shields 1 mm (1/16”) from the surface of the
finished wall. Seal around the plaster shields with a
suitable, non-staining, waterproof bathroom sealant.
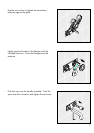
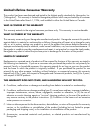
· Use a 27 mm deep socket wrench to remove the
flush insert.
· Use a 17 mm deep socket wrench to remove the
plug from the spout port.
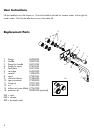
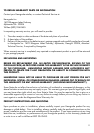
· Install the cartridge and anti twist device to the
cartridge housing. Make sure that the cartridge is
oriented as shown in the diagram.