


27
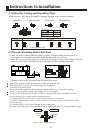
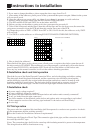
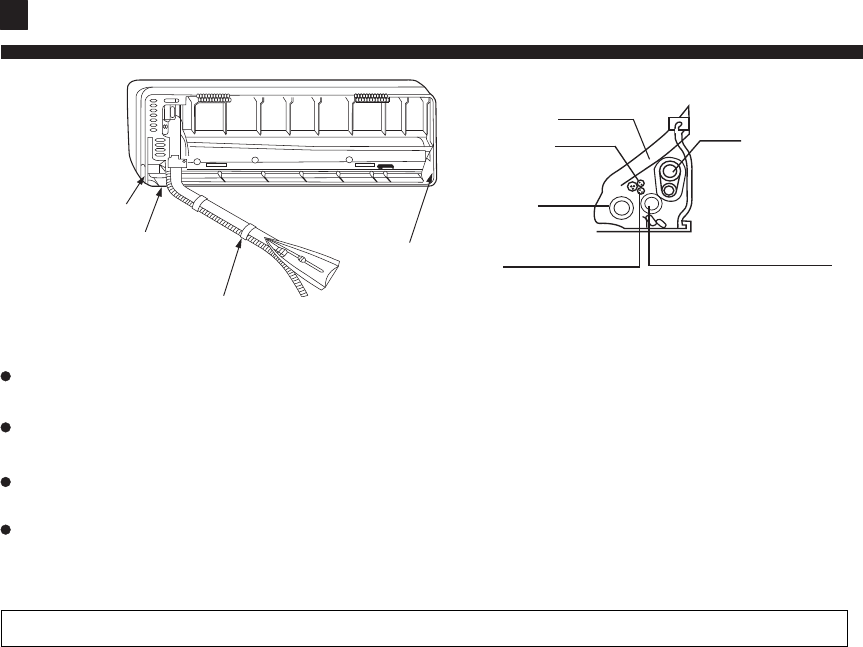
Heat insulation
material
Drain hose
Piping
Indoor/outdoor
electric cable
signal wire
Change-for-fresh-air tube
Indoor/outdoor electric cord and drain hose must
be bound with refrigerant piping by protecting tape
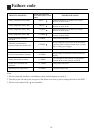
8. Indoor unit communication addresses setting
1.There are two methods to set the communication address
A. Use the remote controller(default status in first installation).
B. Use dip switches on the indoor unit PCB.
2. Address setting procedure when using the remote controller.
A. Set the addresses only after the successful installation of the refrigerant pipes and connecting cables,
and open all the stop valves;
B. Please confirm that the indoor units and the outdoor unit in the same system use the same power source;
C. Power on the units, but put all the indoor units in the status of STANDBY;
D. Please note that the address must be set as following:
Indoor unit that connect to valve A, the address must be 1;
Indoor unit that connect to valve B, the address must be 2;
Indoor unit that connect to valve C, the address must be 3;
E. Example: set unit A to address 1.
Continuously press the emergency switch for about 15 seconds, the buzzer will sound 4 times(PI PI PI PI)
and then leave go of the switch. At this time, the indoor unit has entered the address setting procedure. But
the LED board is blank.
F. Use the controller to turn on the indoor unit. At this time, the controller should be changed from OFF to
ON, and then theTIMER LED flshes once. That is to say, the address setting is enabled.
G. Press the button “SLEEP” on the controller, the times you press it stands for the address you want to set,
detailed as following:
Press button “SLEEP” once, the address is “1”, and the TIMER LED flashes once;
Press button “SLEEP” twice, the address is “2”, and theTIMER LED flashes twice;
Press button “SLEEP” three times, the address is “3”, and the TIMER LED flashes three times;
H. Use the remote controller to turn off the unit, At this time, the controller should be changed from ON to
OFF, and the unit will exit the address setting procedure, the address will be memorized. The LED board
will always display the address of this indoor unit until the system be powered off.
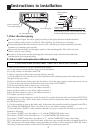
Lid for right piping
Lid for under piping
Lid for left piping
Fix with adhesive tape
7. Other direction piping
Cut away, with a nipper, the lid for piping according to the piping direction and then bend the
pipe according to the position of wall hole. When bending, be careful not to crash pipes.
Connect beforehand the indoor/outdoor electric cable, and then pull out the connected to the heat
insulation of connecting part specially.
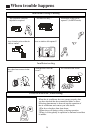
Hang surely the unit body onto the upper notches of the mounting plate. Move the body from
side to verify its secure fixing.
In order to fix the body onto the mounting plate, hold up the body aslant from the underside
and then put it down perpendicularly.
CAUTION! FAIL TO DO THIS, THE UNIT WILL NOT WORK.
Instructions to installation