


22
4. INSTALLATION OF INDOOR UNIT
In the case of new ceiling
< After installation on the ceiling >
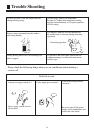
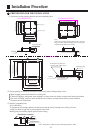
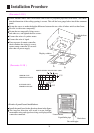
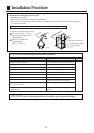
(3) Adjust unit to its right position. (Refer to preparation for the installation-(1))
(4) Check unit's horizontal level.
Watert pump and flating switch is installed inside indoor unit, check four corners of the unit for its level
using horizontal compartor or PVC tube with water. (If unit is tilting against the direction of water drainage,
problem may occur on floating switch, causing water leakage.)
(5) Remove the washer mounlting , and tighten the nut above.
(6) Remove the paper pattern.
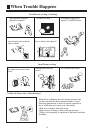
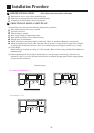
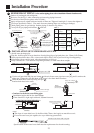
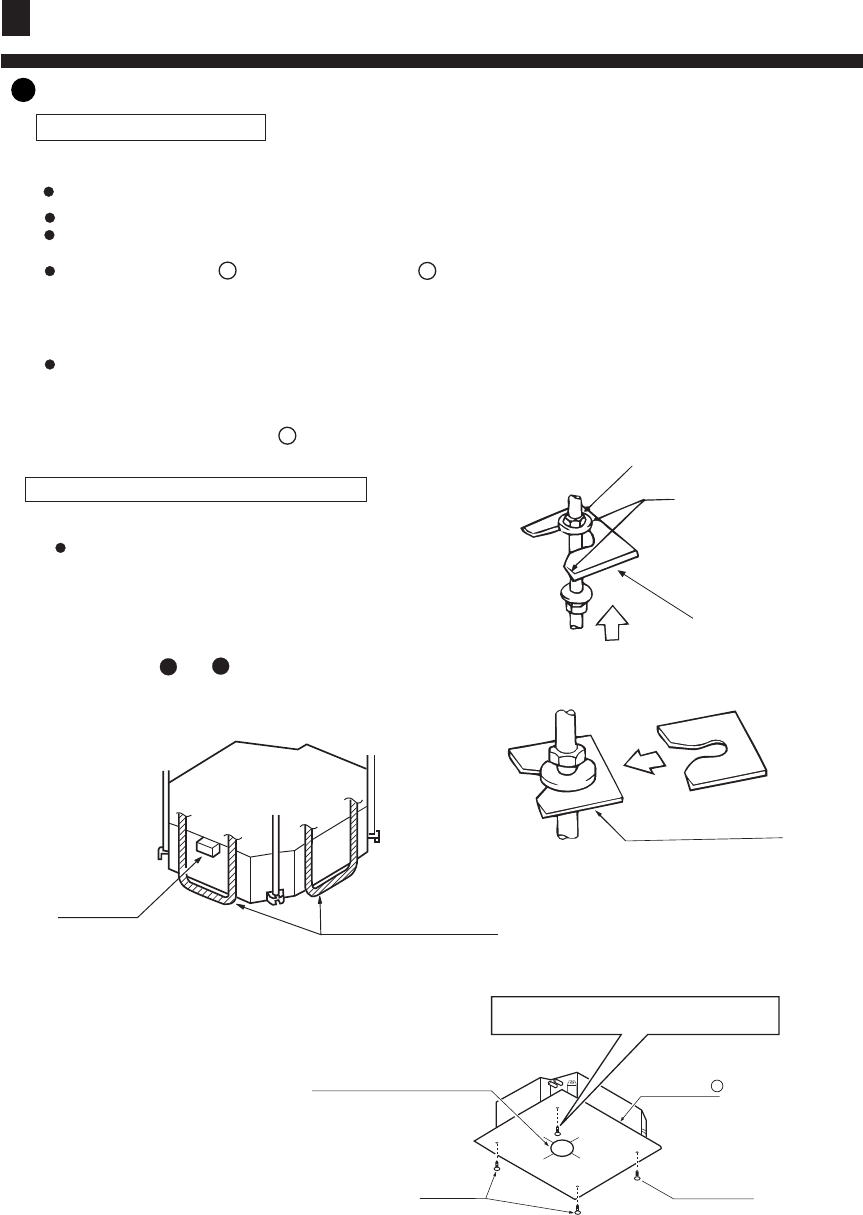
(2) As for the dimensions of ceiling hole, see paper pattern. Ask your real estate dealer for details.
Center of the hole is marked on the paper pattern.
Center of the unit is marked on the card in the unit and on the paper pattern.
Mount paper pattern onto unit using 3 screws . Fix the corner of the drain pan at piping outlet.
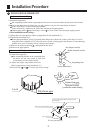
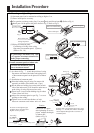
(1) Install unit temporally
Put suspending bracket on the suspending bolt. Be sure to use nut and washer at both ends of the bracket.
In the case of ceiling already exists
Screws at the piping outlet is fixed at the corner
of drain pan.
Center of ceiling hole Paper pattern
5
Paper pattern
Screw (accessory)
Screw (accessory)
[Fix the paper pattern]
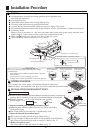
(1) Install unit temporally
Put suspending bracket on the suspending bolt.
Be sure to use nut and washer at both ends
of the bracket. Fix the bracket firmly.
(2) Adjust the height and position of the unit.
(Refer to preparation for the installation (1) ).
(3) Proceed with and of "In the case of new ceiling".
4
Nut (Prepare in feild)
Washer (Prepared in feild)
Suspending bolts
Fasten (double nuts)
Insert
Washer fixing pad
(prepared in feild)
[ secure the washer firmly]
Level
Polythene pipe
3
4
2
5
6
Installation Procedure