


18
1.There are two methods to set the communication address
A. Use the remote controller(default status in first installation).
B. Use dip switches on the indoor unit PCB.
2. Address setting procedure when using the remote controller.
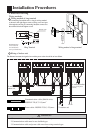
A. Set the addresses only after the successful installation of the refrigerant pipes and connecting cables,
and open all the stop valves;
B. Please confirm that the indoor units and the outdoor unit in the same system use the same power source;
C. Power on the units, but put all the indoor units in the status of STANDBY;
D. Please note that the address must be set as following:
Indoor unit that connect to valve A, the address must be 1;
Indoor unit that connect to valve B, the address must be 2;
Indoor unit that connect to valve C, the address must be 3;
Indoor unit that connect to valve D, the address must be 4;
the LED board is blank.
9. Indoor unit communication addresses setting
CAUTION! FAIL TO DO THIS, THE UNIT WILL NOT WORK.
E. Example: set unit A to address 1.
Continuously press the emergency switch for about 15 seconds, the buzzer will sound 4 times(PI PI PI PI) and
then leave go of the switch. At this time, the indoor unit has entered the address setting procedure. But F. Use the
controller to turn on the indoor unit. At this time, the controller should be changed from OFF to ON, and then
theTIMER LED flshes once. That is to say, the address setting is enabled.
G. Press the button"SLEEP " on the controller, the times you press it stands for the address you want to set, detailed
as following:
Press button " SLEEP " once, the address is "1 ", and the TIMER LED flashes once;
Press button " SLEEP " twice, the address is " 2 ", and theTIMER LED flashes twice;
Press button " SLEEP " three times, the address is " 3 ", and the TIMER LED flashes three times;
Press button " SLEEP " four times, the address is " 4 ", and the TIMER LED flashes four times;
H. Use the remote controller to turn off the unit, At this time, the controller should be changed from ON to OFF,
and the unit will exit the address setting procedure, the address will be memorized. The LED board will always
display the address of this indoor unit until the system be powered off.
I. If you want to change the address, please repeat the above steps from E to G.
J. After setting all the addresses, please power off the system and then power on again. Otherwise the system will
not start to work.
K. Once the addresses are successfully set, please do not change it any more to avoid confusion.
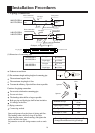
3. Address setting procedure when using the DIP switches SW01 and SW03.
A. The DIP switches SW01 and SW03 are on the indoor unit PCB.
B. Before carrying out the address setting work, the system must be powered off.
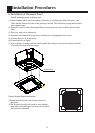
C. Take off the front panal and the filters, then take off the flaps and also the front cover,disconnect the
swing motor connectors from the PCB and then take out the lower part of the PCB.
D. Change the position of DIP 7 of SW01 from OFF to ON, if fail to do this, the addresses set by SW03
will not work.
E. Use SW03 to set the addresses as following (DO NOT CHANGE OTHER DIP SWITCHES):
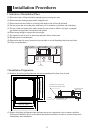
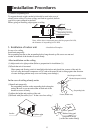
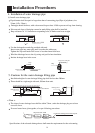
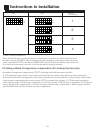
Instructions to installation