


- 6 -
Anode Maintenance
1. Turn "OFF" the electrical supply to the tank.
2. Close the cold water supply valve.
3. Open a nearby hot water faucet served by the system
to depressurize the system.
4. Connect a hose to the drain valve and drain 22 litres (6
gal.) as directed in the “Draining and Flushing” section.
NOTE: The anode(s) has been factory installed using a
power tool. It may be necessary for a second person to sta-
bilize the tank. A few sharp blows on the handle of the sock-
et wrench should loosen the anode nut. If an impact wrench
(power drive) is available, this is an easy way to remove an
anode.
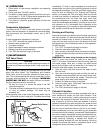
6. Using a 1 1/16" socket, remove anode(s) and inspect it.
The surface may be rough, full of pits and crevices, but
this is normal. If it is less than approximately 10mm (3/8
in.) in diameter, or the inner steel core is exposed, the
anode(s) should be replaced.
7. Apply Teflon
®
tape or sealing compounds approved for
use with potable water, to the threads of the anode(s)
and install into the tank top.
8. Open the cold water supply valve and open a nearby
hot water faucet to purge air from the tank as directed
in the “Filling” section.
9. Check for leaks, repair as required, and re-test.
10. Turn "ON" the electrical supply to the tank.