8 308017
Installation
Grounding
WARNING
FIRE AND EXPLOSION HAZARD
Before operating the pump, ground the
system as explained below. Also read
the section FIRE AND EXPLOSION
HAZARD on page 5.
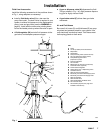
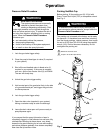
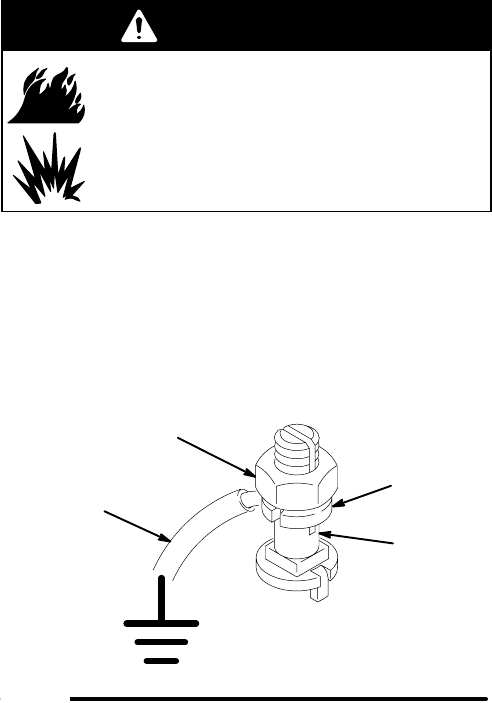
1. Pump: use a ground wire and clamp. See Fig. 2.
Loosen the grounding lug locknut (W) and washer
(X). Insert one end of a 1.5 mm@ (12 ga) minimum
ground wire (Y) into the slot in lug (Z) and tighten
the locknut securely. Connect the other end of the
wire to a true earth ground. Order Part No. 237569
Ground Wire and Clamp.
Fig. 2
W
X
Y
Z
0864
2. Air and fluid hoses: use only electrically conductive
hoses.
3. Air compressor: follow manufacturer’s recommen-
dations.
4. Spray gun/dispense valve: ground through connec-
tion to a properly grounded fluid hose and pump.
5. Fluid supply container: follow your local code.
6. Object being sprayed: follow your local code.
7. All solvent pails used when flushing: follow your
local code. Use only metal pails, which are con-
ductive, placed on a grounded surface. Do not
place the pail on a nonconductive surface, such as
paper or cardboard, which interrupts the grounding
continuity.
8. To maintain grounding continuity when flushing or
relieving pressure, always hold a metal part of the
gun/valve firmly to the side of a grounded metal
pail, then trigger the gun/valve.
Mounting Accessories
Mount the pump (A) to suit the type of installation
planned. Pump dimensions and the mounting hole
layout are shown on pages 46 and 47.
If you are mounting the pump on a ram (B), refer to the
manual supplied with the ram for installation and
operation instructions. The ram shown in Fig. 1 is a 19
liter (5 gal.) pail ram, used with a wiper plate (C). The
ram shown includes an air regulator (T). It also re-
quires an air supply hose (S) and an air manifold (D),
which divides the main air supply into separate lines
for the pump and the ram.
By using Pump Mounting Kit 222776, you can also
mount the pump on Floor Stand 222780, 200 liter (55
gal.) Ram 207279, or Inductor 222635.


