Repair
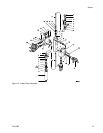
8. Install the o-rings (7) on the lower packing nut
(6). Screw the packing nut into the lower throat
cartridge (4). Torque to 20–30 ft-lb (28–40 N•m).
9. Slide the lower packing cartridge (4) onto the
piston rod (2) and screw the cartridge into the
cylinder (1). Torque to 35–45 ft-lb (48–61 N•m).
10. Screw the rod guard (8) securely onto the lower
packing nut (6). Make sure the plug (9) is in place
at the bottom of the rod guard.
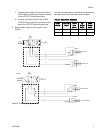
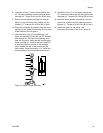
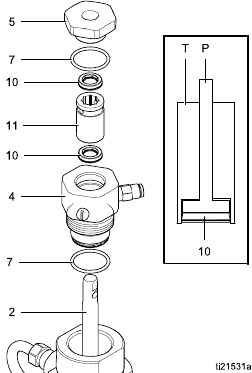
11. Lubricate the o-rings (7) and packing(s) (10).
Place one packing (10) into the tool (T) included
with the seal kit. The lips of the packing must
face out of the tool. Insert the tool into the upper
throat cartridge (4). Push on the tool’s shaft (P)
to seat the packing securely in the cartridge.
When seated, the lips of the packing will be
facing down. Install the bearing (11). Install the
second packing (10) with the lips facing down.
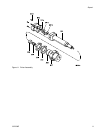
Figur
e 15 Upper Throat Assembly
12. Install the o-ring (7) on the upper packing nut
(5). Screw the packing nut into the upper throat
cartridge (4). Torque to 20–30 ft-lb (28–40 N•m).
13. Slide the upper packing cartridge (4) onto the
piston rod (2) and screw the cartridge into the
cylinder (1). Torque to 35–45 ft-lb (48–61 N•m).
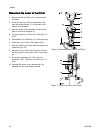
14. Install the lower on the driver; see
Reconnect the Lower to the Driver, page 16.
332339B 15


