


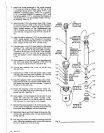
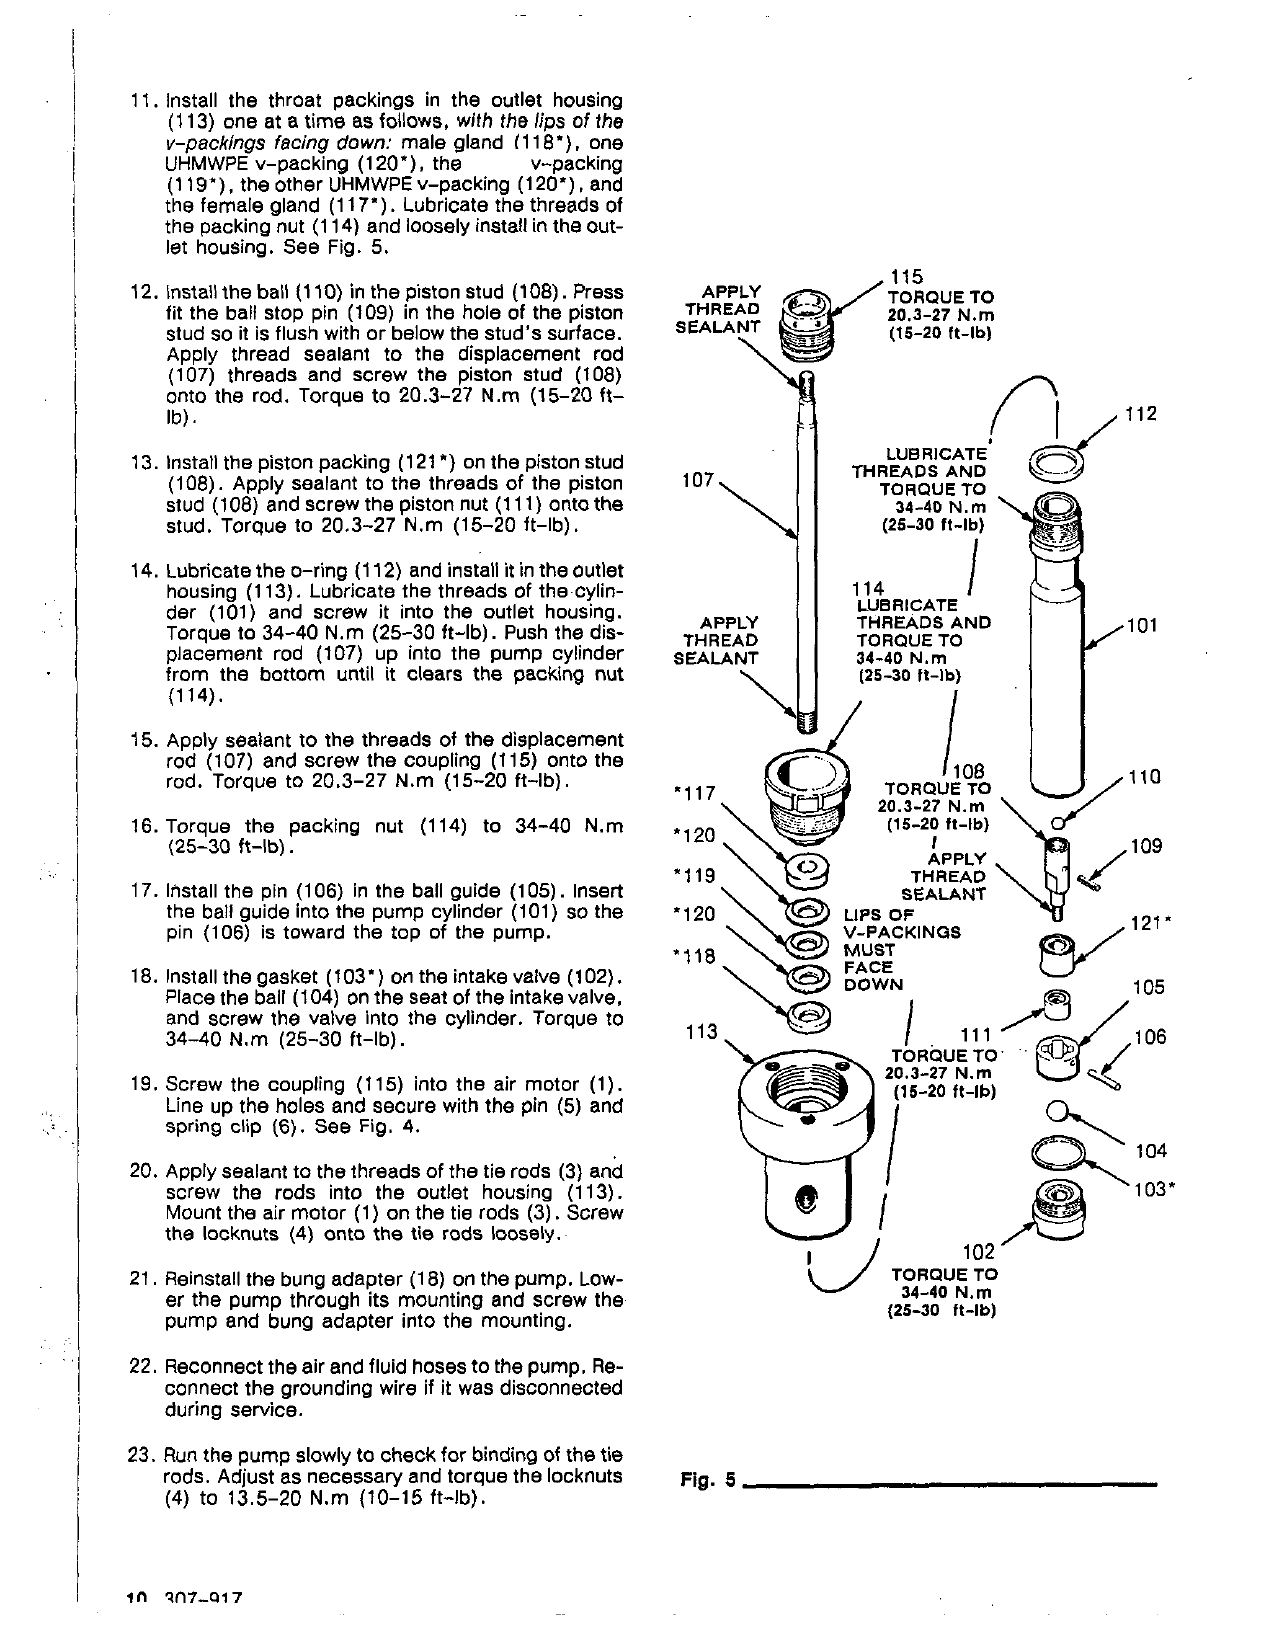
11. Install the throat packings in the outlet hOUSing
v-packings facing
down:
male gland (1
l8'),
one
(1 13) one at a
time
as follows,
with the
lips
of
the
UHMWPE v-packing (120'), the v-packing
the female gland (1 17'). Lubricate the threads of
(1 19"). the other UHMWPE v-packing (120'), and
the packing nut (1 14) and
loosely
install
in
the out-
let housing.
See
Fig. 5.
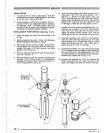
12. Install the ball (1 10) in the piston stud (108). Press
fit the ball stop pin (109) in the hole of the piston
stud
so
it is flush with or below the stud's surface.
Apply thread sealant to the displacement rod
(107) threads and screw the piston stud (108)
onto the rod. Torque to 20.3-27
N.m
(15-20 ft-
Ib).
13. Install the piston packing (1 21 *) on the piston stud
(108). Apply sealant to the threads
of
the piston
stud (108) and screw the piston nut (111) ontothe
stud. Torque to 20.3-27
N.m
(15-20 ft-lb).
14. Lubricate the O-ring (1 12) and install it in the outlet
der (101) and screw it into the outlet housing.
housing (1 13). Lubricate the threads
of
the.cylin-
Torque to 34-40
N.m
(25-30 ft-lb). Push the dis-
placement rod (107) up into the pump cylinder
from the bottom until
it
clears the packing nut
(114).
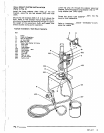
15. Apply sealant to the threads of the displacement
rod (107) and screw the coupling (115) onto the
rod. Torque to 20.3-27
N.m
(15-20 ft-lb).
16. Torque the packing nut (114) to 34-40
N.m
(25-30
ft-lb).
17. Install the pin (106) in the ball guide (105). Insert
the ball guide into the pump cylinder (101)
so
the
pin (106) is toward the top of the pump.
18. Install thegasket (103') on the intake valve
(102).
Place the ball (104) on the seat
of
the intakevalve,
and screw the valve into the cylinder. Torque to
34-40
N.m
(25-30 ft-lb).
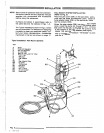
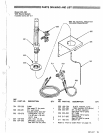
19.
Screw the coupling (115) into the air motor (1).
Line up the holes and secure with the pin
(5)
and
spring clip (6).
See
Fig. 4.
20. Apply sealant to the threads of the tie rods (3) and
screw the rods into the outlet housing (1 13).
the locknuts
(4)
onto the tie rods loosely.
Mount the air motor (1) on the tie rods (3). Screw
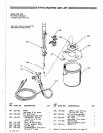
21. Reinstall the bung adapter (1
8)
on the pump. Low-
er the pump through its mounting and screw the
pump and bung adapter into the mounting.
22.
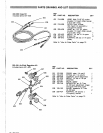
Reconnect the air and fluid hoses to the pump.
Re-
connect the QrOtJnding wire if it was disconnected
during service.
23. Run the pump slowly to check for binding of the
tie
rods. Adjust as necessary and torque the locknuts
(4)
to 13.5-20
N.m
(10-15 ft-lb).
APPLY
THREAD
SEALANT
115
TORQUE
TO
20.3-27
N.m
(15-20
It-lb)
,101
,110
i/
TORQUE
TO
34-40
N.m
(25-30
ft-lb)
Fig.
5
PTFE