


12
For Help,call 1-800-35-GENIE or visit www.geniecompany.com
NOTE
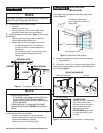
During the next adjustment,if the door stops during
opening or reverses during closing before reaching the
limits,the door force must be adjusted.Change the door
force setting as described in the next section then return
here to finish setting these limits.
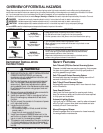
WARNING:TO REDUCE THE
RISK OF SEVERE INJURY OR DEATH
1 READ AND FOLLOW ALL INSTRUCTIONS.
2 Never let children operate or play with the Door Controls.
Keep the Remote Control away from children.
3 Always keep the moving door in sight and away from
people and objects until the door is completely closed.
NO ONE SHOULD CROSS THE PATH OF A MOVING DOOR.
4 NEVER GO UNDER A STOPPED,PARTIALLY OPEN DOOR.
5 Test Opener monthly. The door MUST reverse on contact
with a 1-1/2" high object (or a 2" x 4" board laid flat) at the
center of the doorway on the floor. After adjusting either
the Force or the Limit of travel,retest the Door Opener.
Failure to adjust the Opener properly may cause severe
injury or death.
6 When possible use the Emergency Release only when the
door is closed. Use caution when using this Release with
the door open. Weak or broken springs are capable of
increasing the rate of door closure and increasing the risk
of severe injury or death.
7 KEEP GARAGE DOORS PROPERLY BALANCED. See Owner's
Manual. An improperly balanced door increases the risk of
severe injury or death. Have a Genie Factory Authorized
Dealer make repairs to cables,spring assemblies,and
other hardware.
8 SAVE THESE INSTRUCTIONS.
IMPORTANT SAFETY
INSTRUCTIONS
ADJUSTING AND TESTING THE FORCE
CONTROLS CONTINUED
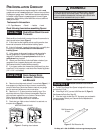
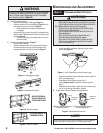
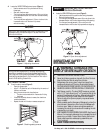
Step 6:
A Locate the OPEN FORCE adjustment screw (Figure 3).
• Use the remote control to cycle the door during these tests.
• Start with the door closed.
• Turn the open force adjustment screw 1/8-turn at a time in the
d
ecrease direction until the door stops midway while opening..
• T
urn the open force adjustment 1/8-turn at a time in the
increase direction until the door fully opens without stopping.
Figure 3 Open force adjustment
F
igur
e 2
C
heck
ing safety reverse
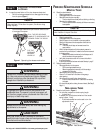
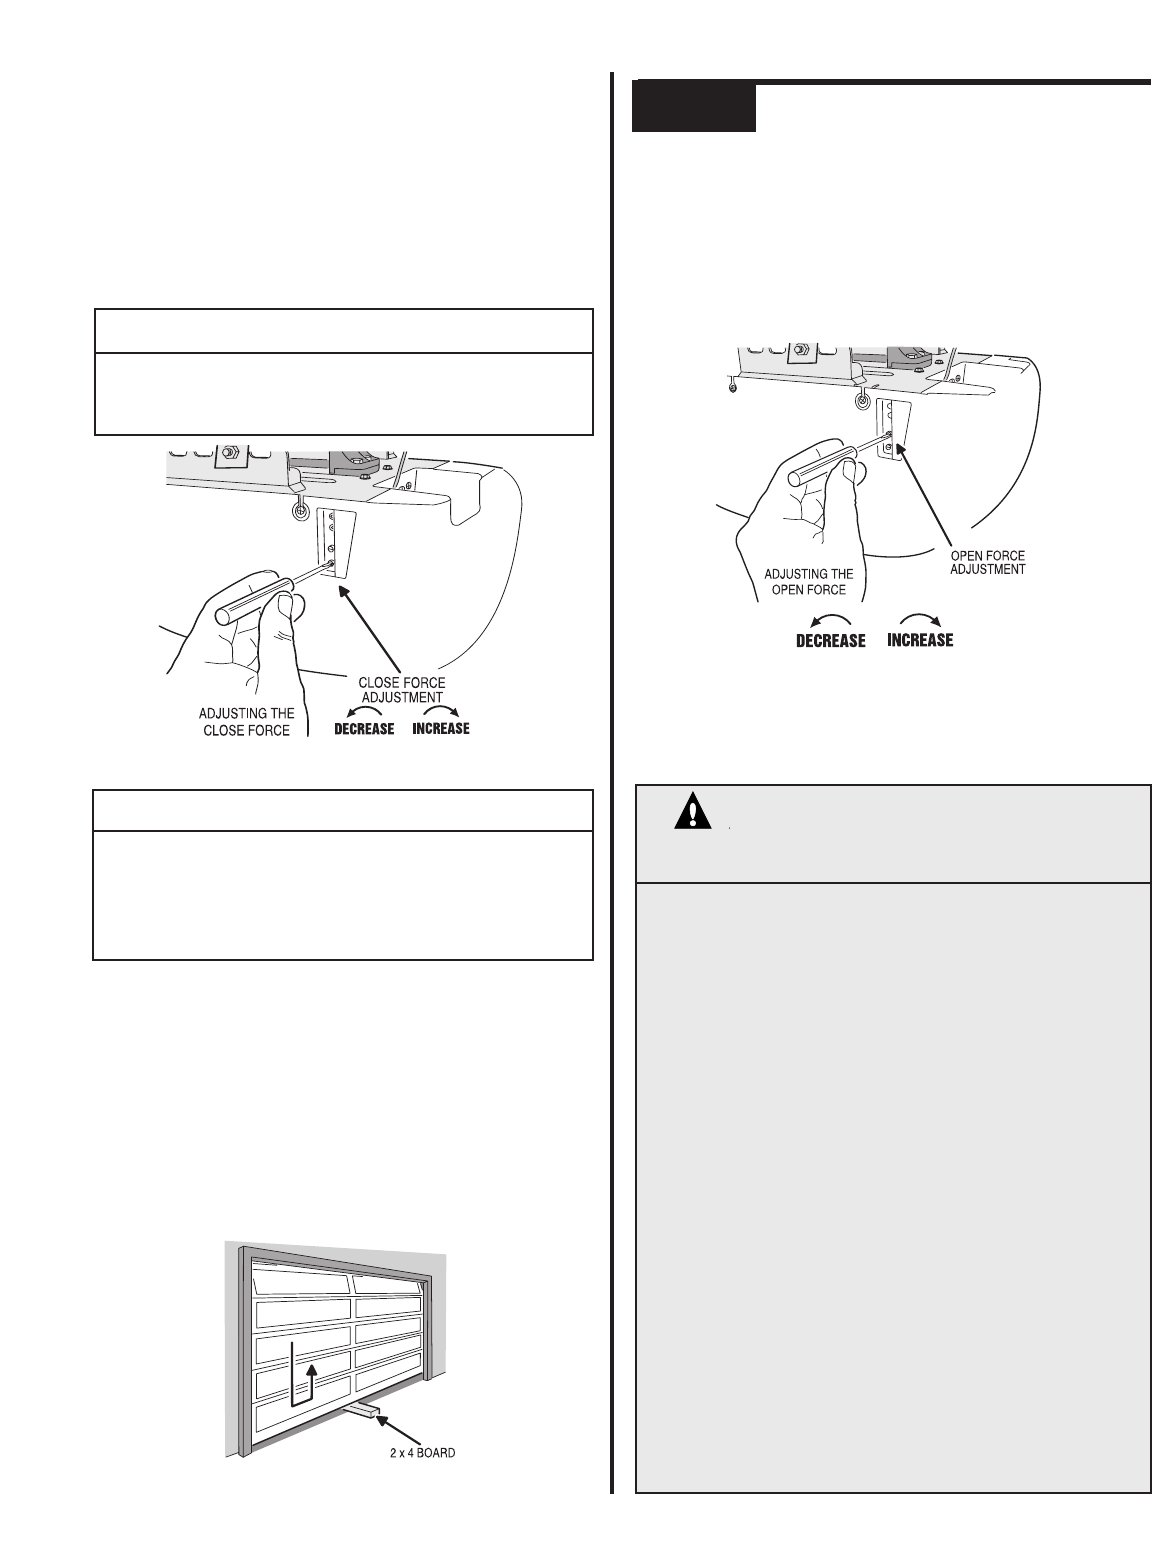
A Locate the CLOSE FORCE adjustment screw (Figure 1).
• Use the remote control to cycle the door during
these tests.
• Start with the door open.
• Turn the close force adjustment screw 1/8-turn at a time
in the decrease direction until the door reverses midway
w
hile closing.
• Turn the close force adjustment 1/8-turn at a time in the
increase direction until the door fully closes
without reversing.
Figure 1 Adjusting close force
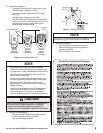
NOTE
Very light, well balanced doors may not be able to be
adjusted using the above steps. If so,set the close
force to minimum.
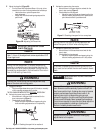
TEST THE SAFETY REVERSE
B
To test the safety reverse (Figure 2).
• Open the garage do
or.
• Lay a 2" x 4" board flat so it will be struck by the center of
the door as it closes.
• Using the remote control, close the door.
– The door must reverse within 2 seconds of hitting
the board.
• I
f the door stops but do
es not r
e
v
erse,the close force
must be decreased.
• Repeat this test until the door reverses as required.