


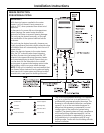
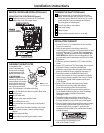


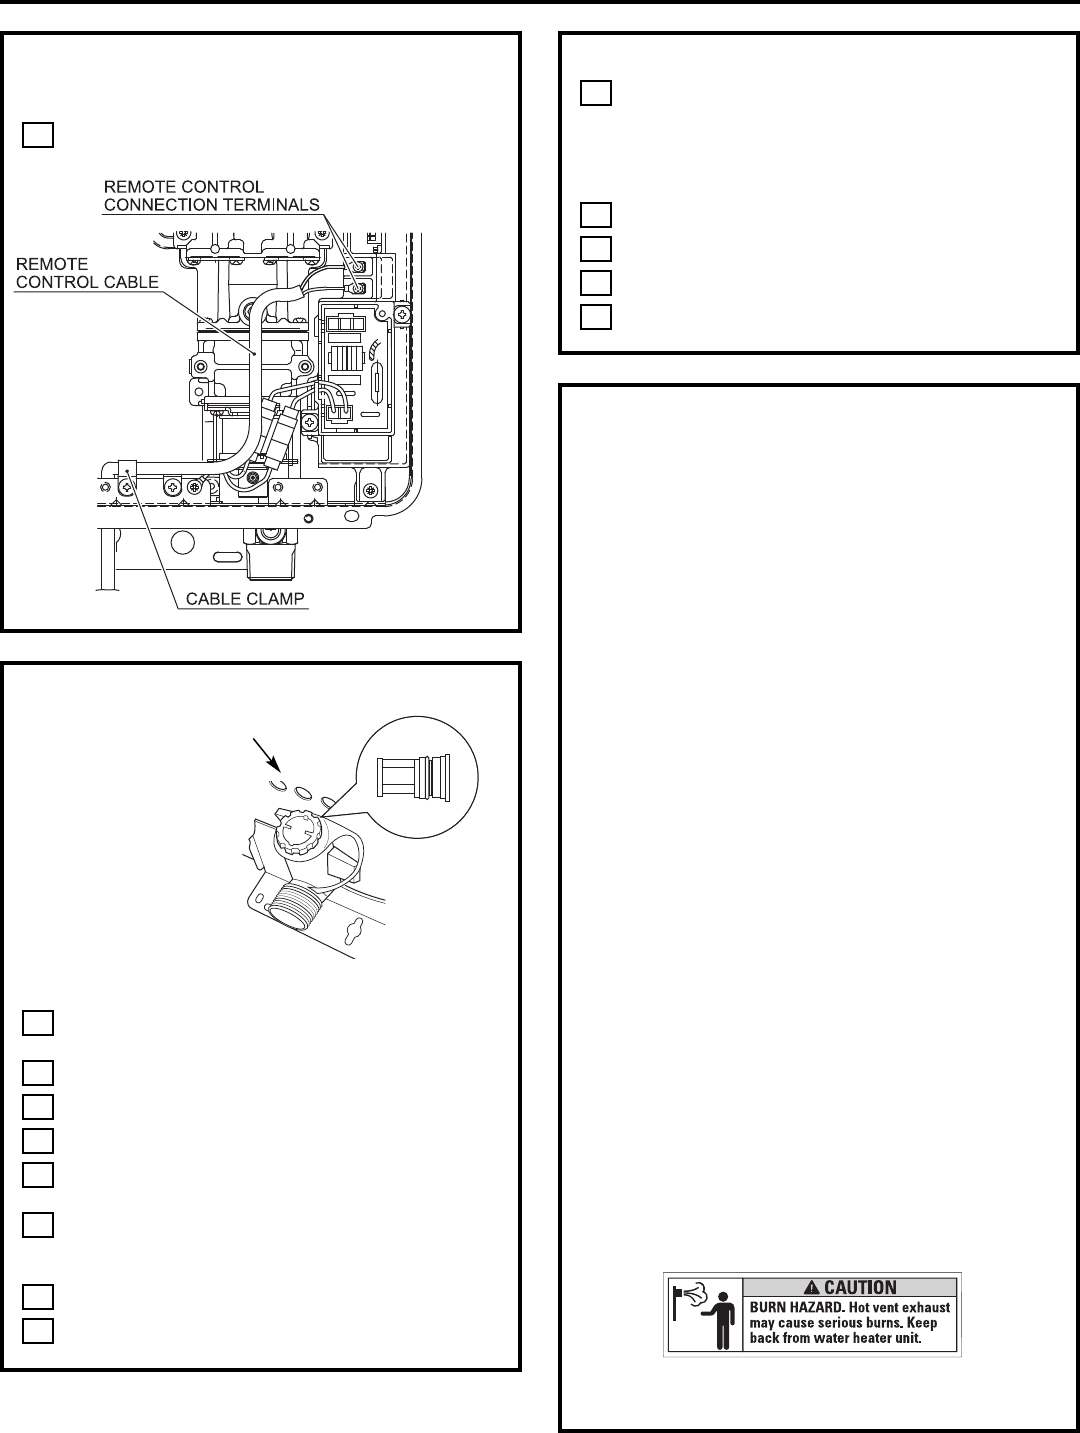
CLEANING THE INLET FILTER
It is imperative that
control compartments,
burners and circulating
air passageways of the
appliance be kept clean.
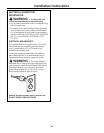
CAUTION: Before
performing this action, first
remove power to the water
heater and be sure not to
stand near the discharge
line of the pressure relief
valve. This will prevent a possible scald injury
.
Turn off and disconnect electrical power. Allow water
heater to cool.
Shut off water inlet.
Open hot water tap at nearest faucet.
Close outlet valve on unit.
Have a small pan or bucket ready to catch spilled
water.
Remove and clean the water inlet filter with a small
brush. If scale is present, clean in a white vinegar
solution.
Replace water inlet filter.
Remove the front panel by removing 4 screws.
8
7
6
5
4
3
2
1
Installation Instructions
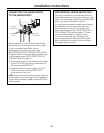
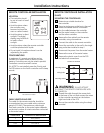
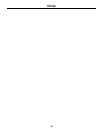
REMOTE CONTROLLER INSTALLATION (cont.)
MOUNTING THE CONTROLLER (cont.)
Replace the plastic cover over the PCB, and then
replace the cover of the water heater.
12
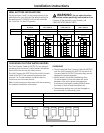
INSTALLATION CHECKLIST
• Ensure 120 Volts A.C. is connected to the unit and that
the circuit is turned on.
• Verify the gas system is functioning correctly by
connecting your manometer to the gas pressure test port
on the unit (see page 13). Operate all gas appliances in
the facility. The inlet gas pressure on the unit MUST NOT
DROP BELOW that listed on the unit rating plate for the
gas type being used. A manometer can be used to check
the pressure.
• Make sure you have cleaned the COLD water inlet filter
screen.
• Inspect HOT (outlet) and COLD (inlet) water lines to ensure
they have not been crossed and are leak-free.
• Ensure the manual gas valve packaged with the water
heater is installed in the gas supply line (see page 12).
• Ensure the controller is installed and functioning.
Instruct the consumer on how to operate the controller.
Instructions are always supplied in the Owner’s Manual
(see page 22). A typical water temperature set point
is 120 degrees.
• Explain to the customer the importance of never
blocking the vent ducting, intake and exhaust.
Never store anything around the vent exhaust.
• Ensure you have used the correct venting products
for the model installed and that you have completely
followed the venting installation instructions
(see pages 19–20).
• Ensure the condensate collector drain on the unit
is installed to allow condensation to drain away from
the water heater to a proper drain source (see page 8).
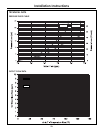
• The vent system should not exceed the maximum length
for the number of elbows used. Refer to the venting
maximum length chart on page 19. Apply the vent
temperature caution label to the vent terminal located
outside the home.
• For instructions on operating the unit,
refer to the Owner’s Manual.
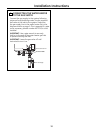
Water inlet
filter
Water inlet
NOTE:Viewshown
isfrom under the unit.
23
CLEANING THE INLET FILTER (cont.)
Use pressurized air to remove dust from the main
burner, heat exchanger and fan blades. Do not use a
wet cloth or spray cleaners on the burner. Do not use
volatile substances such as benzene and thinners.
They may ignite or fade the paint.
Use soft dry cloth to wipe cabinet.
Open water valves.
Check for leaks.
Connect electrical power and turn on the unit.
13
12
11
10
9