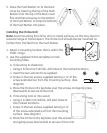
Linking the Push Button to the Chime Unit:
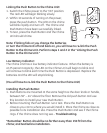
1. Switch the Chime power to the “ON” position.
The red LED will begin blinking slowly.
2. Within 10 seconds of turning on the power,
press the push button. The LED on the chime
will blink rapidly and turn off. The Chime and
Push Button have been successfully linked.
3. To test, press the Push Button and the Chime
Unit should chime.
Note: If linking fails or you change the batteries
or turn the Chime Unit off and back on, you will have to re-link the Push
Button to the Chime Unit. Perform steps 1 and 2 in the “Linking the Push
Button to the Chime Unit.”
Low Battery Indicator:
The Chime Unit has a low battery indicator feature. When the battery is
at 25 percent capacity, the LED on the Chime Unit will begin to blink and
will continue to blink each time the Push Button is depressed. Replace the
batteries and the LED will stop blinking.
(You will have to re-link the Push Button to the Chime Unit)
Installing the Push Button:
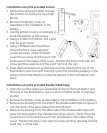
1. Push Buttons are mounted at the same height as the door knob or handle,
between 36” – 44” above the floor. Remove the old push button and use
this location to install your new Push Button.
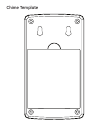
2. Before mounting the Push Button run a test. Place the Push Button as
close as you can to where you would install it. Place the Chime as close as
possible to its installation site. Press the Push Button and see if the Chime
rings. If the Chime does not ring see – Troubleshooting.
*Remember: Button should be no farther away than 150 ft from the
chime; and test before installation.
Press
Press


