


25
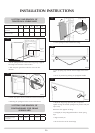
INSTALLATION INSTRUCTIONS
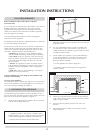
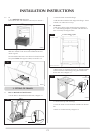
•Positionthebackandsidecastfirebricksonthegrate
behind the raised ribs, See Diagram 30
30
•Slidetheashpan(G)underthegrate
•Hookthefrontbars(H)ontothefireplaceandslidethe
ashpan cover (F) into position below them
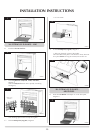
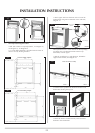
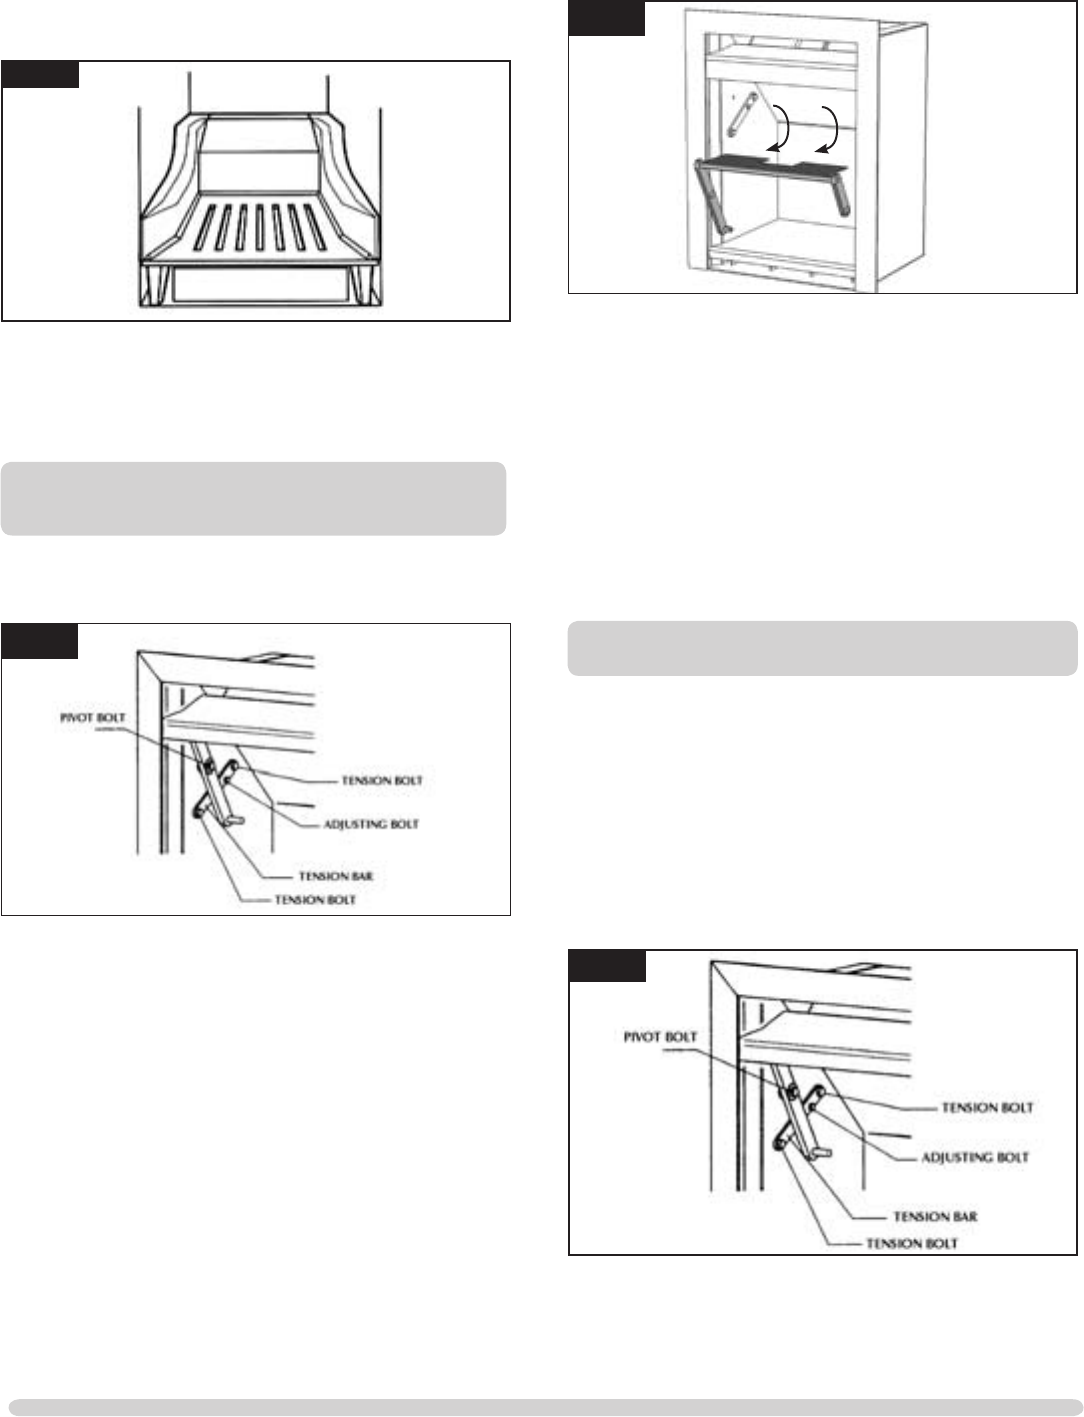
6. FITTING AND REMOVAL OF
FLUE DAMPER
6.1 To maintain efficient combustion, the appliance is fitted
with a Flue Damper System. See Diagram 31
31
6.2 Allow the appliance to cool fully before removing Flue
Damper.
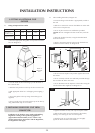
6.3 To remove the damper system, first remove the fuel kit
and Frame if fitted from the appliance to give access to the
firebox, See section 2-3
6.4 Remove the Pivot Bolts (both sides of the firebox) while
holding the Damper in position. This will allow the Damper
to drop down for removal. Note the position of washers on
the Pivot Bolts
32
PR8094
6.5 The replacement of the system is the reverse of the previous
operations.
6.6 It is important to remove and clean the Flue Damper
system to ensure the flue ways are clear of soot and debris
to ensure the safe and efficient operation of the appliance.
The frequency of cleaning will depend on the appliance
operating conditions.
6.7 The Flue Damper system is designed to give safe and
efficient operation of the appliance. Replace any damaged
baffles immediately.
6.8 Do not modify the Flue Damper.
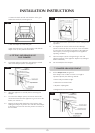
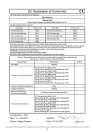
7. DAMPER ARM ADJUSTMENT
7.1 Set the Damper Arm, Diagram 26
If the damper arm is either too loose or too tight in
operation adjust by the following method:
•Ensurebothpivotboltsaretight
•Slackenthetwotensionbolts
•Adjusttheadjustingbolt
•Re-tightenthetwotensionbolts
26