8
USER INSTRUCTIONS
6.13
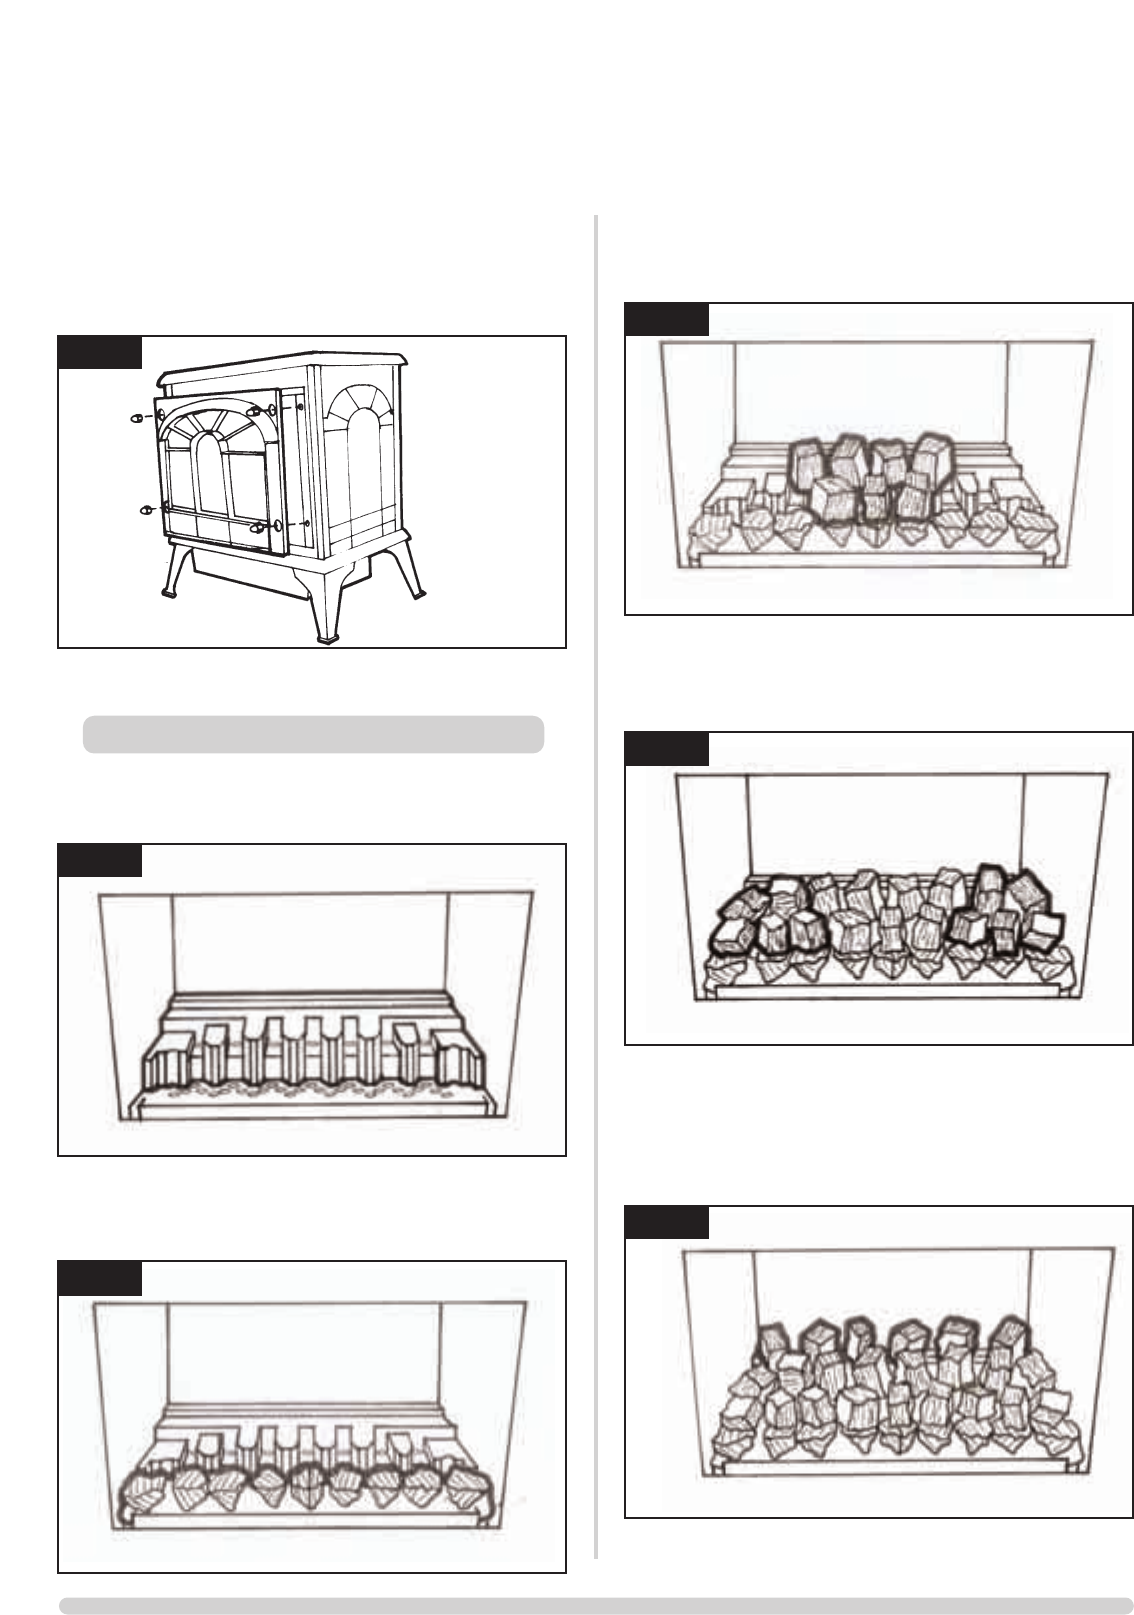
Ensure that the fibreglass seal on the back of the door is intact,
locate the door on the four studs and slide back to the firebox.
Secure in place using the four dome nuts and the tool
supplied, do not over tighten the nuts, see diagram 16. Keep
the tool with these instructions for future use.
NEVER OPERATE THE STOVE WHEN THE DOOR IS
REMOVED OR WHEN THE GLASS IS BROKEN.
6.14 Place the flame baffle onto the shelf at the rear of the tray
and push up against the rear ledge, see diagram 17.
6.15 Locate the front coal moulding in front of the flame baffle
ensuring that the end legs sit flat against the burner skin, see
diagram 18.
6.16 Place three large coals on the front coal so that they lean
against the flame baffle and four large coals on the flame
baffle so that they sit on the fingers, see diagram 19.
6.17 Place three small coals at each end of the front coal so that
they lean against the flame baffle and a further four large
coals on the flame baffle, two at each end, see diagram 20.
6.18 Place six small coals along the rear of the flame baffle,
resting against the rear ledge, see diagram 21.
NOTE: ENSURE THAT THE COALS ARE POSITIONED, AS
DETAILED ABOVE. ONLY USE THE CORRECT AMOUNT
OF COALS, AS SPECIFIED IN THE DIAGRAMS.
16
Large Clarendon
17
18
19
20
21
AR0540
AR0370
AR0371
AR0374
AR0373
AR0372


