


Ensure that the electrical connections for
plugsand sockets are made in areas safe
fromflooding.
Protect the mains plug and the mains
power cable from heat, oil and sharp
edges.
Observe the mains voltage. The information on
the nameplate must be in agreement with the
data for the mains power grid.
The pump’s mains plug must be disconnected
before anybody enters the swimming pool.
Do not interrupt the mains supply by unplugging
at the power extension cable. Disconnect at the
outlet socket.
The mains power cable must not be used for
fastening or transporting the pump.
Submersion and withdrawal of the pump should
be by means of the telescopic pipe.
Alternatively, a cord can be secured on
the telescopic pipe for submersing, lifting and
securing of the Rain Water Tank Pump.
Visual check
Please regularly check the connecting line. If the
connecting line of this appliance is damaged,
it has to be replaced by the manufacturer or the
manufacturer’s aftersales service or a similarly
qualified person to prevent any hazards.
Before using, always subject the pump
(especially the power cables and the power
connections) to a visual inspection.
A pump which is damaged should not be used.
In the event of damage, have the pump checked
by GARDENA Service.
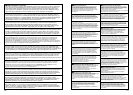
Safety Instructions
Observe the minimum water level in accordance
with the characteristics given for the pump.
Only Art. No. 1740: Allow the pump to run no
longer than one hour against a closed pressure
side.
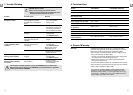
Thermal overload protection switch
If overloaded, the built-in thermal protection for
the motor will switch the pump off. After cooling
down, the pump will start again automatically
(see 7. Trouble-Shooting).
Automatic ventilation
The Rain Water Tank Pump is fitted with a venting
outlet. The function of this venting outlet is to force
out any air which may be present inside the pump.
Small amounts of water flow out of the gap bet-
ween the threaded connection and the housing;
if the water level drops further down, water also
flows out the lower part of the housing. This is no
defect but occurs due to venting purposes.
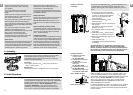
3. Assembly
Install / deinstall foot:
2
1
When the pump is to be used for draining for a flat container,
andis therefore placed on the ground, the foot can be
assembled so that the pump suctions less dirt. On delivery,
thefoot is already assembled.
Install foot:
v From below, place the foot
2
on the pump until the two
locks
1
click into place.
Deinstall foot:
v Press the two locks
1
and pull the foot
2
from the pump.
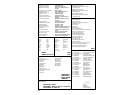
4. Initial Operation
The telescopic pipe
3
is placed on the side of the pump in the
transport position. The telescopic pipe is fitted with a GARDENA
Regulator Valve. We recommend the use of a GARDENA
StandardHose Connector: Art. No. 2015/2915 for 13mm (1/2")
and Art.No. 2016/2916 for 16mm (5/8") and 19mm (3/4")
respectively, for connecting a garden hose. With the use of
19-mm-(3/4")-hose line, the pumping quantity is the greatest.
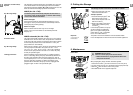
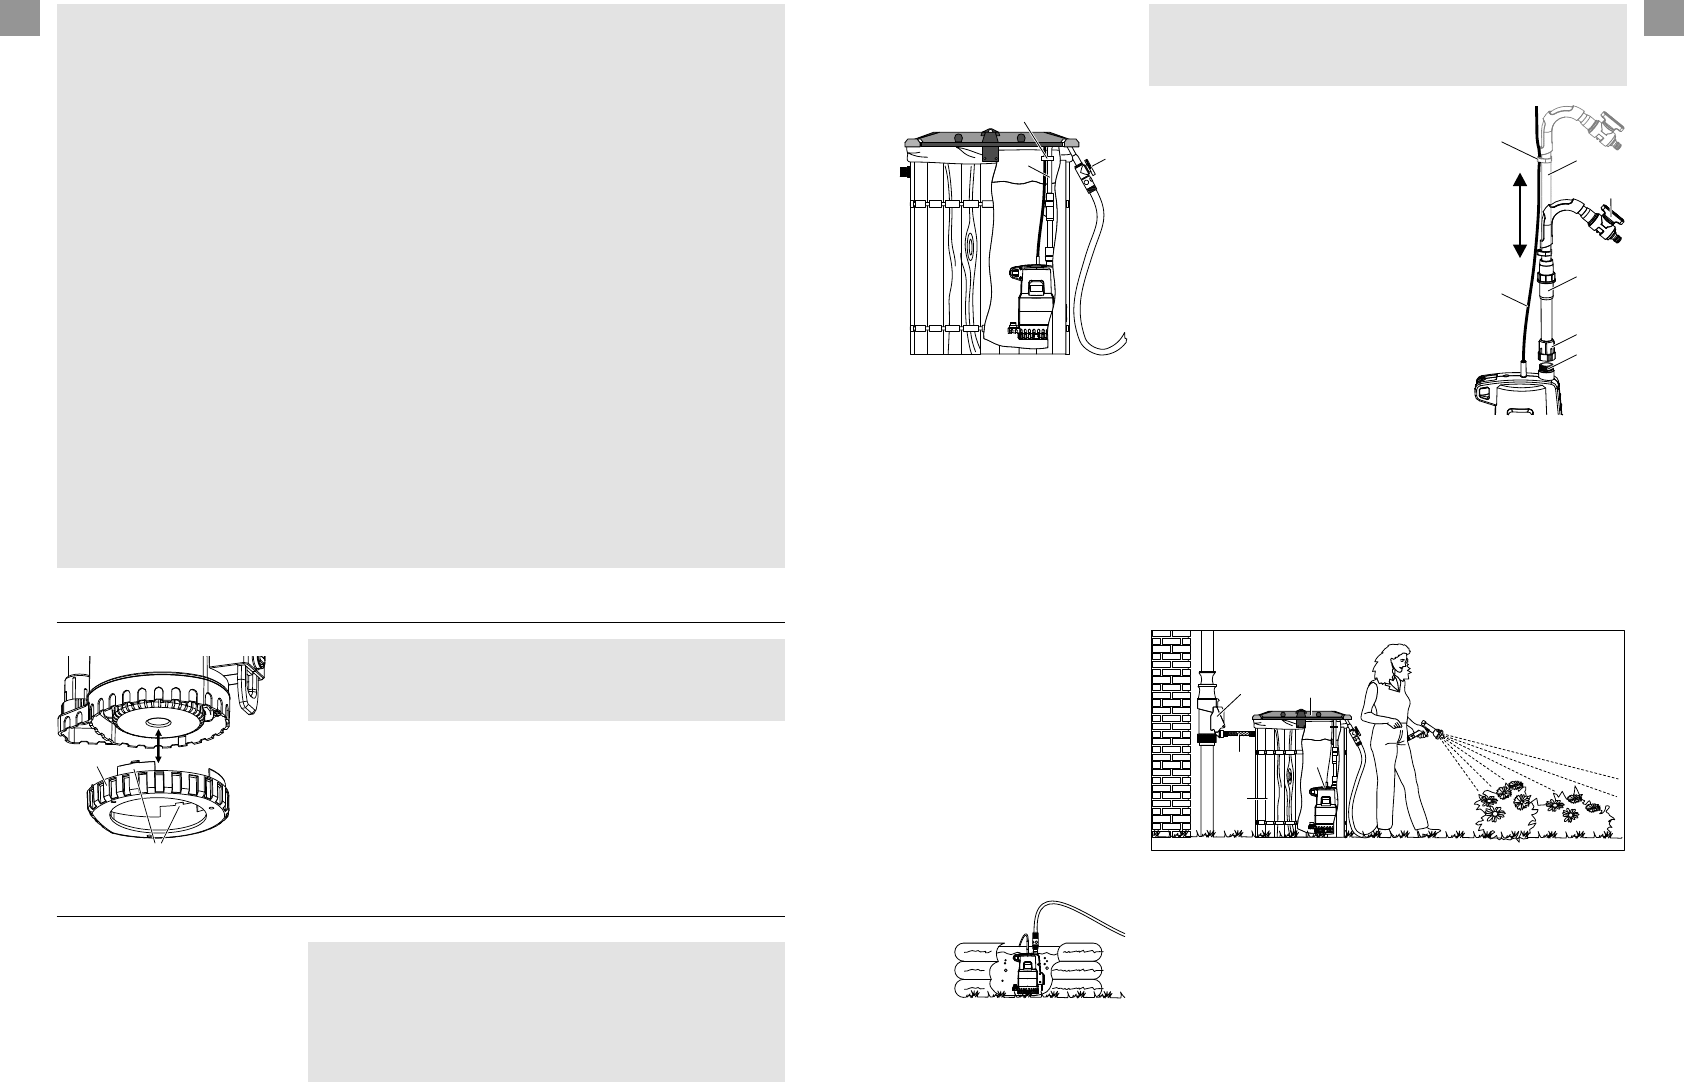
Pumping water from
containers:
8
7
3
The length of the telescopic pipe
3
should be adjusted in such
amanner that the pump does not touch the bottom of the
container; this way, dirt in the container is kept away from the
pump.
1. Pull telescopic pipe
3
from the side
ofthepump and screw onto the pump
connector
4
. Ensure that the washer
lies in the mating thread
ß
3a
of the
telescopic pipe
3
.
2. Loosen threaded collars
5
of the
telescopic pipe
3
.
3. Adjust telescopic pipe
3
to the height of
the container.
The telescopic pipe can be adjusted
between 73 – 91cm.
4. Turn threaded collars
5
until they hold
firmly again.
5. Attach mains cable
6
with the attach-
mentclip
7
on the telescopic pipe
3
.
6. Hang pump with telescopic pipe
3
into
the container.
7. Insert the power plug.
ATTENTION! The pump begins operating
immediately.
3
5
4
8
7
6
z
3a
The shut-off valve
8
in an operating pump takes on the
function of a water tap. With an open system (Micro-Drip-
System, Sprinklers), the hose may not be placed deeper than
the container as otherwise the water flows through the pump
from the container even when the pump is switched off.
Complete solution:
a
GARDENA Rain Water
Collection Filter
Art. No. 3820 / 3821
b
GARDENA Connecting Set
Art. No. 3815
c
GARDENA Cover for Rain
Water Tank
Art. No. 3801 / 3805
d
GARDENA Rain Water Tank
Art. No. 3800 / 3804
e
GARDENA Rain Water Tank
Pump Art. No. 1740 / 1742
a
e
b
c
d
Use in shallow vessels: If the Rain Water Tank Pump is used in a shallow vessel, e. g. to
empty an inflatable children’s pool, the telescopic pipe can be
removed and replaced by the GARDENA Threaded Tap Connector
26.5mm (G 3/4) – Art. No. 2901/2801. The hose connection
13mm (1/2”), 16mm (5/8") or 19mm (3/4") is made using the
Original GARDENA System or GARDENA Profi “Maxi-Flow”
System threaded hose connectors.
Use in deep containers: For deeper containers (up to max. 7m), the pump can no longer be
hung on the telescopic pipe. The pump must then be attached
through a cord connected to the telescopic pipe and submersed
into the container.
10
GB
11
GB