


11
ENGLISH
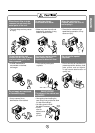
SEAL
WINDOW FRAME
BOTTOM
GUIDE
ABOUT
1/4"
L
BRACKET
UPPER GUIDE
TYPE B
SASH SEAL
(TYPE E)
L BRACKET
TYPE A
TYPE B
Support Bracket
(TYPE G)
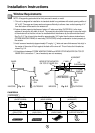
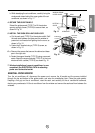
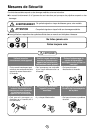
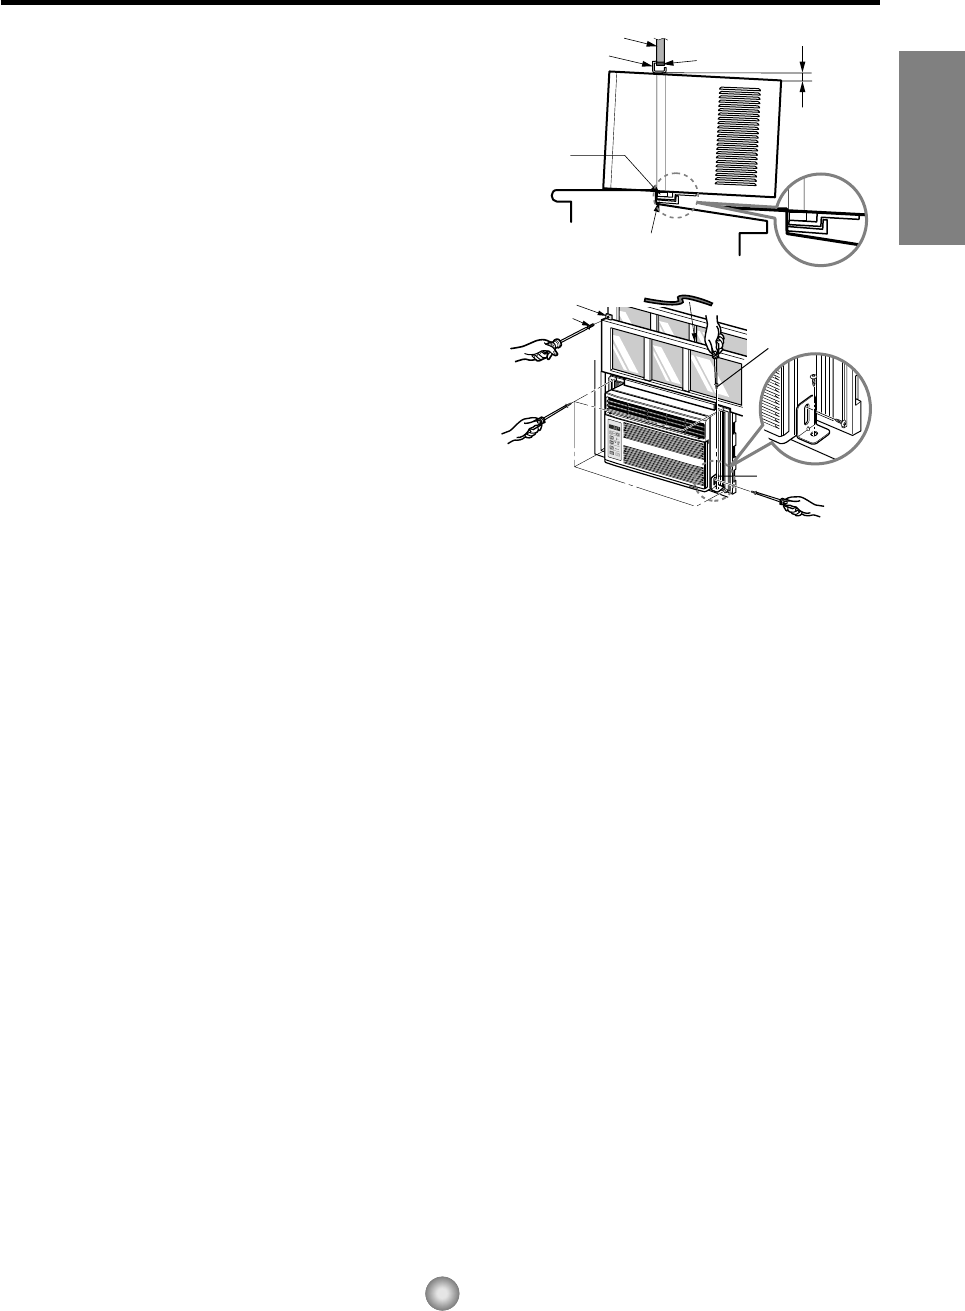
b. While steadying the air conditioner, carefully bring the
window sash down behind the upper guide of the air
conditioner, as shown in Fig. 11.
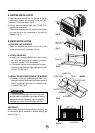
4. SECURE THE GUIDE PANELS
Extend the guide panels (TYPE F) to fill the window
opening using 4 screws (TYPE B) to secure them, as
shown in Fig. 12.
5. INSTALL THE SASH SEAL AND SASH LOCK
a. Cut the sash seal (TYPE E) to the window width. Stuff
the sash seal between the glass and the window to
prevent air and insects from getting into the room, as
shown in Fig. 12.
b. Fasten the L bracket using a (TYPE A) screw, as
shown in Fig. 12.
6. a. Remove the screws that secure the cabinet and base
pan in the right side.
b.
Fasten the support bracket (TYPE G) using a removed
screw. Attach the support bracket (TYPE G) in the inner
window sill with a screw (TYPE B), as shown Fig. 12.
7. Window installation of room air conditioner is now
completed. See ELECTRICAL DATA for attaching
power cord to electrical outlet.
REMOVAL FROM WINDOW
Turn the air conditioner off, disconnect the power cord, remove the L bracket and the screws installed
through the top and bottom of the guide panels, and save for reinstallation later. Close the guide panels.
Keeping a firm grip on the air conditioner, raise the sash, and carefully tilt the air conditioner backward,
draining any condensate. Lift the air conditioner from the window and remove the sash seal from between the
windows.
Fig. 11
Fig. 12