


www.fmiproducts.com
122638-01E 5
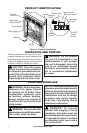
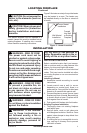
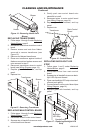
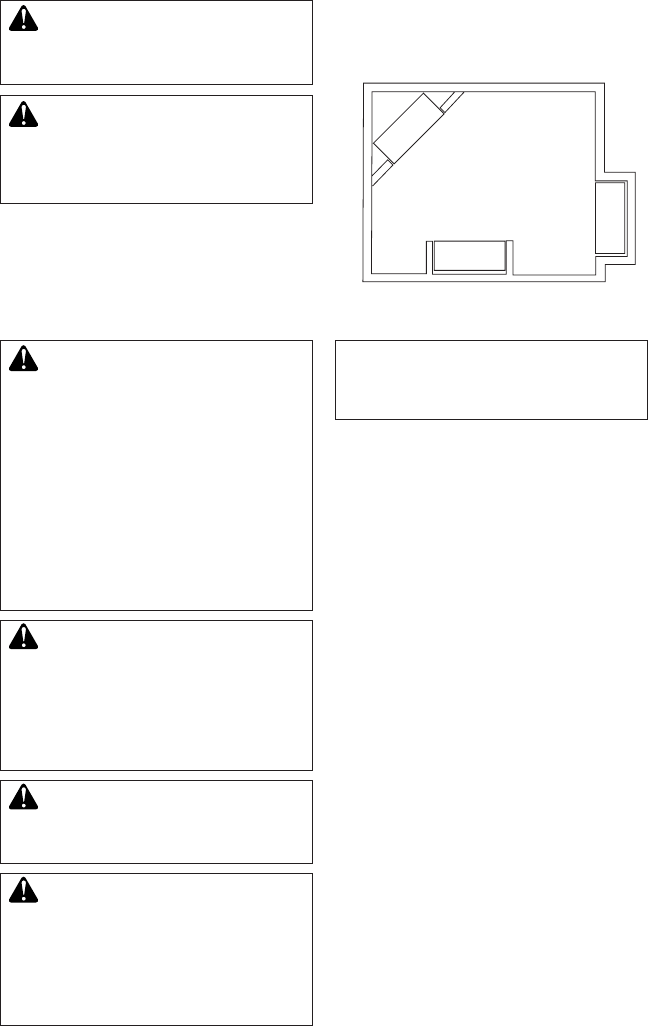
Figure 3 - Heater Locations
CAUTION: Do not expose the
heater to the elements (such as
rain, etc.)
CAUTION: Wear gloves and
safety glasses for protection
during installation and main-
tenance.
This electric replace can be installed in a
mantel, framed into a wall or installed into an
existing replace. If installing into a mantel,
follow mantel’s assembly instructions.
LOCATING FIREPLACE
Continued
Figure 3 illustrates a variety of ways the heater
may be located in a room. The heater may
be installed directly on the oor or raised on
a hearth.
INSTALLATION
WARNING - RISK OF FIRE!
The power cord must not be
pinched or against a sharp edge.
Secure cord to avoid tripping or
snagging to reduce the risk of re,
electric shock or personal injury.
Do not run cord under carpeting.
Do not cover cord with throw rugs,
runners or the like. Arrange cord
away from trafc areas and where
it will not be tripped over.
WARNING - RISK OF FIRE!
To prevent a possible re, do
not block air intake or exhaust
in any manner. Do not use on
soft surfaces where openings
may become blocked.
WARNING - RISK OF FIRE!
Do not blow or place insulation
against the rebox.
WARNING: If the informa-
tion in these instructions is
not followed exactly, a re or
explosion may result causing
property damage, personal in-
jury or death.
Do not store or use gasoline or
other ammable vapors in the vi-
cinity of this or any other heater.
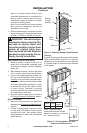
INSTALLING FIREPLACE
Select a suitable location that is not suscep-
tible to moisture and is a safe distance from
drapes, furniture and high trafc areas.
Note: Follow all national and local electrical
codes. This insert can be installed into either
an existing replace or as new construction/
renovation.
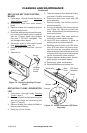
Installing in Mantel
1. Assemble mantel according to mantel
instructions.
2. Locate mantel near a wall (or corner
depending on mantel type) close to a
power source. You may have to alter base
boards to t mantel ush against wall.
3. Connect replace to power source. Insert
replace into front of mantel. Be careful not
to scratch nish on base. Fireplace will t
ush against front of mantel.
4.
Push mantel with replace into nal location.
Existing Fireplace Installation
1. Thoroughly clean out existing replace
and hearth area.
2. Seal all drafts, vents or ash clean-outs
with berglass insulation. Seal ue. Once
sealed, close damper to stop debris from
falling onto unit.
3. If existing re box is susceptible to mois-
ture, cap top of chimney ue to prevent
inltration of water.
Corner Mantel
Installation
Wall Mantel
Installation
Framed
Into Wall
or Existing
Fireplace