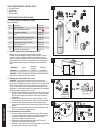
Label
Lug
6
J
K
L
M
N
O
Q
5
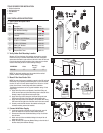
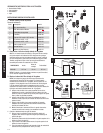
BASIC INSTALLATION INSTRUCTIONS continued
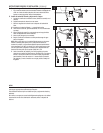
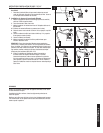
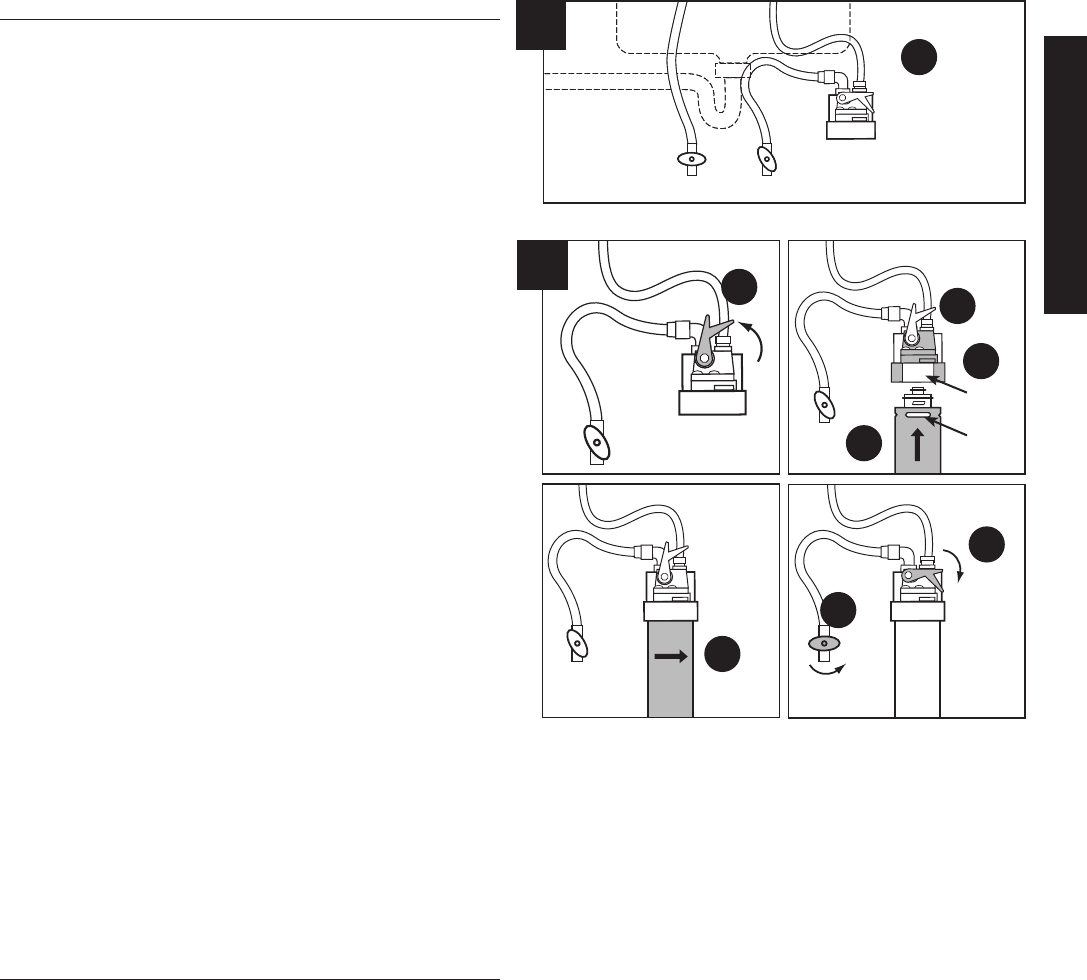
Attach Filtered Water To Cold Line of Faucet
Attach open end of existing Braided Tubing to Union Fitting on
outlet side (right) of new Filter Head. Hand tighten to avoid damage
to fittings.
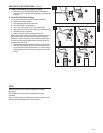
Install And Flush Filter Cartridge
Lift handle of the build-in shut off (QC Valve) on the Head.
Hold Head firmly with one hand.
Align cartridge lug with label on filter Head.
Insert filter Cartridge—Push upwards.
Turn it to the right—About 1⁄4 turn—Until rotation stops.
Open cold water valve and check for leaks up to Inlet Elbow Fitting.
Open Water Faucet (not pictured).
Lower the QC Valve Handle to flush water to the sink.
NOTE: Flush new filter cartridges for at least 3 minutes to remove air
and any loose carbon. At first the water may appear cloudy due to
trapped air in the filter and tubing. If water continues to be cloudy for
more that one week, please contact Everpure Technical Services for
assistance: (800) 942-1153
Remove plastic wrapper and pull Tab from back of Everpure Filter
Timer. The LED and buzzer will cycle 3 times to confirm the start.
It is programmed to flash and sound again in 11 months. Remove
adhesive backing and mount Timer in a convenient location under
the sink.
5.
I.
6.
J.
K.
L.
M.
N.
O.
P.
Q.
R.
I
Label
Lug
6
J
K
L
M
N
O
Q
• 3 •
ENGLISH
5
NOTES
Reduces limescale build-up in water-using appliances as tested
by Everpure
This installation must comply with all applicable state and local
regulations.
Do no use with water that is microbiologically unsafe or unknown quality
without adequate disinfection before or after the system.


