


5. Changing the Head Light Bulb:
Warning: Always disconnect from
power source when servicing or
cleaning the unit. Failure to do so
could result in electrical shock or
personal injury from cleaner suddenly
starting.
• Turn unit “Off” and unplug from
wall outlet.
• Insert the edge of a flat edge
screw driver into the locking tab
on the headlight lens and pull the
handle of the screw driver
towards you. Do NOT push with
the blade of the screw driver
against the lens because it might
cause it to break.
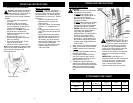
• Remove the lens. (Fig. 12)
• Remove the light bulbs by pulling
them out carefully.
• Push the new light bulbs in and
replace the lens cover.
• Make sure that it snaps in place.
Note: Always replace the light bulb with
the same or smaller wattage size (12V
4W) to prevent damage to the
surrounding parts.
Lens locking tab
Fig. 12
WARNING: When the vacuum is
turned on, the beater brush will
continue to rotate. Avoid tipping
the vacuum or setting it on furniture,
fringed area rugs or carpeted stairs
while you are using the hose with the
attachments. Avoid leaving the
vacuum is one place for an extended
period of time, particularly on thick
carpet.
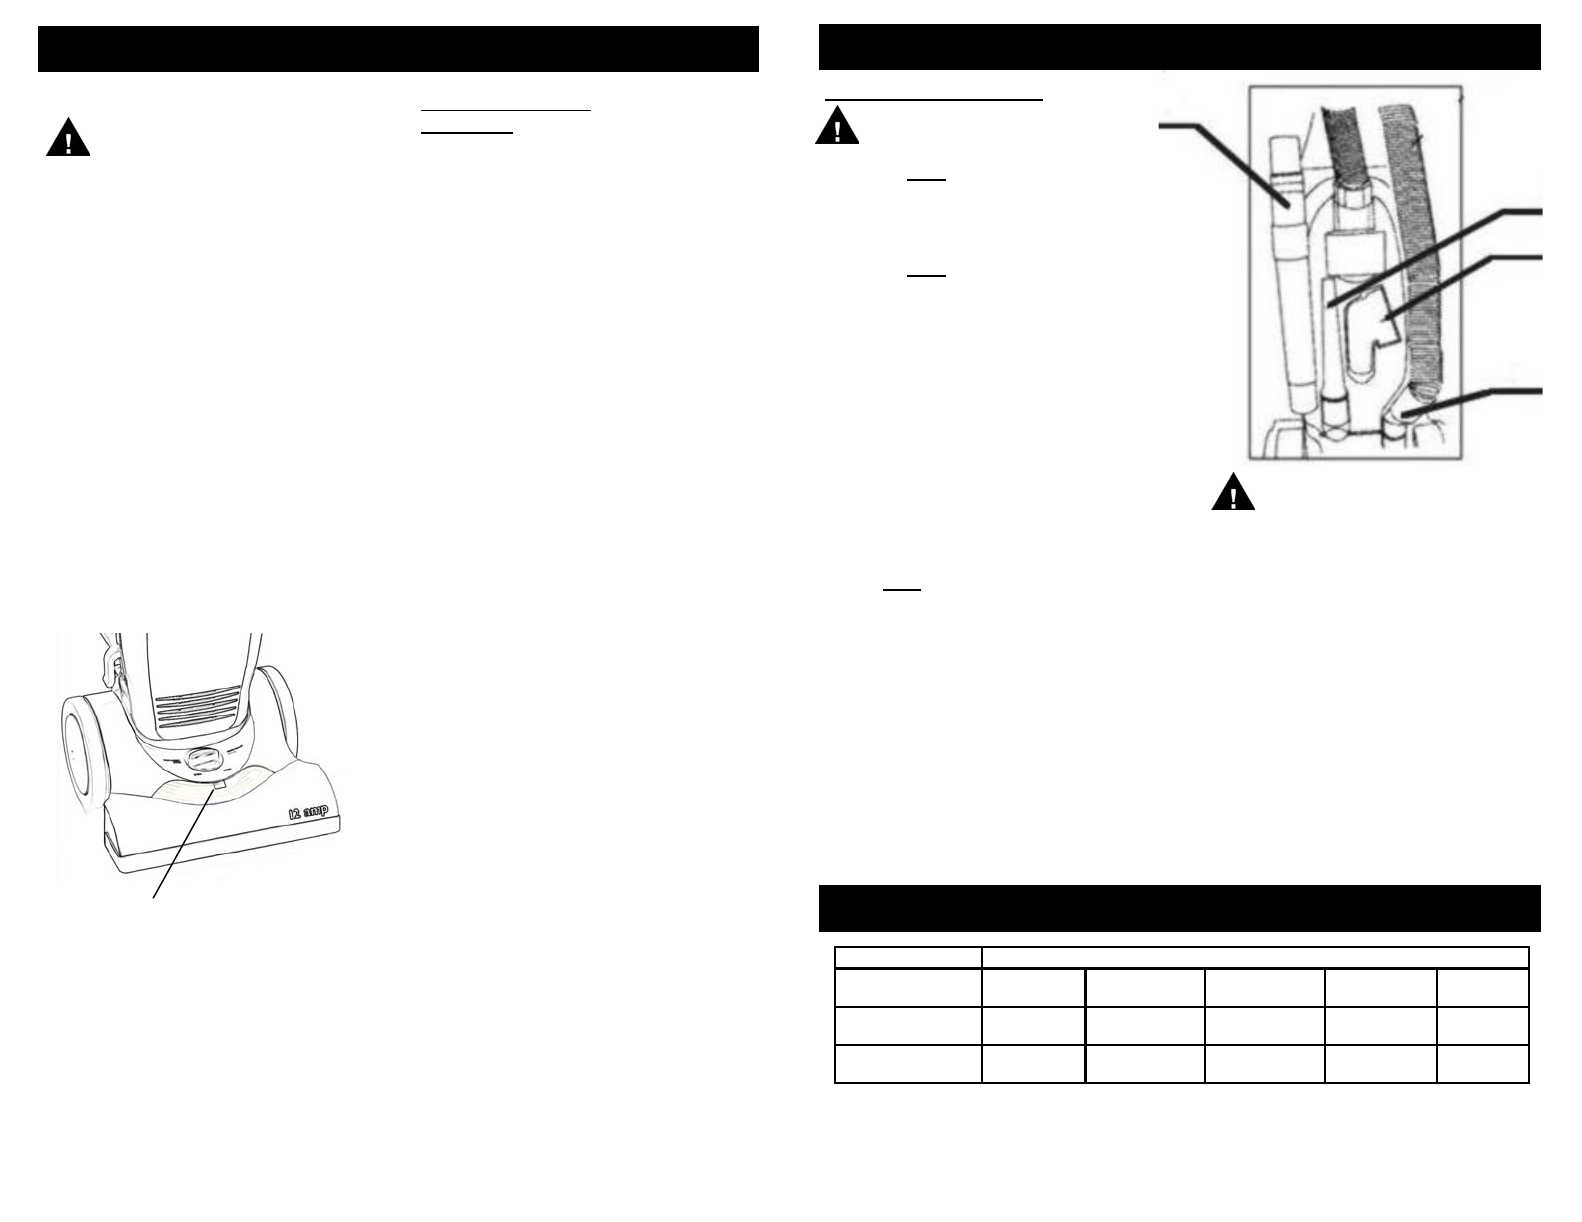
Extension
Tube (2)
Crevice
Tool
Dusting
Brush
Hose
Connector
IMPORTANT: If the bag is not
inserted correctly into the housing, the
cover will not close. Please make
sure that the bag is inserted all the
way in until the latch catches
otherwise front cover will not close.
Warning:
• Always turn vacuum "Off" before
attaching the accessories.
•Do NOT
place hands or feet
underneath the agitator brush at
any time. When using the
attachments, the agitator brush
continues to rotate.
•Do NOT
allow the vacuum cleaner
to remain in just one place for a
long period of time as the agitator
may damage the floor surface.
• NEVER place the vacuum cleaner
on furniture, the fringed area of
rugs, deep pile carpeting or
carpeted stairs. The ideal position
for the vacuum cleaner when
using any attachment is for the
unit to be on a level surface with
the handle in the upright position
and the carpet height adjustment
knob in HIGH.
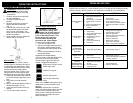
ATTACHMENT USE CHART
Using the Attachments
Fig. 3
Motor Thermostat
Important: This unit is equipped
with a motor protective thermostat. If
for some reason the vacuum cleaner
should overheat, the thermostat will
automatically turn the unit off. Should
this occur:
• Push the On/Off button once.
• Disconnect the plug from the
power source.
• Check the source of overheating
problem. (i.e. clogged hose or
filter)
• If clogged hose or filter is found,
unclog the hose and replace the
filters.
• Wait at least 45 minutes before
attempting to reuse the vacuum.
• After unit has cooled down for
45 minutes, plug in the cleaner
and push the On/Off button. The
vacuum should start again.
• If the vacuum still does not start,
contact customer service at
1-800-798-7398.
OPERATING INSTRUCTIONS
OPERATING INSTRUCTIONS
1. Place vacuum in its upright position.
2. Make sure that the vacuum cleaner
is NOT plugged into the electrical
outlet.
3. Turn the carpet adjustment knob to
the high pile position.
4. Pull the hose connector from the
rear of the vacuum and push the
desired attachment firmly onto the
end of the hose. (Fig. 3)
5. If additional length is required,
attach one or both of the extension
tube to the end of the hose and then
attach the crevice tool or dusting
brush to the end of the extension
tube.
CLEANING AREA
ATTACHMENT Furniture
Between
Cushions
Drapes Stairs Walls
DUSTING
BRUSH
****
CREVICE
TOOL
** *
4
7