


ENGLISH
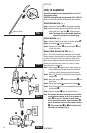
HOW TO ASSEMBLE
Assemble completely and charge batteries for 14-16
hours before using.
CAUTION: Use only Eureka charger model 351-U-1025-1A
Have a screwdriver available for assembly (not included).
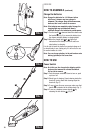
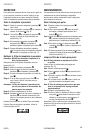
Attach Handle Grip (Fig. 1)
Step 1:
Locate the 2-part bolt
●
H
in the assembly package.
Step 2: Align the handle grip and handle tube holes and
secure with the 2-part bolt
●
H
.Tighten the bolt.
Note: The single hole in the handle tube faces
forward in relation to the handle grip.
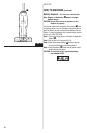
Attach Handle (Fig. 2)
Step 1:
Use your thumb to pull back on the lock button
●
M
.
Step 2: Push handle
●
G
into top of cleaner.
Step 3: Release lock button
●
M
and rotate handle
●
G
until
it locks into place.
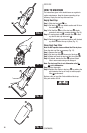
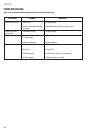
Secure Wall Bracket on Wall (Fig. 3)
Have a 1/4 inch drill available for assembly (not included).
Cleaner hangs in bracket with the nozzle end down. Mount
on a wall in close proximity to an electrical outlet where
there are not dangerous objects hidden beneath the wall
surface like electrical wires, pipes, etc. Leave 14 inches
above the floor for clearance.
Step 1:
Hold bracket
●
I
against wall to mark location for
screws. Make sure the wall bracket is positioned
vertically, with the charger socket at the bottom.
Step 2: Use a 1/4 inch drill for drilling holes for the plastic
anchors
●
N
.
Step 3: Insert the anchors
●
N
and drive the screws
●
O
into
both holes.
Step 4: Tighten the screws
●
O
to secure the bracket
●
I
.
Step 5: Place cleaner, with the nozzle pointed down, on the
wall bracket
●
I
.
Step 6: Plug the charger
●
L
into an electrical outlet.
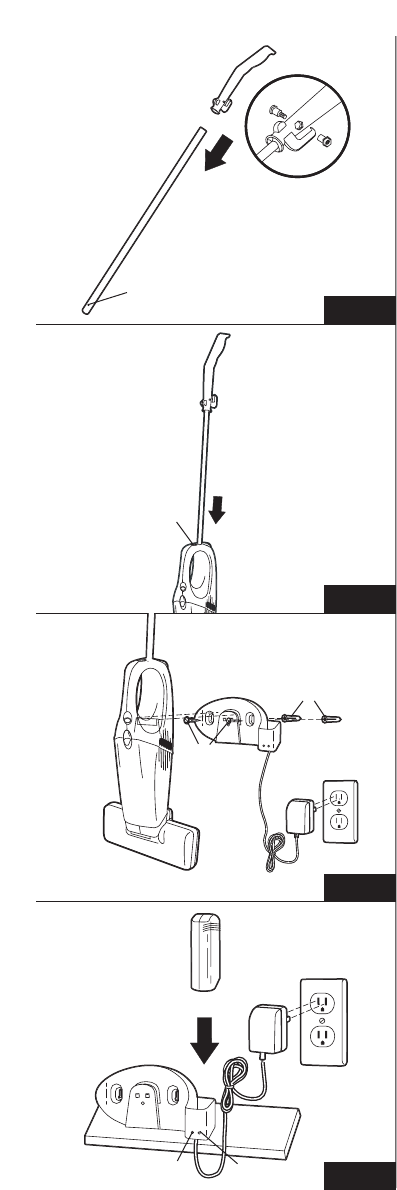
Note: This charger has been designed to use as either
a wall mounted charger or to sit on a counter or
shelf
●
P
. To use on a counter or shelf,locate
next to an electrical outlet. Take the battery
●
C
out of the cleaner and put in the counter bracket
●
I
. The charge light
●
J
or
●
K
will indicate that
the battery is charging (Fig. 4).
8
FIG. 1
FIG. 2
FIG. 3
FIG. 4
(CONTINUED)
●
H
●
M
●
I
●
N
●
O
●
L
●
C
●
I
●
J
●
K
●
P
●
G
Hole to Front