6
●
A
●
B
ENGLISH
HOW TO ASSEMBLE
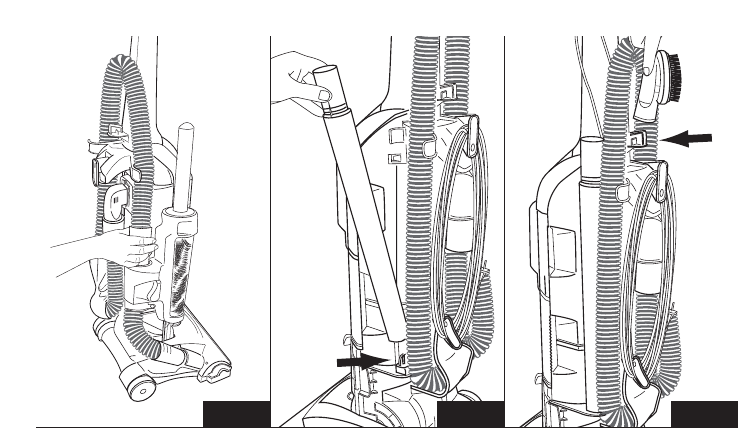
Step 6: Place the hose
●
C
on the back of the vacuum, wrapping
it up and over the hose hook as shown (FIG. 4).
Step 7: Secure the bottom of the self-cleaning duster
●
G
to the
hose retainer and tighten the silver screw. Firmly push
the end of the hose into the top of the self-cleaning
duster (FIG. 4).
Step 8: Store the wands
●
A
on the side of the vacuum in front
of the hose (FIG. 5).
Step 9: Store the dusting brush
●
B
on its holder (FIG. 6).
ESPAÑOL
CÓMO ARMARLA
Paso 6: Coloque la manguera
●
C
en la parte trasera de la
aspiradora, envolviéndola por arriba y sobre el gancho
de la manguera como lo muestra la ilustración (FIG. 4).
Paso 7: Sujete la parte inferior del plumero autolimpiador
●
G
al
retén de la manguera y apriete el tornillo plateado.
Presione firmemente el extremo de la manguera dentro
de la parte superior del plumero autolimpiador (FIG. 4).
Paso 8: Guarde los tubos
●
A
en el costado de la aspiradora en
frente de la manguera (FIG. 5).
Paso 9: Guarde el cepillo para polvo
●
B
en su portacepillo
(FIG. 6).
●
C
●
G
FIG. 4 FIG. 5 FIG. 6


