


8
ENGLISH
HOW TO USE
WARNING: Avoid injury. Keep loose clothing, hair, fingers, and all
other parts of body away from any moving part (such as
the revolving brush). Turn off the switch and unplug the
cleaner before changing the cleaner height setting.
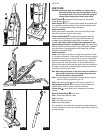
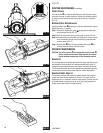
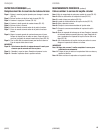
ON/OFF Switch
●
L
. International symbol I means On, International
symbol O means Off (FIG. 7).
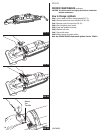
Handle Release
●
M
(FIG. 8). Step on handle release to pull handle back
to a comfortable operating position. To lower handle completely to the
floor (FIG. 9), depress handle release a second time.
Helpful Information:
Before cleaning under low furniture, check area first for objects that
might harm the unit or block the vacuum hose.
Cleaner Height Setting
●
N
. An adjustment that raises or lowers the
cleaner base to match the type of floor surface. With the cleaner cord
unplugged, set the adjustment to lowest setting for maximum carpet
cleaning. If the cleaner is difficult to push, move adjustment to next
highest setting until cleaner is comfortable to push. The brushroll must
reach the carpet for effective cleaning. For ease in moving the adjustment
knob, place handle in operating position and tilt cleaner back to remove
weight from front wheels (FIG. 8).
Helpful Information:
Listen to your cleaner. If you notice a change in the sound of the motor
or a change in performance, it could simply indicate a common usage or
maintenance issue. Such as, a need to raise or lower the carpet height
adjustment, possible blockage in hose or brushroll area, or a broken or
loose brushroll belt. These are all easy to fix and the instructions are
included in this owner’s guide. Becoming familiar with the information in
this guide will help you to get the best possible performance from your
new cleaner for many years to come.
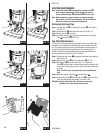
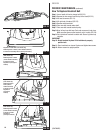
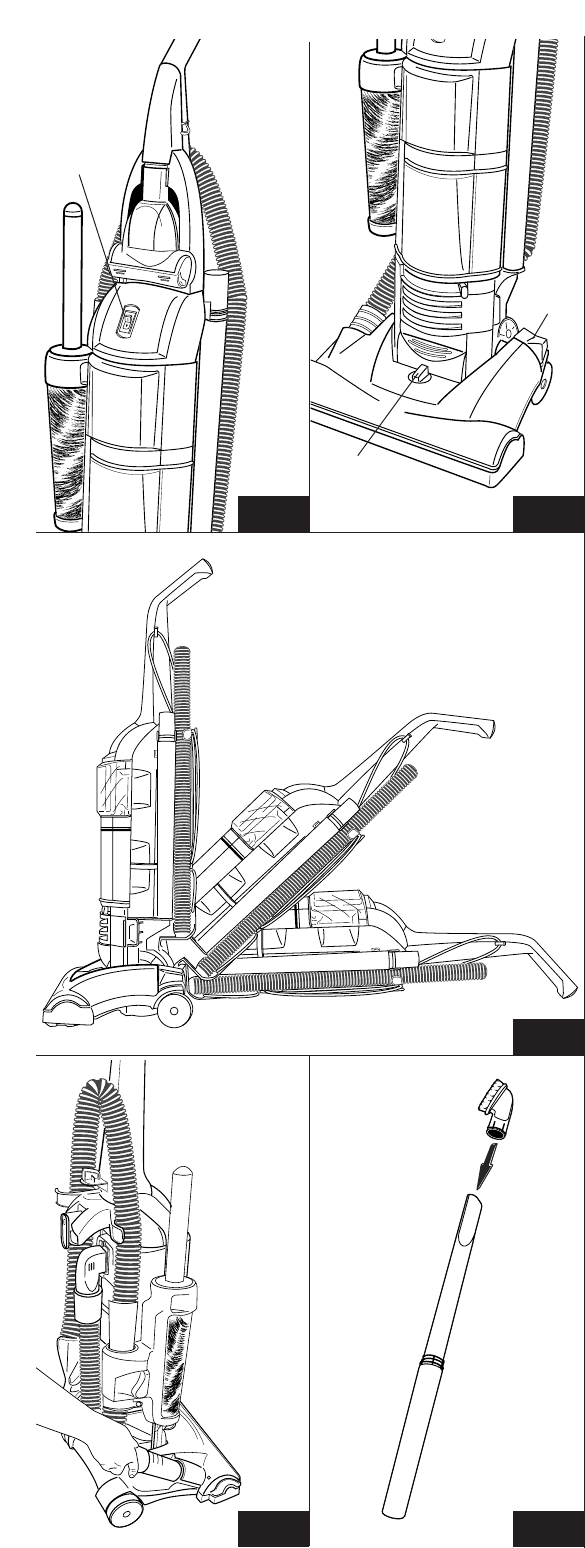
Note: While using accessories, do not place cleaner on furniture or
steps as the brushroll may cause damage. Place cleaner on
floor with the handle in storage position.
Step 1: To use accessories remove hose from hose retainer in hood of
cleaner by lifting up and twisting (FIG. 10).
Step 2: Place desired accessory onto end of hose or wand (FIG. 11).
Dusting/Upholstery Brush
●
B
is for furniture, blinds, books, lamp
shades, shelves, curtains, draperies, cushions and fabrics.
Crevice Wand
●
A
cleans corners, stairs, baseboards, and between
cushions.
Nested Extension Wands
●
A
to add reach.
Step 1: Grasp both wands near ridges.
Step 2: Pull apart.
Step 3: Turn ridge end to center.
Step 4: Push wands together.
The instructions in the booklet serve as a guide to routine maintenance.
To avoid unnecessary service calls, check the top and bottom filters, belt
and brushroll often.
FIG. 8FIG. 7
FIG. 11FIG. 10
FIG. 9
●
L
●
N
●
M
●
B
●
A