


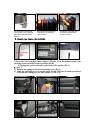
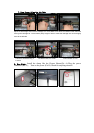
4、Step 4.
1)Remove old cartridges in the printer (Pic A);
2) Insert the CIS cartridges into the cartridge car (Pic B); Make sure the
cartridges installed well.(Pic.C)
A B C
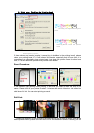
5、Step 5, Fix Supporting Arm:
1) Tear off the sticker(Pic A); Measure 2.6cm from the edge of the printer, Attach
supporting arm on the printer as Picture B show;
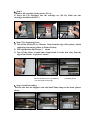
2) The right position like Picture C shown
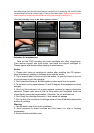
3) Tear off the sticker of small tube clamp;Attach it at the 4cm away from the
edge of the Printer. As picture F shown.
Rip the label Stick the Support arm at 3cm distance as the position show on
from the left side, and at 4 cm distance the above picture.
from the upside of the printer
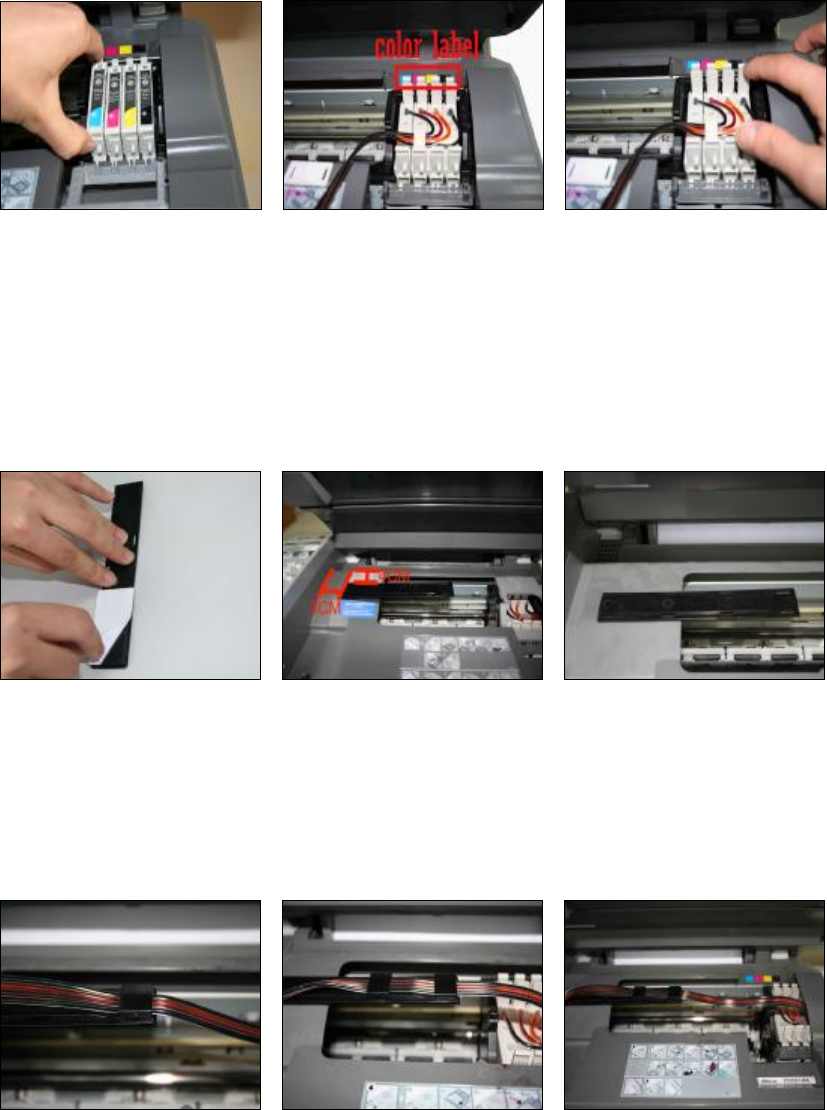
6、Step 6. Install the tubing.
Put the tube into the Support Arm and Small Tube clamp as the below picture
shown.
Clamp the tube on the support arm Finish