


CIS for EPSON Stylus CX4200 Instruction
Thank you for purchasing XM Continuous Ink Supply System. We appreciate
your support and will try our best to make your experience with our products a
pleasant one. Printing has been a different experience ever since you installed
XM Continuous Ink Supply system on your own printer. Just imagining being
able to print without regard to the ink level in those expensive little cartridges.
Please take your time installing XM Continuous Ink Supply system. Do not
remove your old cartridge until you have the XM CIS system primed and ready
to install (to prevent the drying of heads). In addition, make sure you are getting
perfect nozzle checks before installing the XM CIS system. The XM CIS system
won’t be able to work properly if the nozzles are previously clogged.
Most people get a perfect nozzle check the first time after installing the XM
Continuous Ink Supply system; others may need to run two or three cleaning
cycles or let the printer sit for a while before they get the perfect results.
1、General Guide:
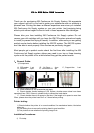
1) Components
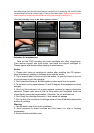
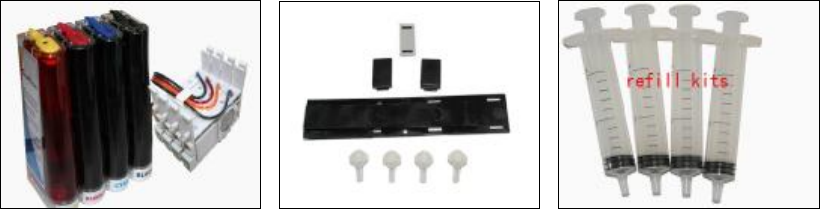
A、CIS system 1 set B、 Air filters 4pcs C、Support Arm 1 set
D、Refill Kit 4 pcs E、Instruction CD 1pc
2) Opening box inspection
a、Check whether all the accessories are ready.
b、Check whether there's leakage of CIS System, whether some tubes have been
separated from CISS. If there is, please kindly to contact the local dealer.
C、Check whether there is air space in the tube. If the length of air space is more than
20cm, please clean the printer head for 2 or 3 times before printing.
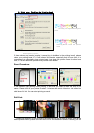
Printer testing:
1) Check whether the printer is in normal condition, like mechanical status, lubrication
status etc.
2) Print testing lines to ensure the printing head is good condition.
3) Print pictures to see whether the printing image is ok.
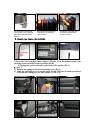
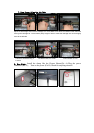
Installation Procedures:
1) First step