


27
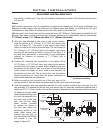
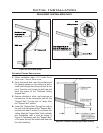
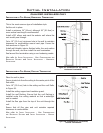
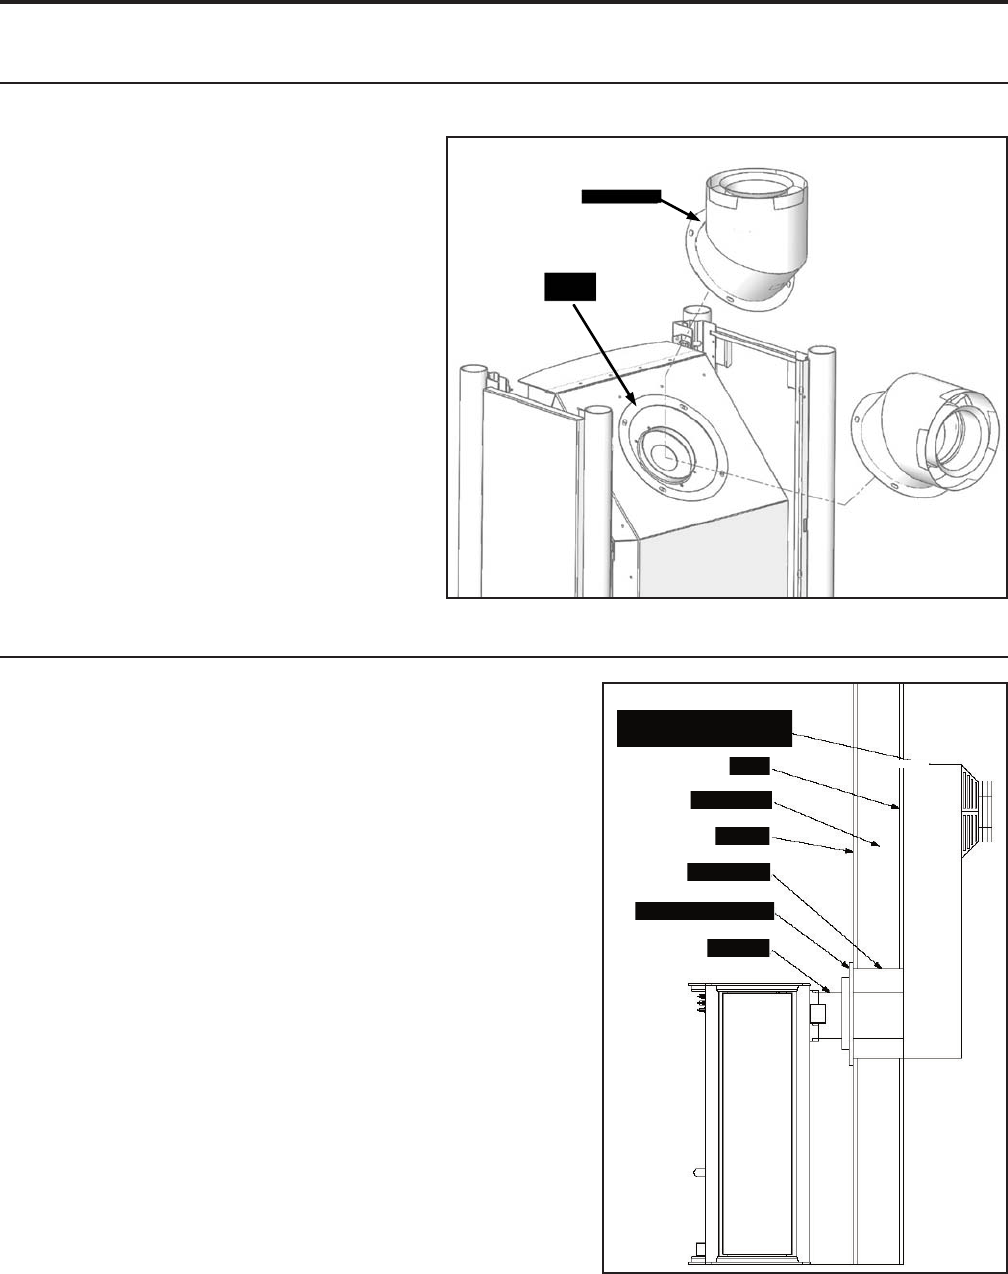
Vent Pipe
Inside Finished Collar
Dry Wall
Wall Thimble
Exterior Wall
Siding
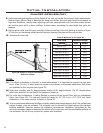
Minimum Vent Terminal 36”
(914mm) High Snorkel Kit.
Figure 46: Installation for Rear Vented;
33,500 Btu/hr.
Place the unit into position.
Attach a small section of pipe on the unit and mark exterior
wall where vent would pass through the wall.
Cut a 10” (25.4 cm) minimum hole in the wall to maintain
clearances to combustibles. Frame hole as shown in Figure
32.
Install a wall thimble, interior nished collar, and the vent
section through the wall.
THIS UNIT MUST BE VENTED WITH A 36” (91 cm) SNORKEL
KIT.
Seal around the vent terminal to the structure using a non-
hardening mastic.
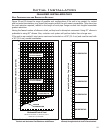
Also refer to INITIAL INSTALLATION - VENT CONFIGURATIONS AND
RESTRICTOR SETTINGS and INITIAL INSTALLATION - HORIZONTAL
INSTALLATION.
Initial Installation
QUALIFIED INSTALLERS ONLY
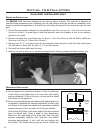
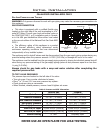
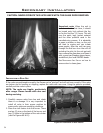
CONVERTING TOP VENTED INTO REAR VENTED:
This unit has been shipped as a 33,500 Btu/hr top-vented freestanding unit. This unit can be converted
Figure 45: Converting Top Vented into Rear Vented.
INSTALLATION OF REAR VENTED APPLIANCE:
to a rear vented unit for use with a 36” (915
mm) snorkel. Also refer to INITIAL INSTALLATION
- INSTALLATION OF REAR VENTED APPLIANCE.
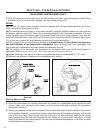
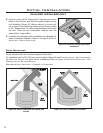
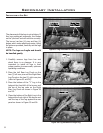
1. Carefully remove the trivet and the
stovetop. Place on a soft surface as not to
damage the nish.
2. Remove the four (4) ” screws that hold
the ue collar elbow to the unit body.
3. Carefully remove the elbow being sure not
to damage the gasket that is glued to the
ue collar elbow, it seals the ue to the
rebox (see Figure 42).
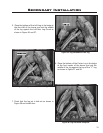
4. Turn the elbow 180° to the rear vent
position and re-fasten with the screws
removed in step 2.
Venting
Gasket
Rotate 180
o